background image

30

Wandgehäuse AX IT / Wall-mounted enclosures AX IT / Coff rets muraux AX IT

7. Inspektion und Wartung
7. Inspection and maintenance
7. Inspection et entretien

Der Wartungsplan ist empfohlen für alle Wand-
gehäuse AX IT.

Wartungsintervall

Die Wartung muss regelmäßig in Abhängigkeit 
der Einsatz- und Umgebungs bedingungen, 
mindestens einmal jährlich durchgeführt und 
entsprechend dokumentiert werden.

Art und Umfang der durchzuführenden 
Arbeiten:


◾ Die Scharniere der Türen werden auf Leicht-

gängigkeit überprüft und mit einem geeigne-
ten, wasserfreien Schmiermittel eingesprüht.


◾ Das Schloss wird auf Leichtgängigkeit 

überprüft. Alle beweglichen Verschlussteile 
werden mit einem geeigneten, wasserfreien 
Schmiermittel eingesprüht.


◾ Dichtungen im Andruckkantenbereich 

müssen bei Beschädigung komplett ersetzt 
werden. Bei Beschädigung der Dichtung 
außerhalb der Andruckkanten ist i. d. R. 
noch eine ausreichende Dichtwirkung 
vorhanden.


◾ Um Beschädigungen durch temperaturbe-

dingtes Anfrieren der Dichtungen zu ver-
hindern, können übliche Mittel wie Talkum, 
Vaseline oder Wachse eingesetzt werden. 
Alle Komponenten und Oberfl ächen werden 
auf äußere Beschädigungen untersucht.


◾ Stahlschränke werden zusätzlich auf Korro-

sionsspuren untersucht. Eventuelle Beschä-
digungen werden wie folgt repariert:
–  Kleinfl ächige Schäden, die nur einen Teil 

der Oberfl äche betreff en (z. B. Kratzer): 
Oberfl äche an der beschädigten Stelle 
leicht anschleifen und alle Korrosionsspu-
ren sowie alle Verschmutzungen entfer-
nen. Je nach Größe der Beschädigung 
entweder mit einem Lackstift, einem Pinsel 
oder mit der Lackspraydose den Rittal 
Ausbesserungslack aufbringen (alternativ: 
2K-PUR Acryllack)

 – 


Großfl ächige Schäden: Oberfl äche 
gleichmäßig abreiben und mit Testbenzin 
reinigen; anschließend gesamte Fläche mit 
Rittal Ausbesserungslack überlackieren 
(alternativ: 2K-PUR Acryllack).

Wartungsarbeiten sind durch die jeweilige 
Fachkraft zu vollziehen. Alle allgemein gel-
tenden Richtlinien zu Wartungseinheiten sind 
einzuhalten.

Hinweis:

 Beim Reinigen der Oberfl ächen ist 

darauf zu achten, dass keine Flüssigkeiten 
über die Kabeleinführung in das Gehäuse 
eingebracht werden.

The maintenance schedule is recommended 
for all wall-mounted enclosures AX IT.

Maintenance interval

Maintenance must be performed at regular 
intervals depending on use and ambient con-
ditions, at least once annually and documen-
ted accordingly.

Nature and extent of the work to be 
performed:


◾ The hinges of the doors are checked for 

ease of movement and sprayed with a  suit-
able, water-free lubricant.


◾ The lock is checked for ease of movement. 

All moving closure parts are sprayed with a 
suitable, water-free lubricant.


◾ Gaskets in the contact edge area must be 

replaced completely if damaged. If the gas-
ket is damaged outside the contact edges, 
the sealing eff ect is still suffi  cient as a rule.


◾ Common agents such as talcum, vaseline or 

wax can be used to prevent damage due to 
gaskets freezing because of low tempe-
ratures. All components and surfaces are 
examined for external damage.


◾ Steel enclosures are also inspected for 

traces of corrosion. Any damage is repaired 
as follows:
–  Damage to small areas that aff ect only a 

part of the surface (e.g. scratches): Lightly 
sand off  the surface at the damaged place 
and remove all traces of corrosion as well 
as all contamination.
Depending on the degree of damage, 
apply the Rittal touch-up paint either with 
a paint stick, a brush or a spray can (alter-
native: 2K-PUR acrylic paint).

 –  Large area damage: Smooth the surface 

uniformly and clean with white spirit; then 
paint over the entire surface with Rittal 
touch-up paint (2K-PUR acrylic paint).

All maintenance work should be carried out by 
trained experts. The applicable guidelines on 
maintenance units must be observed.

Note:

 When cleaning the surfaces, take care 

to prevent the ingress of liquids into the 
enclosure via the cable entry.

Le calendrier d’entretien est recommandé 
pour tous les coff rets muraux AX IT.

Periodicite d’entretien

L’entretien doit être réalisé régulièrement 
en fonction des conditions d’exploitation et 
ambiantes, au minimum une fois par an, et 
consigné en conséquence.

Type et ampleur des travaux à eff ectuer :


◾ En cas d’utilisation de charnières, leur 

mobilité doit être vérifi ée et elles doivent être 
vaporisées avec un lubrifi ant sans eau.


◾ La mobilité de la serrure est vérifi ée. Toutes 

les pièces de fermeture mobiles sont vapori-
sées avec un lubrifi ant sans eau adapté.


◾ Les joints d’étanchéité doivent être rempla-

cés dans leur totalité en cas de dommages 
au niveau des zones d’arêtes d’étanchéité.


◾ Une étanchéité suffi  sante est en règle géné-

rale encore assuré en cas de dommages du 
joint d’étanchéité hors des zones d’arêtes 
d’étanchéité.


◾ Des produits courants comme le talc, la 

vaseline ou la cire peuvent être utilisés 
pour empêcher les joints de coller s’ils sont 
exposés au gel. Tous les composants et 
toutes les surfaces doivent être examinés 
afi n de vérifi er qu’il n’y a pas de dommages 
externes.


◾ Les armoires en acier sont de plus inspec-

tées pour vérifi er qu’il n’y a pas de traces 
de corrosion. Les détériorations éventuelles 
doivent être réparées de la manière 
suivante :
–  Dommages de petite superfi cie qui ne 

concernent qu’une partie de la surface 
(par exemple rayures) : poncer légèrement 
la surface à l’endroit endommagé et ôter 
toutes les traces de corrosion et de saleté. 
Selon la taille des dommages, appliquer 
la peinture de retouche Rittal soit avec un 
crayon pour retouches, un pinceau ou une 
bombe de peinture (ou aussi avec de la 
peinture acrylique 2K-PUR).

 – 


Dommages de grande superfi cie : poncer 
uniformément la surface et la nettoyer 
avec du white-spirit ; appliquer ensuite la 
peinture de retouche Rittal sur l’ensemble 
de la surface (ou de la peinture acrylique 
2K-PUR).

Les travaux d’entretien doivent être réali-
sés par le spécialiste respectif. Toutes les 
directives générales en vigueur en matière 
d’entretien doivent être respectées.

Remarque :

 lors du nettoyage des surfaces, 

veiller à ne pas introduire de liquide dans le 
coff ret via l'introduction de câbles.

Summary of Contents for AX IT 7641.350

Page 1: ... IT Wall mounted enclosures AX IT Coffrets muraux 19 AX IT Montage und Bedienungsanleitung Assembly and operating instructions Notice de montage et d emploi AX IT 7641 350 AX IT 7643 350 AX IT 7645 350 AX IT 7646 400 ...

Page 2: ...nting the door door hinged on left 21 4 6 Removing the cam lock 22 4 7 Mounting the cam lock door hinged on right 22 4 8 Mounting the cam lock door hinged on left 23 4 9 Depth adjustment of the 482 6 mm 19 level 24 4 10 Mounting options Earth rail and socket strip 25 4 11 Inserting the sealing bungs 26 4 12 Earthing Enclosure and door 27 5 Transport 28 6 Earthing and potential equalisation 29 7 In...

Page 3: ...3 Wandgehäuse AX IT Wall mounted enclosures AX IT Coffrets muraux AX IT Inhaltsverzeichnis Contents Sommaire 4 19 29 33 20 20 21 22 22 23 24 25 IP 26 27 28 ...

Page 4: ...e product They must be given to the plant operator who is then responsible for the storage of the documents so that they are readily available when needed 1 3 Symbols used Please observe the notes in this guide The safety instructions can be found on pages 10 14 Danger F R Note Front rear view 1 4 Other applicable documents These assembly and operating instructions for the described enclosures can...

Page 5: ...fabrication via une analyse des risques selon la norme DIN EN ISO 12100 Les remarques suivantes sont à respecter car quelques risques résiduels ne peuvent pas être supprimés Il est possible que la santé et la vie des personnes soient mises en danger en cas de non respect des consignes de sécurité Consignes de sécurité Lors du transport du montage du démontage et de l équipement le coffret doit êtr...

Page 6: ... soveltuminen on varmistettava Asennusohjeissa mainittuja kuormitusrajoja on noudatettava AX IT seinäkotelon kehityksessä on otettu jo suunnitteluvaiheessa huomioon turvallisuuden kannalta kriittiset pisteet DIN EN ISO 12100 n mukaisen riskiarvioinnin perusteella ja niitä on vältetty Koska joitakin jäännösriskejä ei voi välttää on noudatettava seuraavia ohjeita Mikäli turvallisuusohjeita ei noudat...

Page 7: ...тадии конструирования были оценены и минимизированы факторы влияющие на безопасность Так как некоторые остаточные риски исключить не возможно следует принять во внимание следующие указания При несоблюдении мер безопасности возможна опасность для здоровья и жизни Меры безопасности Во время транспортировки монтажа и демонтажа корпус должен быть закреплен от опрокидывания падения и скольжения При все...

Page 8: ...instrukcijoje Projektuojant plieninius AX IT korpusus ir atlikus rizikos vertinimą pagal DIN EN ISO 12100 jau konstravimo etape buvo įvertinta rizika atsižvelgta į saugos reikalavimus ir imtasi priemonių pašalinti galimus pavojus Kadangi kai kurių liekamųjų pavojų pašalinti negalima reikia laikytis toliau pateiktų nurodymų Nesilaikant saugos nurodymų kyla pavojus sveikatai ir gyvybei Saugos nurody...

Page 9: ...z hľadiska bezpečnosti na základe posúdenia rizika v zmysle normy DIN EN ISO 12100 čím sa predišlo ich výskytu Keďže nie je možné vylúčiť výskyt malého počtu zvyškových rizík je nutné dodržiavať nasledovné pokyny V prípade nerešpektovania bezpečnostných pokynov môže dôjsť k ohrozeniu zdravia a života Bezpečnostné pokyny Počas prepravy skladania a rozoberania ako aj demontáže musíte teleso zaistiť ...

Page 10: ...culement lors du déplacement du centre de gravité Waarschuwing voor kantelen als gevolg van zwaartepunt verschuiving Varning för vältande föremål på grund av förskjuten tyngdpunkt Warnung vor schweren Lasten Caution Heavy loads Attention aux charges lourdes Waarschuwing voor zware belastingen Varning för tung last Aufsteigen auf eine Fläche ist verboten Climbing on surfaces is prohibited Il est in...

Page 11: ...ning på grund af forskydning af tyngdepunktet Ostrzeżenie przed przewróceniem się z powodu przesunięcia środka ciężkości Pericolo carichi pesanti Advertencia de cargas pesadas Varo raskasta kuormaa Advarsel Tunge belastninger Ostrzeżenie przed dużymi ciężarami Divieto di salire sulla superficie Prohibido subirse a una superficie Päällenousu on kielletty Det er forbudt at klatre på maskinens overflade...

Page 12: ...ввиду смещения центра тяжести Προειδοποίηση ανατροπής λόγω μετατόπισης του κέντρου βάρους Avertizare de răsturnare prin depla sarea centrului de greutate Varování před těžkými břemeny Предупреждение за опасност от тежки товари Предупреждение о тяжелых нагрузках Προειδοποίηση για βαριά φορτία Avertizare privind sarcini grele Nešlapat na povrh Качването върху повърхностите е забранено Становиться на...

Page 13: ...est raskus keskme nihkumise tõttu Brīdinājums par apgāšanos smaguma centra novirzīšanās dēļ Upozorenje na teške terete Figyelmeztetés nehéz teherre Įspėjimas apie sunkius krovinius Hoiatus raskete koormate eest Brīdinājums par lielu slodzi Zabranjeno je penjanje na površinu A felületre lépni tilos Draudžiama lipti ant paviršiaus Pinna peale astumine on keelatud Aizliegts kāpt uz virsmas Nosite zaš...

Page 14: ...risco de queda pelo deslo camento do centro de gravidade Opozorilo pred težkimi bremeni Varovanie pred ťažkými bremenami Cuidado com cargas pesadas Vzpenjanje na površino je prepovedano Je zakázané vystupovať na plošinu É proibido subir para a superfície Nosite zaščitna očala Noste ochranné okuliare Usar óculos de proteção Uporabljajte zaščito za roke Používajte ochranu rúk Usar proteção das mãos ...

Page 15: ...té de la livraison 3 2 Kennzeichnung Tür Gehäusekorpus und das Typenschild des Schrankes besitzen einen QR Code mit bauteilspezifischen Daten Identifier Dateninhalt 01 Fertigungs auftragsnummer 04 SAP Materialnummer 09 Breite 10 Höhe 11 Tiefe 19 Baugruppenstufe vormontiert 50 Artikel Ersatzteilnummer 51 Seriennummer Beispiel Gehäuse 01 0000112620195 04 398529 09 600 10 380 11 350 19 374082 51 E 20HG...

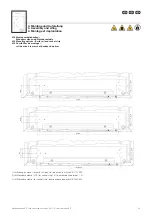
Page 16: ...IT Wall mounted enclosures AX IT Coffrets muraux AX IT 3 3 Auspackhinweise 3 3 Unpacking instructions 3 3 Indications de déballage 3 Gerätebeschreibung 3 Device description 3 Description du coffret B 2 2 1 2 F 3 2 1 F B ...

Page 17: ... 4 x 4 x 4 x Ø 16 1 x 1 x 7 x Ø 6 5 2 x 2 x 3 x 1 x 1 x 1 x M8 x 25 1 x 1 x 1 x Type K Ø 8 2 1 x 1 x 1 x Type S Ø 8 2 2 x 2 x 2 x M8 3 x 3 x 3 x 3 4 Lieferumfang AX IT mit Vorreiberverschluss 3 4 Scope of delivery AX IT with cam lock 3 4 Composition de la livraison coffrets muraux AX IT avec serrure à came 3 Gerätebeschreibung 3 Device description 3 Description du coffret ...

Page 18: ...must be sufficiently smooth Observe all specified torque values Over or undershooting the tensioning torques speci fied in these instructions can cause system damage severe injuries or even death Ensure adequate carrying capacity for wall mounting The notes in the instructions for the deployed system accessories must also be observed 4 1 Exigences concernant le lieu d implantation Avant le montage i...

Page 19: ...nge must be swapped to the opposite side Changement de charnières requis 2 2 Scharnierwechsel erforderlich The hinge must be swapped to the opposite side Changement de charnières requis 2 2 TX25 Bei 1 türigen Wandgehäusen AX IT ist sowohl ein Drehen des Schrankes sowie ein Türanschlagwechsel möglich With 1 door wall mounted enclosures AX IT the enclosure may be rotated and the door hinge may also ...

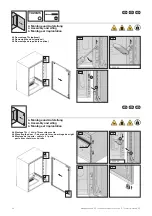
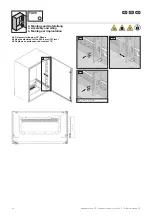
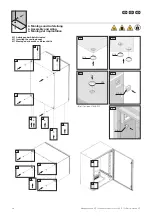
Page 20: ...tellung 4 Assembly and siting 4 Montage et implantation 1 1 1 1 2 TX20 25 1 3 1 2 1 1 2432 000 1 2 1 3 1 2 1 2 1 1 Ø 5 x 66 4 4 Montage Tür 1 türig Türanschlag rechts 4 4 Mounting the door 1 door enclosures door hinged on right 4 4 Montage de la porte coffrets à 1 porte porte avec charnières à droite 4 Montage und Aufstellung 4 Assembly and siting 4 Montage et implantation 2 2432 000 ...

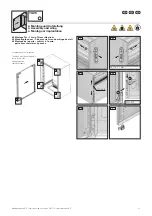
Page 21: ... 4 2 3 2 1 2 2 4 5 Montage Tür 1 türig Türanschlag links 4 5 Mounting the door 1 door enclosures door hinged on left 4 5 Montage de la porte coffrets à 1 porte porte avec charnières à gauche 3 Scharnierwechsel erforderlich The hinge must be swapped to the opposite side Changement de charnières requis 2 1 1 MA 4 1 Nm TX25 2432 000 2 1 2 1 3 Ø 5 x 66 ...

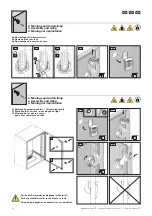
Page 22: ...res à droite 4 6 Demontage Vorreiberverschluss 4 6 Removing the cam lock 4 6 Démontage de la serrure à came 4 Montage und Aufstellung 4 Assembly and siting 4 Montage et implantation 4 Montage und Aufstellung 4 Assembly and siting 4 Montage et implantation 2 4 R 2 5 F 2 1 2 3 2 2 1 2 Risiko der Potenzialverschleppung im Fehlerfall Risk of potential transfer in the event of a fault Risque de propaga...

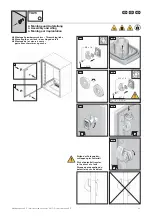
Page 23: ...R 4 8 Montage Vorreiberverschluss Türanschlag links 4 8 Mounting the cam lock door hinged on left 4 8 Montage de la serrure à came porte avec charnières à gauche TX25 1 1 1 4 MA 2 0 5 Nm F M5 x 16 M5 x 16 Ø 10 Ø 10 Risiko der Potenzialver schleppung im Fehlerfall Risk of potential transfer in the event of a fault Risque de propagation du potentiel en cas de défaut 1 1 ...

Page 24: ...T Coffrets muraux AX IT 4 9 Tiefenverstellung der 19 Ebene 4 9 Depth adjustment of the 482 6 mm 19 level 4 9 Réglage en profondeur du montant 19 4 Montage und Aufstellung 4 Assembly and siting 4 Montage et implantation 1 1 3 1 1 1 2 TX25 MA 2 5 0 5 Nm ...

Page 25: ...strip 4 10 Possibilités de montage rail de mise à la masse et bandeau de prises 4 Montage und Aufstellung 4 Assembly and siting 4 Montage et implantation 1 für Erdungsschiene for earth rail pour rail de mise à la masse DK 7113 000 2 für Steckdosenleiste 1 HE for socket strip 1 U pour bandeau de prises 1 U 3 für Steckdosenleiste for socket strip pour bandeau de prises DK 7000 630 ...

Page 26: ...T 1 3 Ø 9 25 4 Ø 6 5 4 11 Anbringen der Abdichtstopfen 4 11 Inserting the sealing bungs 4 11 Montage des bouchons d étanchéité 11 Ø16 21 Ø16 4 Montage und Aufstellung 4 Assembly and siting 4 Montage et implantation Ø16 11 1 2 3 3 3 3 3 3 2 1 1 1 Bei for pour 7646 400 1 4 4 ...

Page 27: ...häuse und Tür 4 12 Earthing Enclosure and door 4 12 Mise à la terre coffret et porte 4 Montage und Aufstellung 4 Assembly and siting 4 Montage et implantation 1 MA 10 1 Nm 2 1 M8 x 25 2 2 M8 x 25 Type K Ø 8 2 Type S Ø 8 2 M8 SW13 M8 Type S Ø 8 2 MA 10 1 Nm M8 M8 Type K Ø 8 2 Type S Ø 8 2 1 2 ...

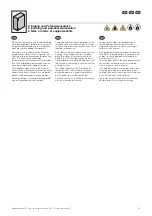
Page 28: ...portation including raising and lowering ensure that the load is supported on the base plinth cor ner pieces at all times and never on the base plinth trim Transport and lifting with mounted 19 compo nents is prohibited Lors du transport du montage et de l équipement les coffrets muraux AX IT doivent être sécurisés pour ne pas basculer Lors du transport y compris lors du levage et de la dépose des...

Page 29: ... required for expansion An automatic potential equalisation from the housing to the support section the gland plate the interior installation rails and the 482 6 mm 19 mounting angles is present The designer must determine whether or not the automatic contacting is sufficient for the earthing system To include the door in the Protection for indirect contact with automatic shutdown protective measu...

Page 30: ...eezing because of low tempe ratures All components and surfaces are examined for external damage Steel enclosures are also inspected for traces of corrosion Any damage is repaired as follows Damage to small areas that affect only a part of the surface e g scratches Lightly sand off the surface at the damaged place and remove all traces of corrosion as well as all contamination Depending on the deg...

Page 31: ...bient temperature is not lower than 40 C the relative humidity does not exceed 50 at 40 C Higher humidity levels are permitted at lower temperatures e g 90 relative humidity at 20 C Suitable measures should be taken to prevent the formation of condensation If used under special operating conditions their suitability must be confirmed by Rittal Pour le stockage du coffret il faut veiller à ce que la...

Page 32: ...cifications 9 Caractéristiques techniques Best Nr AX IT Model No AX IT Référence AX IT Watt Watt Watt W ΔT 20 K 7641 350 99 99 66 7643 350 132 143 99 7645 350 154 176 121 7646 400 176 198 132 Best Nr AX IT Model No AX IT Référence AX IT Schutzgrade Degree of protection Indice de protection IP1 IK1 7641 350 102 10 7643 350 102 10 7645 350 102 10 7646 400 102 10 11 Verlustleistung 11 Heat loss 11 Pui...

Page 33: ...ITTAL GmbH Co KG Auf dem Stützelberg D 35745 Herborn Phone 49 0 2772 505 1855 Fax 49 0 2772 505 1850 E mail service rittal de Service HUB USA Service HUB USA Plateforme de service aux États Unis RITTAL Corporation 801 State Route 55 Dock 25 Urbana OH 43078 Phone 1 800 477 4000 option 3 E mail service rittal us www rittal corp com Service HUB Indien Service HUB India Plateforme de service en Inde R...

Page 34: ...34 Wandgehäuse AX IT Wall mounted enclosures AX IT Coffrets muraux AX IT Notizen Notes ...

Page 35: ...35 Wandgehäuse AX IT Wall mounted enclosures AX IT Coffrets muraux AX IT Notizen Notes ...

Page 36: ...Software Services www rittal com contact You can find the contact details of all Rittal companies throughout the world here RITTAL GmbH Co KG Auf dem Stuetzelberg 35745 Herborn Germany Phone 49 2772 505 0 E mail info rittal de www rittal com 01 2020 D 0000 00002405 00 ...

Reviews: