


Installing 6
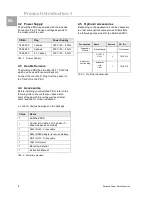
10
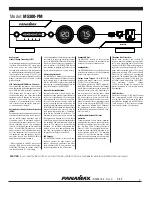
Switched Power Distribution Unit
EN
6
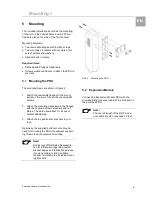
Installing
Danger!
Only trained specialists may perform
the assembly and installation.
6.1 Security advices
The Rittal Switched PDU may be operated only
with connected protective earth conductor. The
protective earth conductor connection is made by
plugging in the IEC connection cable. This re-
quires that the IEC connection cable at the power
supply side be connected with the protective
earth conductor.
The electrical connection voltage and frequency
must conform to the rated values specified at the
rear of the power supply unit and in the technical
specifications
Before commencing work on the Rittal Switched
PDU, it must be disconnected from the mains
power supply and protected against being re-
connected.
Protect the connection cables using cable ties on
the used housing or enclosure.
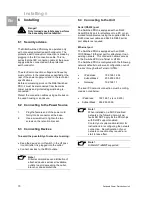
6.2 Connecting to the Power Source
1.
Plug the female end of the power cord
firmly into its connector at the base.
2.
Use a screwdriver to tighten the two
screws on the retention bracket.
6.3 Connecting Devices
To avoid the possibility of noise due to arcing:
•
Keep the device’s on/off switch in the off posi-
tion until after it is plugged into the outlet.
•
Connect devices to the PDU outlets.
Note!
Rittal recommends even distribution of
attached devices across all available
outlets to avoid exceeding the outlet,
branch or phase limitations.
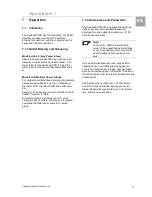
6.4 Connecting to the Unit
Serial (RS232) port
The Switched PDU is equipped with an RJ45
Serial RS-232 port for attachment to a PC or net-
worked terminal server using the supplied RJ45 to
RJ45 crossover cable and RJ45 to DB9F serial
port adapter as required.
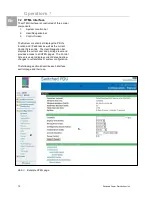
Ethernet port
The Switched PDU is equipped with an RJ45
10/100Base-T Ethernet port for attachment to an
existing network. This connection allows access
to the Switched PDU via Telnet or HTML.
The Switched PDU is configured with the following
network defaults to allow unit configuration out-of-
the-box through either Telnet or HTML:
•
IP address:
192.168.1.254
•
Subnet Mask:
255.255.255.0
•
Gateway:
192.168.1.1
The local PC network connection must be config-
ured as noted below:
•
IP address:
192.168.1.x (x is 2-253)
•
Subnet Mask: 255.255.255.0
Note!
When installed on a DHCP enabled
networks, the following network de-
faults DO NOT apply as the PDU ships
with DHCP support enabled.
Contact your system administrator for
instructions in reconfiguring the network
connection. Reconfiguration of your
network connection may require a re-
start to take effect.
Note!
RiWatchIT is NOT supported