5 Setting up the machine
14
We reserve the right to make technical modifications.
Rittal electrical crimping machine R8 E
EN
Cross-section [mm²]
Die size
Insulation stripping stage
0.50
I
1, 2, 3
0.75
4, 5, 6
1.00
II
7, 8, 9
1.50
10, 11, 12
2.50
III
13, 14, 15
Blade replacement
I II III
99
Tab. 1:
Setting values
5.4.1
Die size setting
◼
Open the twist lock.
◼
Swivel the flap to the side.
Caution!
There is risk of finger injuries by the fixed ferrule separating blade.
◼
Do not touch the blade when the drum is turned.
◼
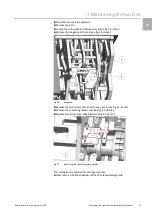
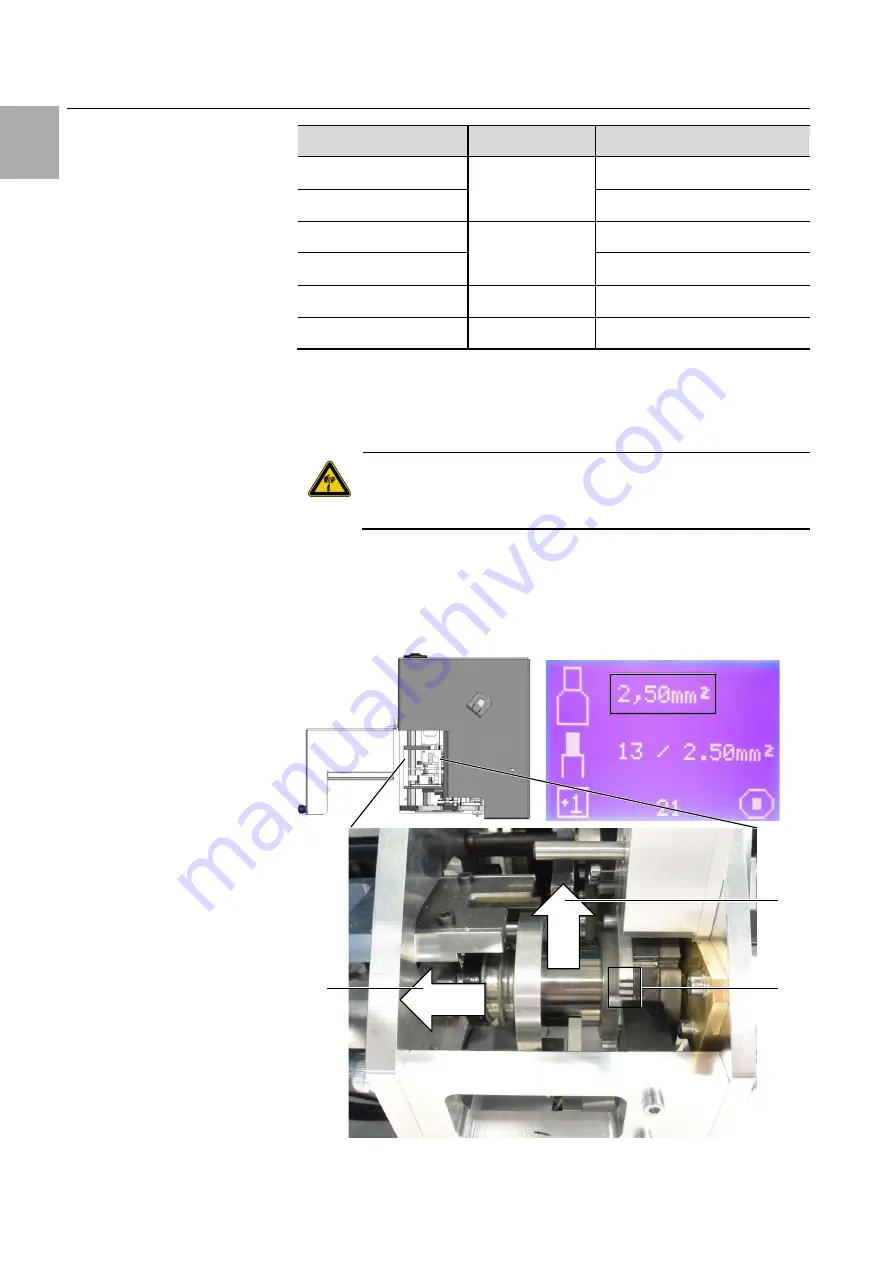
Press the drum backwards (see fig. 8, item 1) and turn (see fig. 8, item 2) to the
desired die size.
◼
Release the drum until it latches.
The current nest is displayed with the bars (see fig. 8, item 3).
◼
Check by turning whether the drum has latched.
Fig. 8:
Setting the die size
3
2
1


