OPERATION
CHILD SAFETY
CORD CLEAT
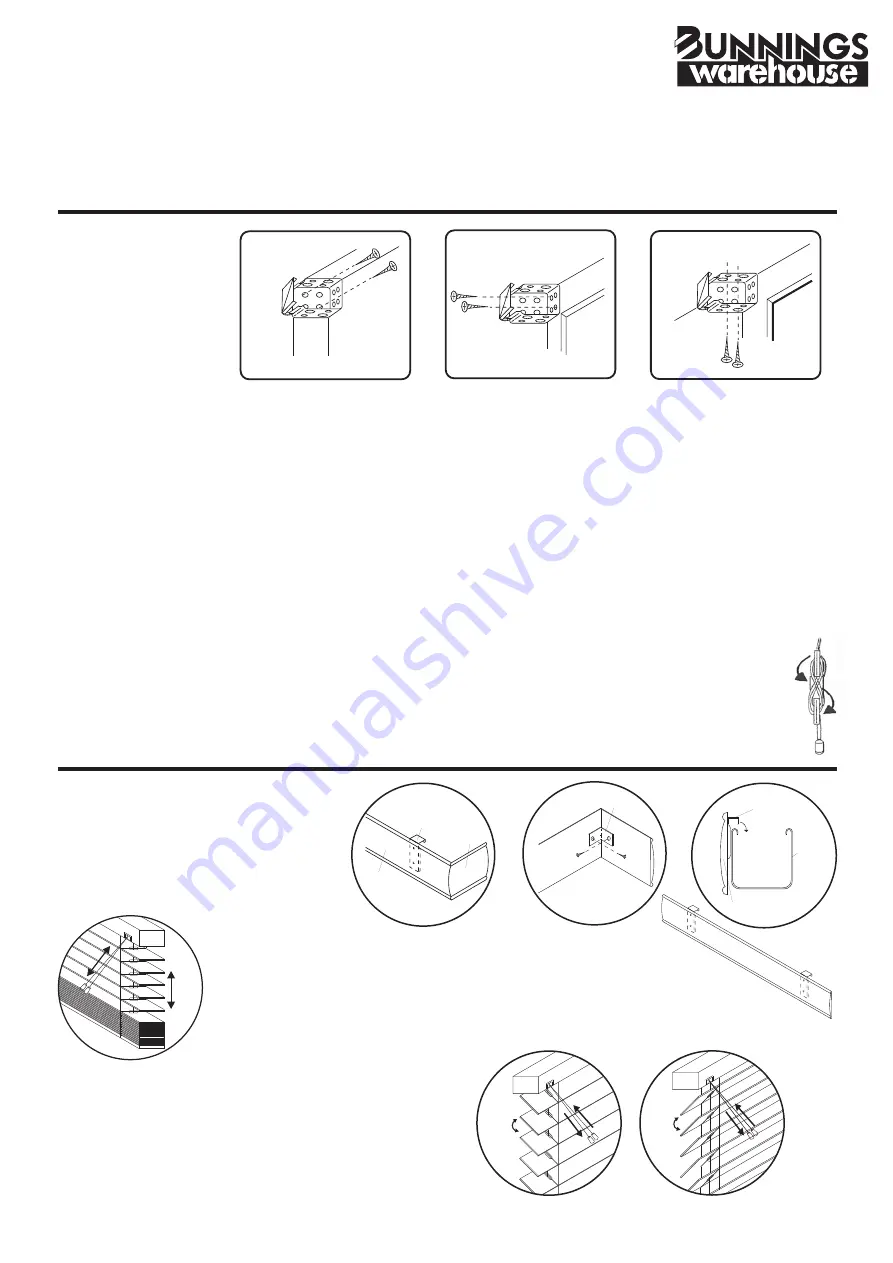
INSTALLING
A
B
C
A.
Inside mounting to the
inside or between the sides
of window frame.
B.
Outside mounting to the
face or outside the window
frame.
C.
Ceiling mounting overhead
to a surface such as the top
inside of window frame or the
ceiling.
STEP 2.
Measure where you want the blind to hang, make sure that the blind is centred and level.
Hold one bracket (large hole faces to the floor) at desired height and width you have chosen and
mark the screw holes with a pencil.
STEP 3.
Drill pilot holes where you marked the screw holes. Use a screwdriver to attach the brackets
to the wall or roof using the necessary screws.
STEP 4.
After the first bracket is mounted, carefully position and attach the second bracket. Double
check to be sure that it is level and aligned with the first bracket and that both are the correct
distance apart.
STEP 5.
Pick up the blind and slide the head rail into the brackets. Make sure that the blind cord and
the tilt cord collar face toward you. Mark and fix centre bracket (if necessary) and close the front
cap on each bracket.
STEP 6.
Attach Child Safety Cord Cleat where required to prevent tangling
or child strangulation.
STEP 1.
Select
the method of
mounting that
best suits your
purpose
(A, B or C).
LOWERING:
Pull cord downward until blind reaches desired
height and release the cord; blind will lock automatically.
RAISING:
Hold cord at eye level and move to left gently until cord
lock releases. Allow cord to slip through fingers until blind reaches
desired level. Move pull cord to the right and release, blind will
lock automatically.
TILTING:
For tilting the angle of the slats, pull either of
the tilt cords to adjust the amount of light or privacy
required.
Always tilt slats horizontally before raising or lowering
the blind to increase the life of your venetian.
ALL FITTINGS INCLUDED
VALANCE:
After your blind has been
installed, attach brackets and
returns (included), to the valance
and hook brackets over the head
rail. Note: Return is supplied only for
Face Fix. Recess fix has no return.
Bracket
Return
Valance
Return Bracket
Valance
Valance
Bracket
Head Rail


