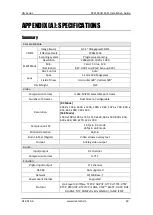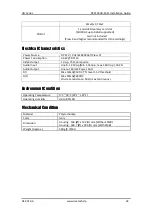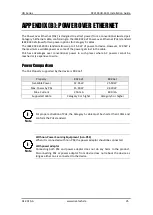
HD Series
RC2103HD-6511 Installation Guide
01-2015-A
www.rivatech.de
10
1)
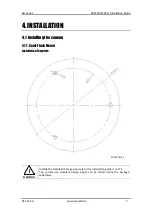
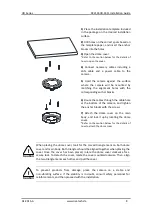
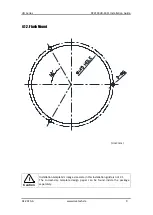
Place the installation template included
in the package on the desired installation
surface.
2)
Drill holes on the correct spots based on
the template paper, and insert the anchor
blocks into the holes.
3)
Open the dome cover.
*Refer to the caution below for the details
about how to open the cover.
4)
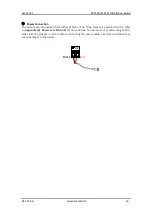
Connect necessary cables including a
LAN cable and a power cable to the
camera.
5)
Unscrew the three bolts attached on the
dome cover’s surface, and place the FMB
mount between the dome shell and the
bottom circular cylinder. Then, align the
three screw holes on each component
together,
and
tighten
the
three
components with the bolts included in the
package.
6)
Attach the three components-combined
dome cover to the main body, and lock it
up by rotating the cover.
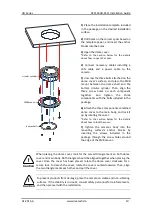
*Refer to the caution below for the details
about how to lock the cover.
7)
Tighten the camera’s body into the
mounting surface’s anchor blocks by
inserting the screws included in the
package through the screw holes around
the edge of the FMB mount.
Caution
!
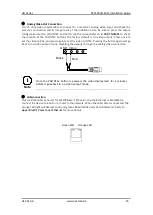
When placing the dome cover, look for the carved triangle mark on both dome
cover and main body. Both triangles should be aligned together when placing the
cover. Once the cover has been placed, rotate the dome cover clockwise for a
secure lock. To detach the cover, rotate the cover counterclockwise. Then, align
the two triangle marks each other, and pull the cover.
Caution
!
To prevent products from damage, place the camera on stable and non-vibrating
surfaces. If the stability is in doubt, consult safety personnel for reinforcements,
and then proceed with the installation.
circular cylinder
FMB mount
dome shell


