SteelConnect Access Point Hardware Guide
13
Installing the SDI-AP5R
Mounting the SteelConnect Access Point Appliances
4.
Plug in the power supply or PoE to power up the AP.
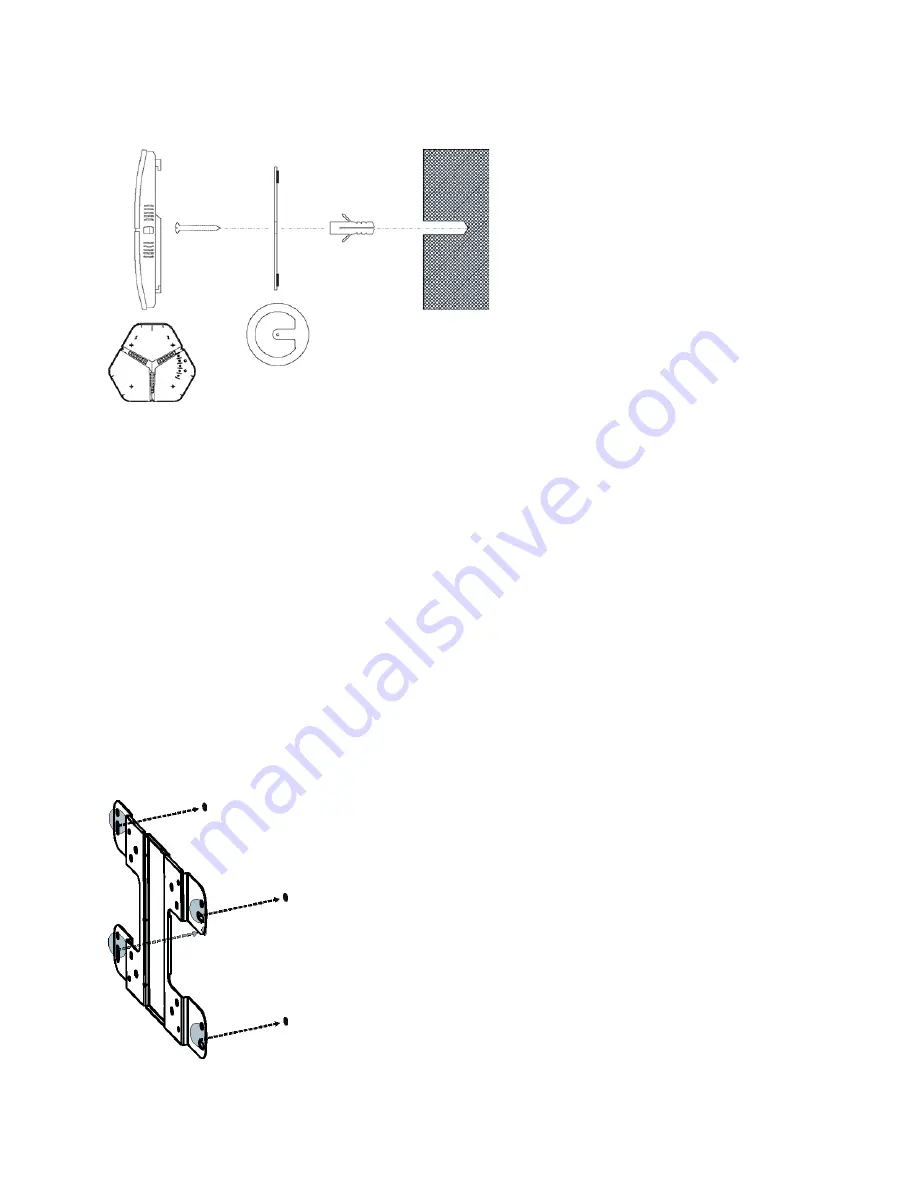
Figure 2-1. Mounting the SDI-AP3 and SDI-AP5
Installing the SDI-AP5R
You can mount the SDI-AP5R to a wall or a pole using the mounting kit that ships with the appliance.
Make sure to mount all antennas as indicated on the device (2.4 GHz and 5 GHz) before mounting the
appliance. Distance from the appliance to the power supply source should be considered before
mounting it.
The AP can only be powered by PoE+ (IEEE 802.3at) through the LAN1 port. Supply power by connecting
the LAN1 port either to a PoE+ injector or a PoE+ capable switch port.
Use the grounding strap that ships with the SDI-AP5R to prevent damage to the AP. Connect one end of
the grounding strap to a grounding post with a screw and washer. Securely attach it to another nearby
metal structure.
Wall Mounting the SDI-AP5R
1.
Mark the four locations on a flat surface for the mounting holes.
Figure 2-2. Mounting Hole Locations
Summary of Contents for SteelConnect SDI-AP3
Page 1: ...SteelConnect Access Point Hardware Guide June 2016 ...
Page 4: ...4 SteelConnect Access Point Hardware Guide Contents ...
Page 6: ...6 SteelConnect Access Point Hardware Guide Welcome ContactingRiverbed ...
Page 10: ...10 SteelConnect Access Point Hardware Guide SteelConnectOverview SteelConnectAccessPointLEDs ...
Page 22: ...22 SteelConnect Access Point Hardware Guide Specifications SDI AP5RSpecifications ...


