Check for parts online at
www.huntriversedge.com
or call 800-450-EDGE (3343) M-F 8-5
Check for parts online at
www.huntriversedge.com
or call 800-450-EDGE (3343) M-F 8-5
12
Operator's Manual
Rivers Edge One-Man Ladder Stands
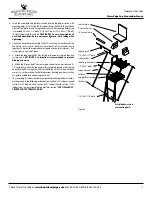
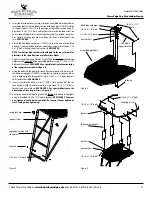
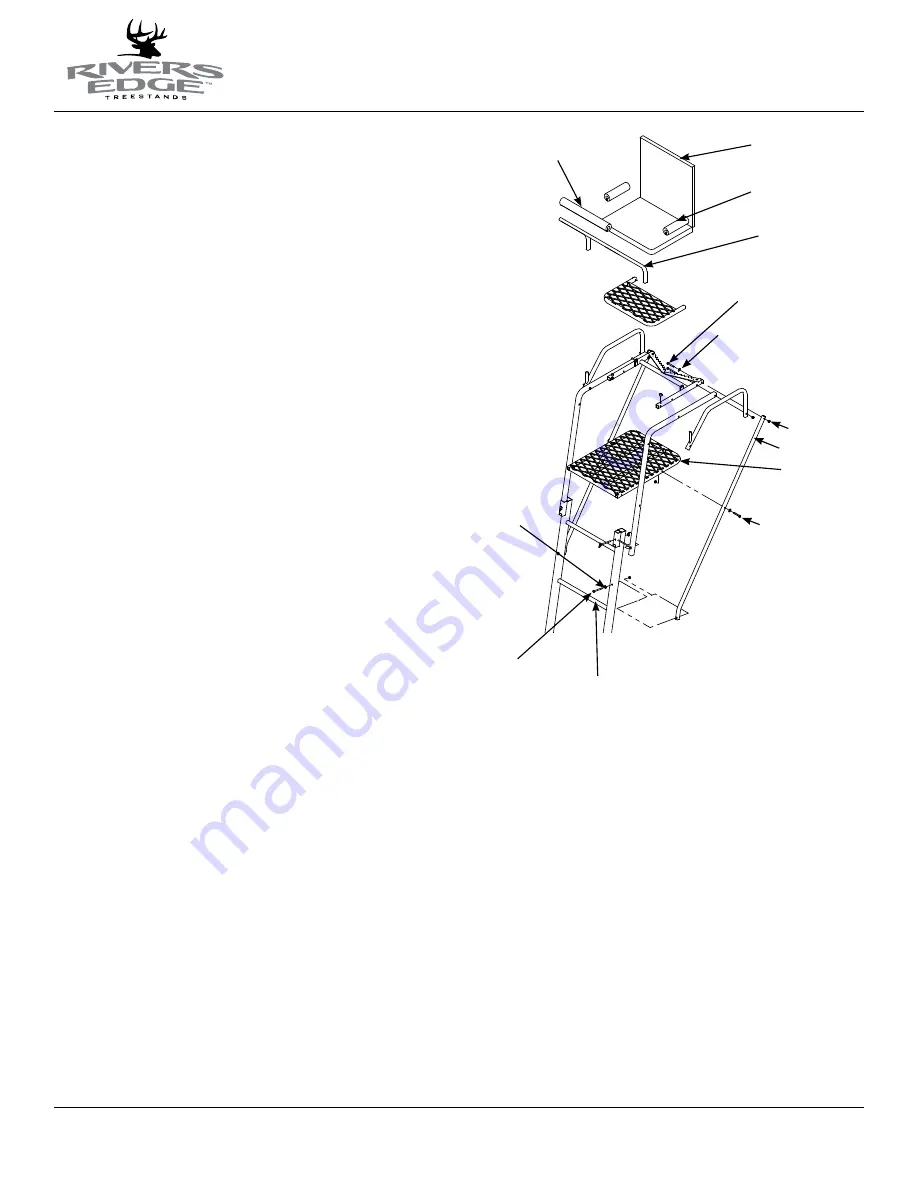
Figure 4
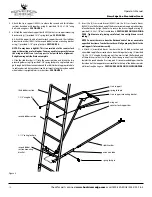
seat cushion
9" camo sleeve
shooting rail
4-step ladder section
w/ mounting holes
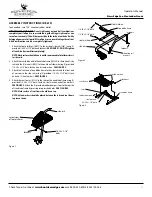
5. Attach the (2) brace supports (48055) to the rear holes of tree blade frame
and foot platform using (4) provided 1/4-20 x 2” bolts, locknuts and steel
washers. SEE fIGuRE 4.
6. Insert the assembled top platform section into the pockets of top ladder
section with mounting holes (SL74). Attach the (2) support braces to the
back side of top ladder section using (2) provided 1/4-20 x 2-3/4” bolts,
locknuts and steel washers. SEE fIGuRE 4. You must now tighten all nut
& bolt assemblies. Be sure not to over tighten or crush tubing when
tightening!
7. Attach the removable seat cushion (48819) to the top of seat frame. Wrap
the Velcro straps or buckle straps around seat frame and secure together.
Snap the side release buckles together for buckle style seats. Pull straps
tight so seat is not loose.
8. a. Attach the shooting rail (SR10) by setting rail down over studs on armrests.
SEE fIGuRE 4. Lubrication is recommended to prevent binding and noise.
b. Attach the (2) provided 9” camo sleeves to the armrests and the (1) 18”
camo sleeve to the shooting rail by wrapping around metal tubing and
attaching Velcro together.
c. Tap the (2) provided plastic end caps into top end of top ladder section
using a rubber mallet.
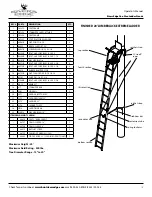
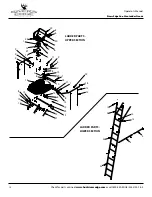
9. The remaining (3) ladder sections are assembled to the top ladder assembly
on the ground in the following order: bottom section (SL71 ladder); second
section (SL72 ladder); third section (SL73 ladder); top section (assembled
top, platform section). SEE fINIShED 20’ luMBERJACk EXTREME lADDER.
1/4-20 x 2-3/4" bolts
steel washers
1/4-20 x 2" bolts
top platform
section
support braces
locknuts
steel washers
1/4-20 x 2" bolts
18" camo sleeve

