Check for parts online at
www.HuntRiversEdge.com
or call 800-450-EDGE (3343) M-F 8-5
3
Operator's Manual
Landmark
™
Permanent Blind
1. Open box, remove contents and organize all parts together according to their labels (four A1 parts together, four HUB1 parts
together, etc.). This step greatly helps the ease of assembly.
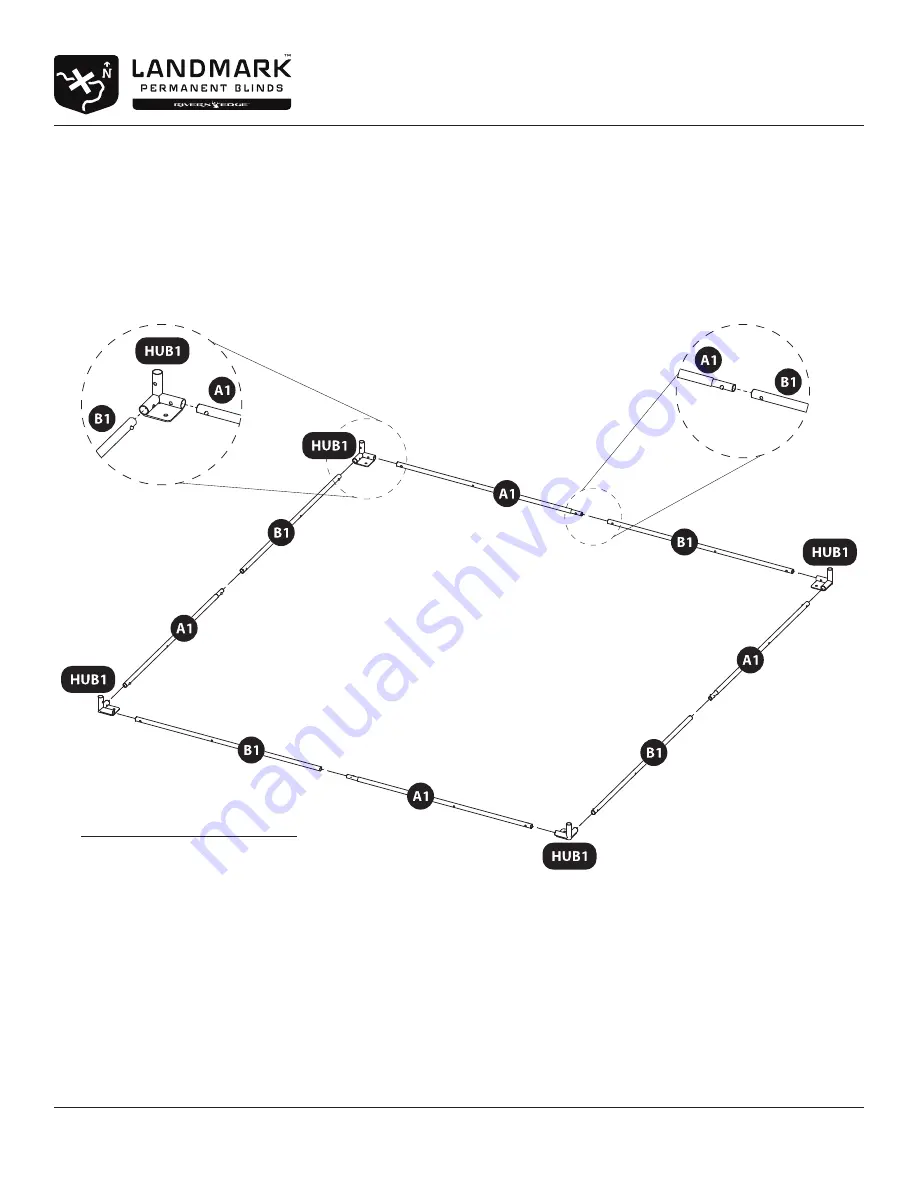
2. Locate the four HUB1 corners, four of the six A1 poles and four of the six B1 poles and lay them out according to FIGURE 1.
3. Slide each A1 pole into the corresponding B1 pole so that the snap button secures both pieces together. Do this with the four
sets of A1 and B1 poles. SEE FIGURE 1.
4. Slide the four assembled A1 and B1 poles into the four HUB1 corners so that the snap buttons secure the pieces together. You
should now have the bottom tier frame of the blind assembled. SEE FIGURE 1.
FIGURE 1
FRAME ASSEMBLY INSTRUCTIONS
Tools needed – two 10mm wrenches
IMPORTANT ASSEMBLY TIP:
Do not tighten any nut and bolt combinations completely until all parts are assembled together! Finger tighten plus one turn of a
wrench only! This will temporarily hold the lock nut on the bolt while helping alignment of all parts! After all parts are assembled
together, all nut & bolt combinations must be completely tightened.


