Page 3 of 4
Made in Viet Nam
email: info@riverside-furniture.com
ASSEMBLY STEPS :
To prevent possible damage to furniture and personal injury, it is recommended that two people are used
to perform the following steps.
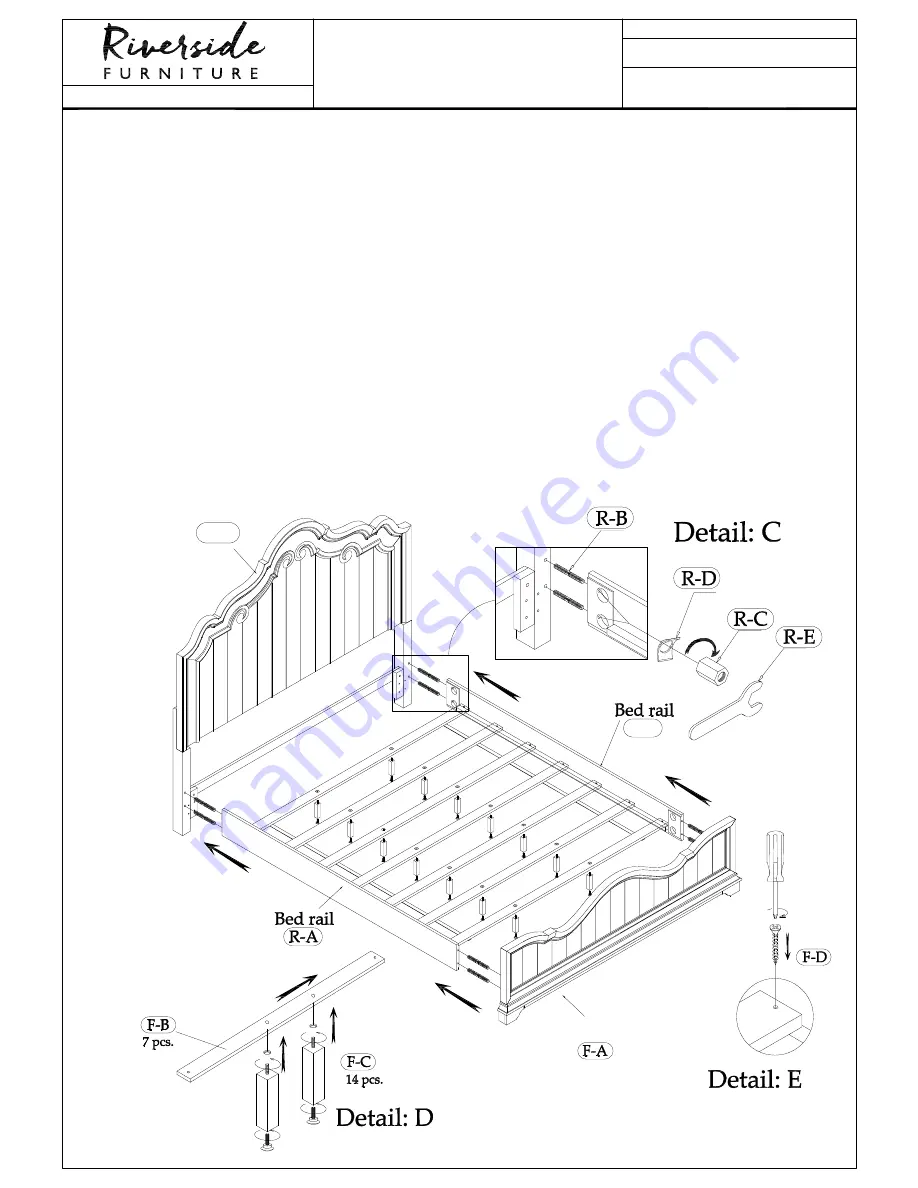
5. Install the All-Thread Bolts (R-B) into the metal threaded inserts installed in the Headboard Posts and
into the metal inserts on the Footboard.
6. Carefully position one end of one Bed Rail (R-A) onto the All-thread Bolts on the Headboard and
connect using the Arc Washers (R-D), and Hex Nut (R-C). Only partially tighten the Nuts until the
Footboard has been connected. Repeat for other Bed Rail.
7. Position and connect the Footboard (F-A) to the other end of the Bed Rails, attaching as in the previous
Steps.
8. Carefully align the Footboard to be 'square' with the Headboard. Using the Open Wrench (R-E) tighten
all Hex Nuts attaching the Side Rails to the Headboard and Footboard. (See Detail C).
9. Attach the 14 Support Legs (F-C) to the bottom side of 7 Wood Slats (F-B). (See Detail D).
10. Position and attach the Slats to the Bed Rails using the Wood Screws (F-D) and your Phillips
Screwdriver. (See Detail E).
The levelers located at the bottom of the Support Legs can be adjusted if necessary to support the Slats.
R-A
H-A
Headboard
Footboard
Elizabeth
King Bed
Assembly Instructions


