(J)
(K)
DETAIL C
(J)
Riverside
FURNITURE
email: info@riverside-furniture.com
Made in Viet Nam
Page 2 of 4
Hutch
#16742
Placid Cove
Entertainment Hutch
Assembly Instructions
5. Using two people, carefully turn the assembled Hutch upright.
6. If using the Piers, then remove the side moulding by sliding them towards the back of the Hutch as shown in
DETAIL D.
DETAIL D
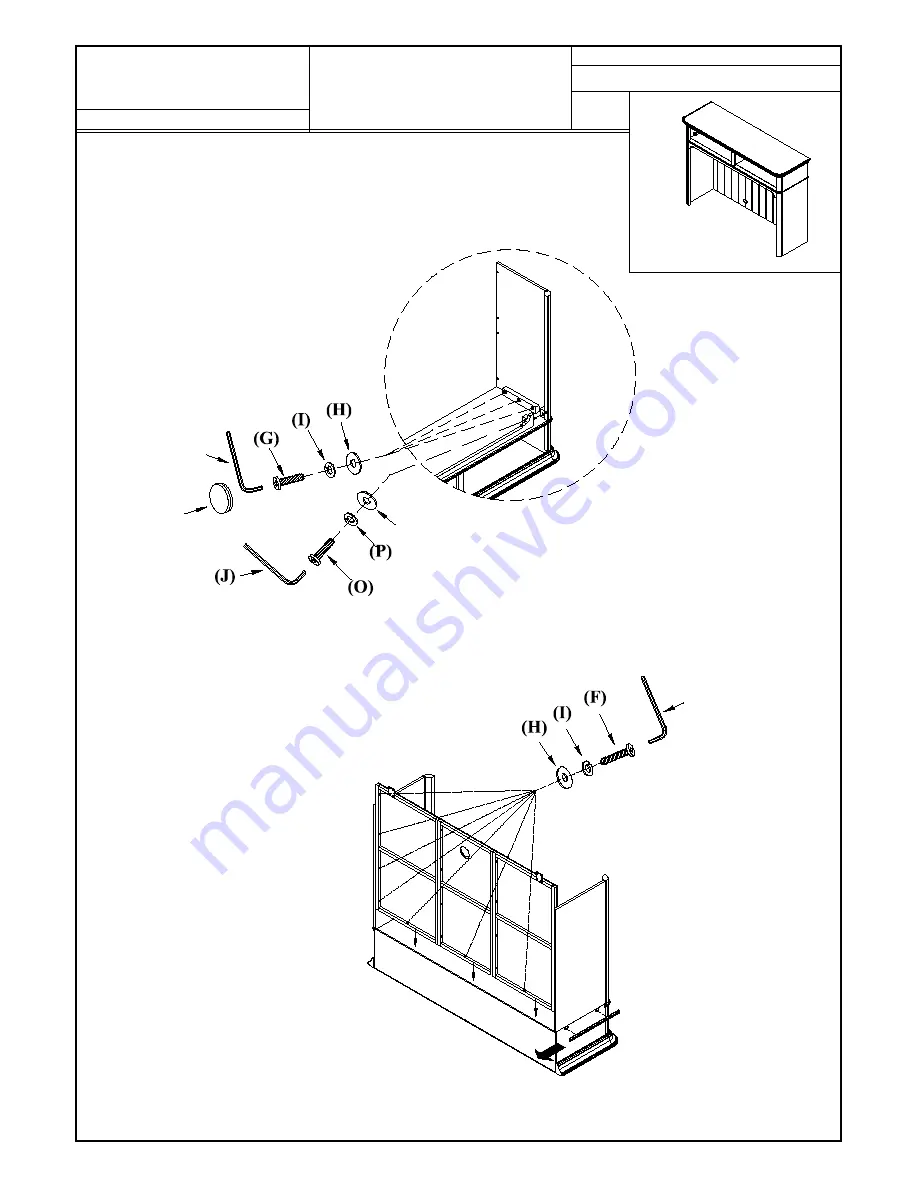
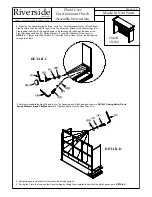
4. Place the Top Assembly upside down, on its top. Carefully assemble the Left and Right
Side Panels to the Front Rail (E) and to the Top Assembly. Attach at the ends through the
Cleats using the Bolts (G) Spring Washers (I) & Flat Washers (H) and at the ends of the
Front Rail using the Bolts (O), Spring Washers (P) and Flat Washers (Q), as shown in
DETAIL C.
Tighten with Allen Wrench (J). Insert the Plastic Caps (K) over the Bolts going
through the Cleats.
(Q)
5. Carefully assemble the Back Panels to the Top Assembly and Side Panels as shown in
DETAIL D using Bolts (F) and
Spring Washers (I) and Flat Washers (H).
Tighten all Bolts with the Allen Wrench (J).
Summary of Contents for Placid Cove Entertainment Hutch 16742
Page 4: ......


