INSTALLING P.C.S.S. ROOF COVERING
3
1
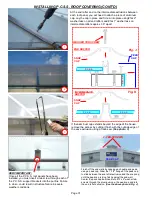
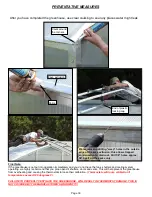
After all extrusions are in place, snap the P.C.S.S. support
brackets onto the purlins. Each purlin will receive (3) support
brackets between each rafter as shown in
photos 1 & 3.
Let the P.C.S.S. support brackets hang upside down and out of
the way until you get the P.C.S.S. roof panels in place.
(See
photo 1)
IMPORTANT:
Remember to check the label and place the proper side of the
P.C.S.S. toward the sun.
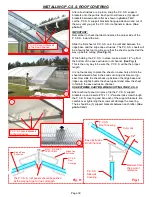
Slide the first sheet of P.C.S.S. onto the roof and between the
ridge base and the ridge cap extrusions. The P.C.S.S. sheets will
be a few inches too long. Be sure that the sheet is pushed all the
way up before cutting.
(See Fig. H)
While holding the P.C.S.S. in place, make a mark 1/2" up from
the bottom of the eave extrusion roof channel.
(See Fig. I)
This is the only way to be sure the P.C.S.S. will be the proper
length.
It is not necessary to place the sheet on a saw horse. Slide the
sheet downward a few inches and cut using a skill-saw or jig-
saw. Now slide the sheet back up between the ridge base and
ridge cap, slightly buckle the sheet upward and allow the sheet
to fall into the eave extrusion channel.
USE EXTREME CAUTION WHEN CUTTING THE P.C.S.S.
After each roof panel is in place, flip the P.C.S.S. support
brackets up and insert a #12 x 1-1/2" washer tek-screw through
the P.C.S.S. covering and into each of the support brackets. Be
careful, over tightening the screws will damage the covering.
There should be (3) support brackets between each rafter.
(See
photo 3 & 4)
1/2"
Measure from
this point of
reference
Cut mark
P.C.S.S.
Roof Covering
P.C.S.S.
Sidewall
Covering
Eave Extrusion
Roof Channel
The P.C.S.S. roof panels should be pushed
all the way up to get a true cut length.
Fig. H
Fig. I
P.C.S.S.
Roof
Covering
Ridge Cap
Extrusion
Ridge Base
Extrusion
P.C.S.S. Support Brackets
In The Down Position.
2
P.C.S.S. Support Brackets
In The Up Position.
4
#12x3" WASHER
TEK SCREW
Page 30
Summary of Contents for Thoreau Series
Page 2: ......

