BASIC TOOL OPERATION
1.
Inspect tool for damage or oil leaking – do not use tool if it is damaged or leaking oil.
2.
Ensure correct nosepiece is installed and tightened with a 12mm spanner. (The size of
the nosepiece is marked on the edge of the nosepiece)
3.
Ensure the
outer sleeving
(3) is tightened, by using a 24mm spanner.
4.
Connect tool to an air supply.
5.
Ensure the
mandrel collector
(28) is installed.
6.
Insert a correct rivet into nosepiece.
7.
Pull trigger to install the rivet.
8.
Release trigger – When releasing the trigger the jaw assembly returns to the start
position automatically.
9.
Eject the spent mandrel by tilting to the rear into the mandrel collector.
10. When the collector is half full, do not use the tool. Disconnect the air supply, unscrew the
collector and empty it.
HYDRAULIC OIL FILLING
It is important that the tool be properly maintained. If the hydraulic oil level is low, the tool will
not work properly.
Caution!
Disconnect the air supply while refilling the hydraulic oil. Keep the tool
upright during all operations.
1.
Unscrew
oil screw
(69) from the body by using the 3mm Hex. Key (supplied). Check
whether the
o ring
(29) remains in the hole.
2.
Fill the syringe (supplied) with hydraulic oil.
3.
Screw the filled syringe up to the o ring in the hole. Then slowly inject the oil into the
tool. Ensure no air is injected. Adequate oil has been added as soon as resistance is
sensed. The excess oil will flow back when the syringe is release if more oil is added
than necessary.
4.
Unscrew and remove the syringe from the body. Check whether the o ring remains in
the hole.
5.
Screw the oil screw into the hole with the Hex. Key.
6.
Wipe off any excess oil.
FRONT END SERVICE
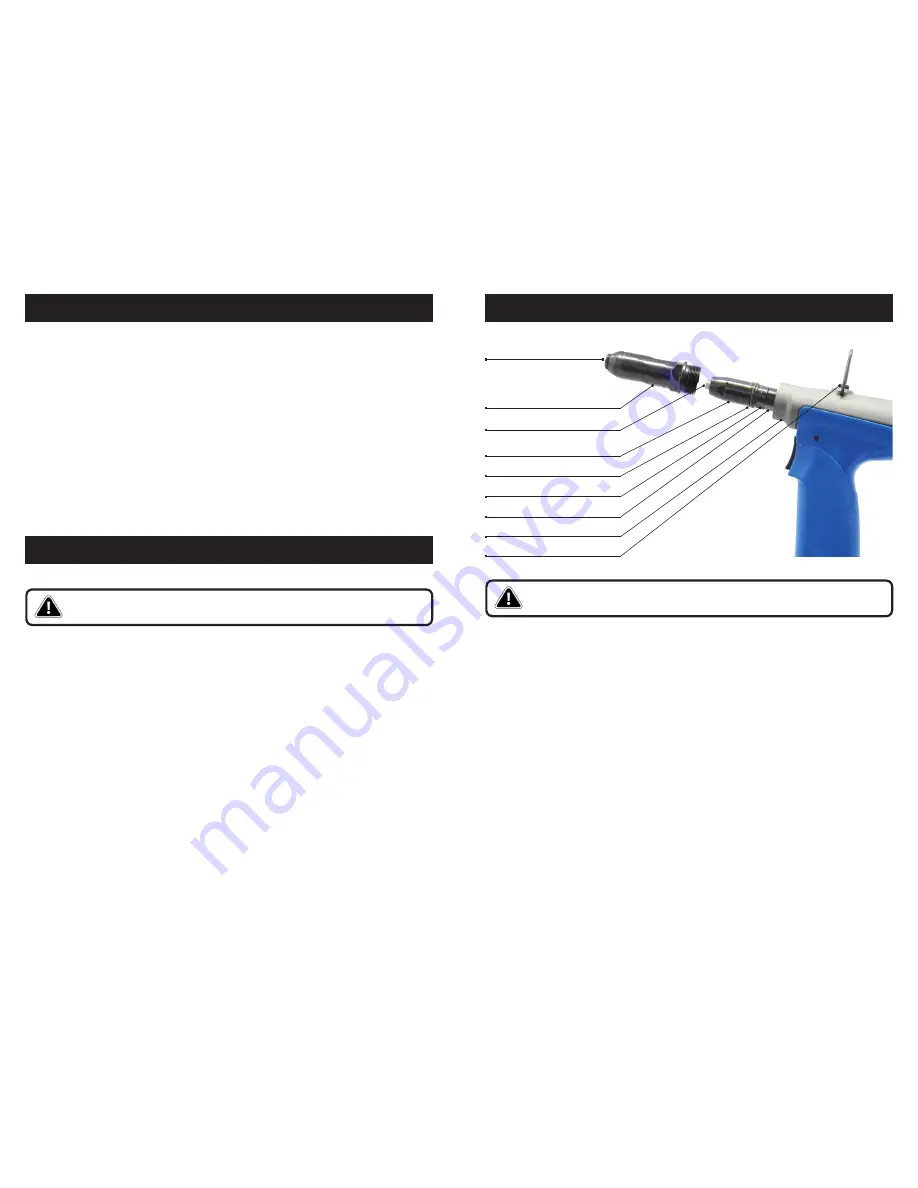
Nosepiece (1)
Outer Sleeving (3)
Jaws (6)
Jaw Case (5)
Lock Ring (9)
Jaw Spreader Housing (10)
Set Nut (12)
Head Assembly (15)
Caution!
Disconnect the air supply while servicing front end to avoid injury.
1.
Remove outer sleeving (3)
Unscrew the outer sleeving with a 24mm spanner and slide the sleeving off the jaw
assembly.
2.
Remove jaw case (5) to access jaws and internal parts
Unscrew and remove the jaw case by using a 17mm spanner on jaw case and a
16mm spanner on
jaw spreader housing
(10). Remove
jaws
(6),
jaw spreader
(7),
spring
(8) and
lock ring
(9).
3.
Cleaning
Clean jaws, jaw spreader, spring, lock ring and the thread of the jaw case. Apply
lubricant on jaws and the thread area. Replace jaws if worn or damaged.
4.
Re-assemble jaws, internal parts and outer sleeving
Place the jaws into the jaw case and slide the jaw spreader, spring and lock ring
into the jaw case. Apply lubricant to the thread of jaw spreader housing. Screw the
jaw case onto the jaw spreader housing by using the 17mm spanner and the 16mm
spanner. Slide the outer sleeving onto the jaw assembly and tighten with the 24mm
spanner.
If the oil level is too low and the tool fails to operate, service is required by a qualified service
person.
Oil Screw (69)
4
5


