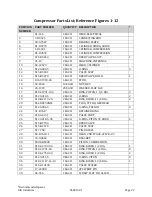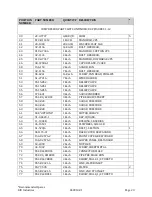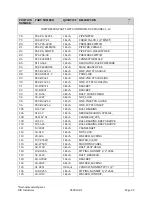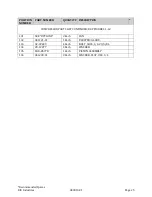
RIX Industries
040910-01
Page 18
7.8
Main Bearings
The crankshaft is supported in the crankcase by two main radial ball bearings.
To remove the main bearings, reference
Figure 2
and follow the instructions below:
1.
Remove heads, cylinders, and piston assembly per
Sections 7.3
,
7.5
and
7.7
.
2.
Remove flywheel.
3.
Bend locking tab on lock washer and remove bearing nut.
4.
Heat bearing housing (piston side) and push out crank. Flywheel side bearing stays in
housing.
5.
Heat outboard bearing housing and push out bearing from far end using suitable fixture.
To install new main bearings:
1.
Slide new main bearing onto the crankshaft. Verify that the bearing is pressed up against
the shoulder on the crankshaft
2.
Slide each crankshaft into the crankcase. Heating may be required.
3.
Install outboard bearing (flywheel side).
4.
Install new lock washer with bearing nut, torque to 50 ft.-lbs., and bend lock washer tab to
secure nut.
5.
Reinstall piston assembly, cylinders, and heads per
Sections 7.7
,
7.5
and
7.3
.
7.9
Piston to Head Clearance
The piston to head clearance of both stages is factory set and should not need adjustment unless
one or more parts of the following items are replaced: cylinder, piston/piston assembly, connecting
rod, crankshaft, or crankcase.
To adjust the 1st stage piston clearance, use the following procedure:
1.
Remove the 1st stage head per
Section 7.3
.
2.
While holding the cylinder firmly in place, rotate crankshaft to ensure piston is at Top Dead
Center (TDC).
3.
Measure the clearance between the piston and the top of the cylinder. Shims may be added
or removed to achieve piston to cylinder clearance of .011" to .015".
4.
Reinstall the head per
Section 7.3
.
Summary of Contents for 2PS-15-115
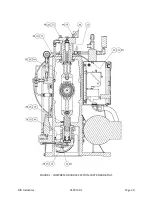
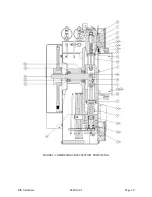
Page 37: ...RIX Industries 040910 01 Page 28 FIGURE 1 COMPRESSOR CROSS SECTION FASTENER DETAIL ...
Page 38: ...RIX Industries 040910 01 Page 29 FIGURE 2 COMPRESSOR CROSS SECTION PUMP DETAIL ...
Page 39: ...RIX Industries 040910 01 Page 30 FIGURE 3 1ST STAGE VALVE DETAIL ...
Page 40: ...RIX Industries 040910 01 Page 31 FIGURE 4 2ND STAGE VALVE DETAIL ...
Page 41: ...RIX Industries 040910 01 Page 32 FIGURE 5 EXTERIOR FASTENER DETAIL ...
Page 42: ...RIX Industries 040910 01 Page 33 FIGURE 6 MOTOR AND CONTROL BOX MOUNTING ...
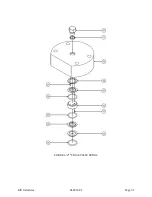
Page 43: ...RIX Industries 040910 01 Page 34 FIGURE 7 SUCTION PLUMBING DETAIL ...
Page 44: ...RIX Industries 040910 01 Page 35 FIGURE 8 INTERSTAGE PLUMBING DETAIL ...
Page 45: ...RIX Industries 040910 01 Page 36 FIGURE 9 FINAL DISCHARGE PLUMBING DETAIL ...
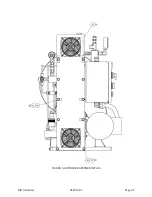
Page 46: ...RIX Industries 040910 01 Page 37 FIGURE 10 COOLING FAN SUB ASSEMBLY DETAIL ...
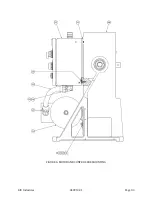
Page 47: ...RIX Industries 040910 01 Page 38 FIGURE 11 BELT INSTALLATION DETAIL ...
Page 48: ...RIX Industries 040910 01 Page 39 FIGURE 12 GUARD MOUNTING DETAIL ...
Page 49: ...RIX Industries 040910 01 Page 40 FIGURE 13 CONTROL BOX DETAIL 1 OF 2 ...
Page 50: ...RIX Industries 040910 01 Page 41 FIGURE 14 CONTROL BOX DETAIL 2 OF 2 ...
Page 51: ...RIX Industries 040910 01 Page 42 FIGURE 15 CONTROL BOX WIRING DIAGRAM ...
Page 52: ...RIX Industries 040910 01 Page 43 FIGURE 16 ELECTRICAL SCHEMATIC ...
Page 53: ...RIX Industries 040910 01 Page 44 FIGURE 17 FLOW SCHEMATIC ...
Page 57: ......
Page 58: ......

