7. SETUP SETTING MODE
IMR01N12-E7
49
Auto calibration (ACAL)
Adjust the full scale point of the Measured value (PV1) on the Input 1 side.
Factory set value:
Related parameters:
PV ratio (P. 44), Shunt resistance output value (P. 68)
Adjustment procedure:
1.
Make sure that the pressure sensor * is installed on the equipment.
3. Wiring (P. 13)
* Relevant pressure sensors: The strain gauge type sensors other than RKC product
2.
Rise the temperature of the equipment installed with the pressure sensor up to the temperature during
operation.
3.
Change the operation state to the control STOP.
4.
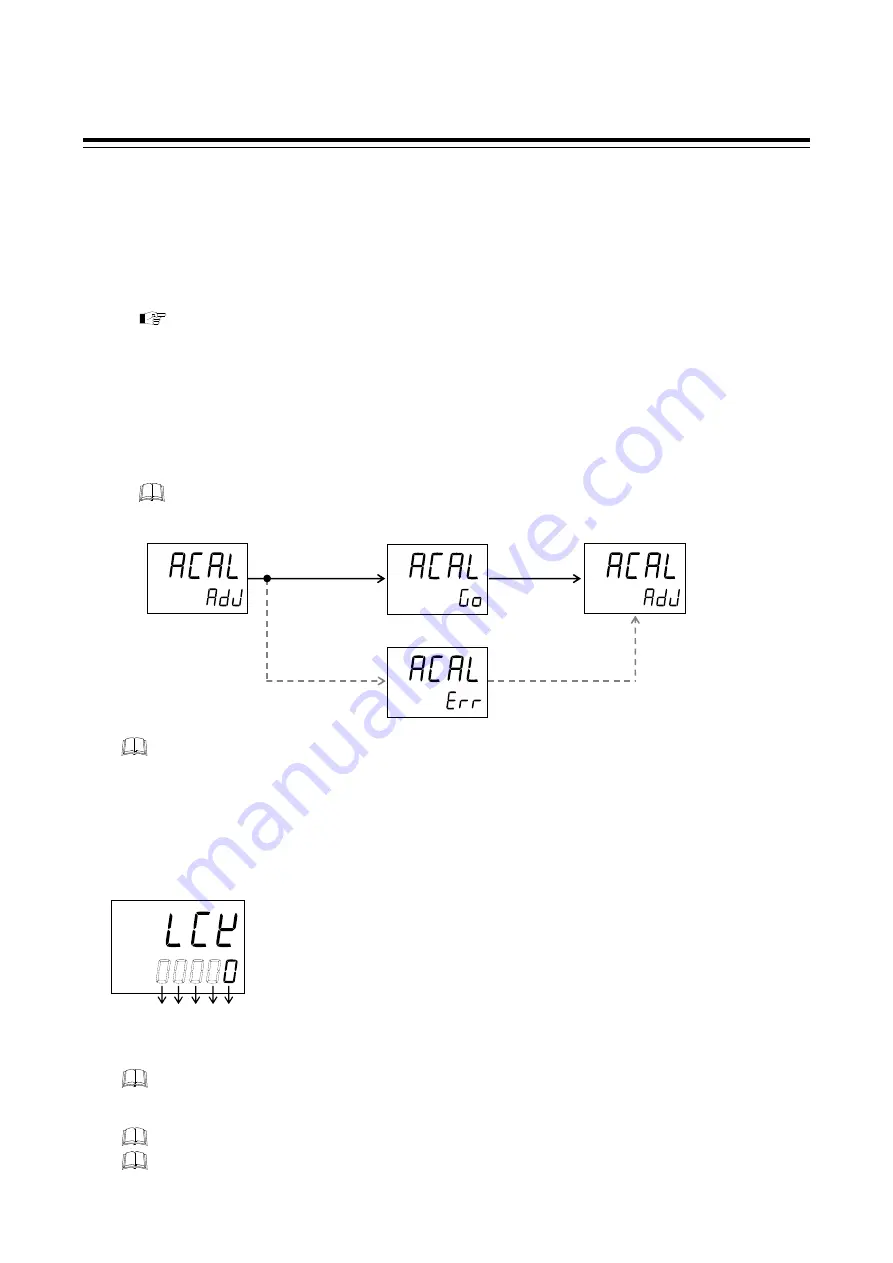
Pressing the shift key for 1 second while displaying the Auto calibration screen automatically starts Auto
calibration operation. If this Auto calibration operation normally end, the screen returns to the Auto
calibration screen.
For this product, in order to generate the R-cal output it is not necessary to short the cables (blue and
orange) on the pressure sensor side.
The result obtained by Auto calibration is reflected to the Input 1_PV ratio (1. Pr) value.
Manual full scale point adjustment can be performed by changing this PV ratio value.
Set lock level (LCK)
The Set lock level restricts parameter setting changes by key operation (Set data lock function).
This function prevents the operator from making errors during operation.
Data range:
(1) Parameters other than Set value (SV) and Event set value (EV1 to EV4):
0: Unlock
1: Lock
(2) Event set value (EV1 to EV4)
0: Unlock
1: Lock
(3) Set value (SV)
0: Unlock
1: Lock
(4)
“0” Fixed (No setting)
(5)
“0” Fixed (No setting)
Factory set value:
00000
In the Set lock level, Data lock is not possible for the following parameters.
Memory area selection (SV setting & Monitor mode),
Parameters of function block number F10 to F91 (Engineering mode)
Set lock level can be changed in both RUN and STOP mode.
Parameters protected by Data lock function are still displayed for monitoring.
Press and hold the shift
key for 1 second
Automatically
(Adjustment end)
(Normal)
(Error display)
Error if out of the gain range
(0.500 to 4.000 mV/V).
(Auto calibration screen)
Press and hold the shift
key for 1 second
(Auto calibration screen)
(When removing error)
AREA
PV2 MAN
REM
AT
SV
PV1
PV2 MAN
REM
AT
OUT1
OUT2 OUT3 OUT4 OUT5 ALM
(1)
(2)
(3)
(4)
(5)


