158 • Configuring the PID Gas in Setup Mode
EAGLE 2 Operator’s Manual
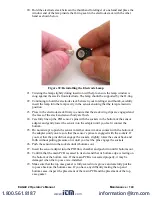
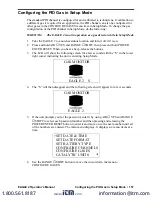
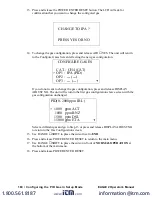
7. Press and release POWER ENTER RESET. The Configure Gases Screen appears
with the cursor flashing next to CAT, the catalytic sensor. If an EAGLE 2 has a PID
sensor installed, one of the three optional sensor types, OP1, OP2, or OP3 will
indicate it is a PID. In the example below, OP1 is shown as a PID sensor.
8. Use RANGE
▼
SHIFT to move the cursor down the menu to the PID sensor.
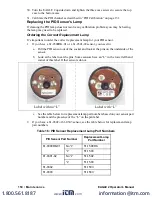
9. To change the PID sensor gas configuration, press and release POWER ENTER
RESET.
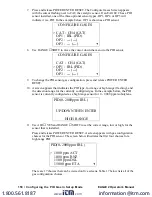
10. A screen appears that indicates the PID type, low range or high range (flashing), and
the detection range for the currently configured gas. In the example below, the PID
sensor is currently configured as a high range sensor for 0 - 2,000 ppm isobutylene.
11. Use AIR
▲
YES and RANGE
▼
SHIFT to set the correct range, low or high, for the
sensor that is installed.
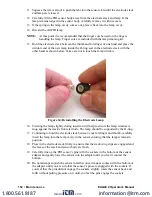
Press and release POWER ENTER RESET. A screen appears with gas configuration
choices for the PID sensor. The screen below illustrates the first four choices for a
high range PID.
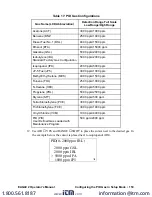
There are 17 choices that can be viewed on five screens. Table 17 below lists all of the
gas configuration choices.
CONFIGURE GASES
> CAT : CH4 (CAT)
OP1 : IBL (PID)
OP2 : --- (---)
OP3 : --- (---)
CONFIGURE GASES
CAT : CH4 (CAT)
> OP1 : IBL (PID)
OP2 : --- (---)
OP3 : --- (---)
PID(0- 2000ppm IBL )
UP/DOWN THEN ENTER
HIGH RANGE
PID(0- 2000ppm IBL )
> 1000 ppm ACT
1000 ppm BNZ
1500 ppm DSL
15000 ppm ETA
www.
.com
information@itm.com
1.800.561.8187

