background image


Part 

Mechanical Configuration 

Great care has been taken to design a rugged, cost effective & flexible mechanical solution for 
the 1S20 series Arc Fault Monitor. The ZA12 case 

MATRIX

 range provides a compact draw out 

case solution with M4 screw terminals: 


  1S20 surface mount type 

ZA12 plastic case suitable for surface or DIN rail mounting 

  1S20 panel mount type 

ZA12 plastic case suitable for through hole panel mounting 

  1S30 arc sensor 

Surface mounting plastic mousing 


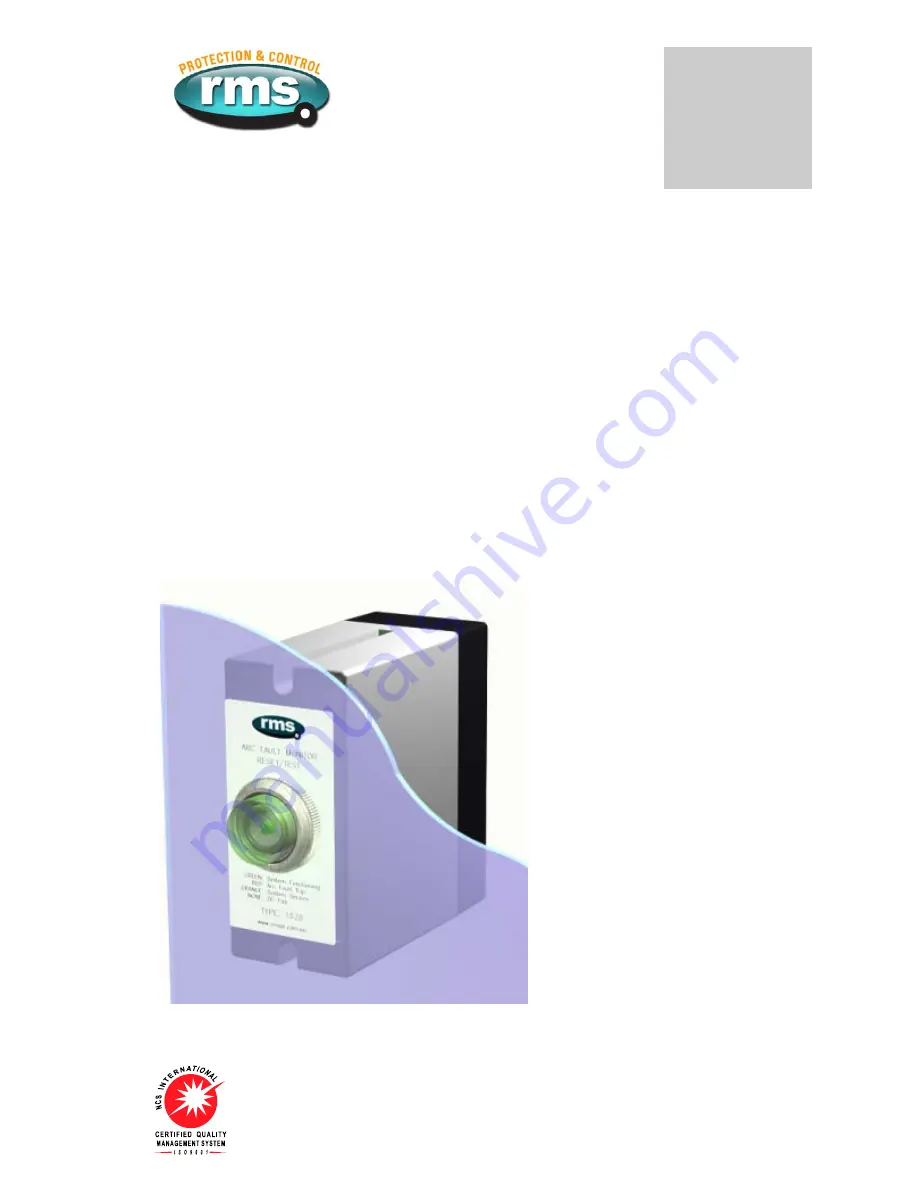
The 1S20 is configured in a ZA12 case & the following photographs depict the general mechanical 
configuration. 


Front view of panel mount version 

Note combined tri-colour LED & reset button 

Visit  

www.rmspl.com.au


  for the latest product information. 

Due to RMS continuous product improvement policy this information is subject to change without notice.  1A54_Guide/Iss B/24/07/06


Summary of Contents for 1S20

Page 1: ...1S20 User Guide Arc Fault Monitor relay monitoring systems pty ltd Advanced Protection Devices User Guide Test Manual ...

Page 2: ...oring Systems Pty Ltd No part of this document shall be reproduced or modified or stored in another form in any data retrieval system without the permission of Relay Monitoring Systems Pty Ltd nor shall any model or article be reproduced from this document without consent from Relay Monitoring Systems Pty Ltd While the information and guidance given in this document is believed to be correct no li...

Page 3: ...ectronic Equipment Safety Unpacking Mounting the 1S20 Arc Fault Monitor Mounting the 1S30 Arc Fault Sensors 1S20 Configuration Switches Equipment Connections Operating Conditions Part 5 Maintenance Mechanical Inspection Speed of Operation Performance Testing Test Intervals Defect Report Form Visit www rmspl com au for the latest product information Due to RMS continuous product improvement policy ...

Page 4: ...er system Each 1S20 version has a specific Test Manual which provides details on the unique attributes of the relay Each Test Manual includes the following information Test Certificate Specific technical variations from the standard model if applicable Test calibration record Wiring diagram A Test Manual is provided with each relay shipped If you require a copy of the Test Manual for an RMS produc...

Page 5: ... DIN rail mounting 1S20 panel mount type ZA12 plastic case suitable for through hole panel mounting 1S30 arc sensor Surface mounting plastic mousing The 1S20 is configured in a ZA12 case the following photographs depict the general mechanical configuration Front view of panel mount version Note combined tri colour LED reset button Visit www rmspl com au for the latest product information Due to RM...

Page 6: ...Arc Fault module Rear view of panel mount version terminal base Note wiring diagram configuration switches Note type number detail retention screws Visit www rmspl com au for the latest product information Due to RMS continuous product improvement policy this information is subject to change without notice 1A54_Guide Iss B 24 07 06 ...

Page 7: ...rsion PCB Internal view of surface mount PCB Note combined tri colour LED reset button Note separate tri colour LED reset button Visit www rmspl com au for the latest product information Due to RMS continuous product improvement policy this information is subject to change without notice 1A54_Guide Iss B 24 07 06 ...

Page 8: ...pl com au handbook 1S20 htm For any specific attributes of a particular version refer to the Test Manual for that type K number The order of precedence for technical information is as follows Test Manual Technical Bulletin User Guide Visit www rmspl com au for the latest product information Due to RMS continuous product improvement policy this information is subject to change without notice 1A54_G...

Page 9: ...ction system based solely on over current detection cannot effectively discriminate between normal system currents an arc fault condition For moderate arc fault currents the trip time of the over current IDMT stage will be too slow For very low arc fault currents the instantaneous trip stage of a standard over current relay cannot be set low enough Technical Bulletin 1S20 Arc Fault Monitor Relay 1...

Page 10: ...signation label supplied with the unit positioned the retention shroud fitted Refer Figure 12 13 1S30 optical arc sensors are fitted in the cable termination box CT chamber as depicted in figure 2 The overcurrent relay starter contact may optionally be wired in series with the arc fault detection trip output contact as depicted in figure 6 The resulting AND function trip output is wired to trip th...

Page 11: ...aker BUS overcurrent check stage not shown BUS Bar Applications BUS BAR ARC PROTECTION Figure 5 depicts how the 1S20 may also be applied for the protection of bus bars The number of sensors in the bus chamber is dictated by the switchgear design and the length of switchboard In most indoor metal clad switchgear the bus bar chamber is a continuous chamber between panels only broken into segregated ...

Page 12: ...ult Monitor ARC FAULT TRIP INITIATE CB ARC FAULT MONITOR SENSOR OVER CURRENT RELAY 3 Pole OC EF RESET TEST System Functioning Arc Fault Trip System Service DC Fail GREEN RED ORANGE DARK Figure 6 Key components required to implement an Arc Fault Protection scheme with an overcurrent check stage to enhance system security The application examples in figures 1 to 5 utilize this concept for enhanced s...

Page 13: ... SENSOR 3 CONFIGURATION SWITCH SETTINGS The internal wiring label identifies the position of the following switch functions Switch 1 Arc sensor 2 ON Arc Sensor 2 fitted OFF Arc Sensor 2 not fitted Switch 2 Arc fault trip indication LED reset ON Latching until manually reset OFF Automatic self reset Extinguish after 4 hours Will also reset contacts set for latching function Switch 3 Independent arc...

Page 14: ...from the front when un plugged from the main housing Note Always wire Arc Sensor 1 Arc Sensors 2 3 are optional 1S20 application diagram Circuits shown in de energised condition 12 8 10 9 9 or 11 5 1 3 11 6 2 4 Vx Fail alarm Arc 1 Must be wired Arc 3 Arc 2 Arc fault trip alarm signal to protection relay status input for comms I start Control Protection 1S20 50 51 Overcurrent relay Arc fault relay ...

Page 15: ...INAL BLOCK RETAINING SCREWS SLIDE OUT CABLE ENTRY POINTS 3 ON ONE SIDE 1 AT EACH END 1S20K2 CAB AUX 36 150V DC S N 123456 Figure 11 Surface mount version side view Mounting Options PANEL MOUNT VERSION This version is suitable for mounting on the front panel of a cubicle or door This is achieved using a 31mm diameter hole in the panel adjacent to the protection relay as depicted in figures 12 13 14...

Page 16: ...Due to RMS continuous product improvement policy this information is subject to change without notice 1S20 Issue R 28 02 2010 8 11 Panel Mount Version Figure 14 Panel mounting cut out detail Figure 15 Surface mounting detail Figure 16 DIN rail mounting detail ...

Page 17: ...y this information is subject to change without notice 1S20 Issue R 28 02 2010 9 11 Surface Mount Version Figure 17 Surface mounting detail Figure 18 DIN rail mounting detail DIN RAIL MOUNTING KIT 901 500 040 Iss A 20 11 09 Figure 19 DIN rail clip fitting detail Specify DIN Rail Mounting Kit P N 290407157 ...

Page 18: ...or DC AC resistive AC inductive 1 250VA 250VA PF 0 4 DC resistive 75W Break capacity I 5A V 300V 30W L R 40ms DC inductive 50W L R 10ms Minimum number of operations 10 6 at maximum load Minimum recommended load 0 5W limit 10mA 5V TRANSIENT OVERVOLTAGE IEC60255 5 Between all terminals earth 5kV 1 2 50us 0 5J Between independent circuits without amage or flashover d 5kV 1 2 50us 0 5J INSULATION COOR...

Page 19: ... ON Latched until manually reset Default 0 OFF Auto reset after 4 hours 3 INDEPENDENT ARC TRIP OUTPUTS 1 ON Arc sensor 1 operates trip output 1 Arc sensor 2 operates trip output 2 Default 0 OFF Arc Sensor 1 or 2 operate both trip outputs 4 TRIP OUTPUT CONTACT RESET 1 ON Latching Resets with trip LED Default 0 OFF Self reset after 2s 5 ARC SENSOR 3 1 ON Arc sensor 3 fitted Default 0 OFF Arc sensor ...

Page 20: ...e along the length of the BUS A sensor version with two optical detectors looking in opposite directions is available for this purpose Refer figure 3 for generic layout Technical Bulletin 1S30 Optical Arc Fault Sensor 1S30 Arc Fault Sensors Through panel mounting detector Front panel view of dual detector View depicted at left version depicted at right Description Made in Australia The 1S30 is an ...

Page 21: ...ed switchgear compartment Figure 3 Detector Characteristics OPTICAL SENSITIVITY 10 000 Lux for white light at normal incidence to the detector window s as depicted in figure 4 Rear Detector 1S30 B models only Light Source Front Detector 1S30 A B models Light Source Figure 4 For the 1S30 A single detector version the front detector only is fitted In this configuration the 1S30 A will be insensitive...

Page 22: ...itoring coverage for each 1S20 Arc Fault Monitor unit Figure 9 1S30 shown mounted on the inside of a switchgear panel This configuration combines the functions described in Figures 6 7 with the application of a single dual detector arc fault sensor PANEL MOUNT CUT OUT DETAIL Figure 10 Flush mounting detail RIGHT ANGLE MOUNTING OFF A SURFACE A right angle mounting bracket may be fabricated using th...

Page 23: ...ption 2 5mA CASING Rugged moulded construction to IP51 TEMPERATURE RANGE Operating 5 to 55 o C Storage 25 to 75 o C Technical Data SENSOR CONNECTIONS The 1S30 is supplied with a 6m two core connection cable as standard Two core multi strand wire 2x16 0 2mm is supplied stripped pre tinned at the 1S20 connection end The standard 6m cable may be cut down to the desired length crimp ring lugs fitted f...

Page 24: ...Flush mount reinforcing plate Ordering Information Generate the required ordering code as follows e g 1S30 A 1 DETECTORS A Single through hole panel detector B Dual detectors 2 SPECIFY OPTIONS Only if required F Flush mount reinforcing plate required S 6m shielded cable required L 20m shielded cable required Order Code Serial No Optional second optical detector looks forward through front label wi...

Page 25: ...ial as the equipment by touching the case 2 Handle the module by its front plate frame or edges of the printed circuit board 3 Avoid touching the electronic components printed circuit track or connectors 4 Do not pass the module to any person without first ensuring that you are both at the same electrostatic potential Shaking hands achieves equipotential 5 Place the module on an antistatic surface...

Page 26: ...n below Caution refer to product information Caution risk of electric shock Functional earth terminal Note this symbol may also be used for a protective safety earth terminal if that terminal is part of a terminal block or sub assembly eg power supply Visit www rmspl com au for the latest product information Due to RMS continuous product improvement policy this information is subject to change wit...

Page 27: ...ling the customer name order number relay part number description the relay job number packing date Storage Handling If damage has been sustained a claim should immediately be made against the carrier also inform Relay Monitoring Systems Pty Ltd and the nearest RMS agent When not required for immediate use the relay should be returned to its original carton and stored in a clean dry place Visit ww...

Page 28: ...upply Fail GREEN RED ORANGE SOLID ORANGE FLASH ORANGE RED NONE S N 123457 52mm SERIAL NO RATING LABEL IN THIS POSITION ON REAR TERMINAL BLOCK FOR 1S20 x A x PANEL MOUNT VERSION REMOVE FOR CABLE ENTRY REAR VIEW REMOVE FOR TWO M4 OR 4BA MOUNTING SCREWS 32mm 31 1mm ID 75 113mm 85mm 30 30 75 FRONT VIEW PANEL CUT OUT DETAIL Minimum clearance to other devices mm Panel Mount Version 1S20K2 CAB AUX 36 150...

Page 29: ...ST NONE RED GREEN ORANGE SOLID ORANGE FLASH ORANGE RED 5mm 82mm 24mm SIDE VIEW OPTIONAL DIN RAIL CLIP P N H01180001B DIN rail mount version DIN RAIL RELEASE LEVER SLIDE OUT CABLE ENTRY POINTS 3 ON ONE SIDE 1 AT EACH END S N 123456 Visit www rmspl com au for the latest product information Due to RMS continuous product improvement policy this information is subject to change without notice 1S20 4 Is...

Page 30: ... be taken by all personnel to avoid electric shock or energy hazards Voltage and current connections should be made using insulated crimp terminations to ensure that terminal block insulation requirements are maintained for safety To ensure that wires are correctly terminated the correct crimp terminal and tool for the wire size should be used Before energising the equipment it must be earthed usi...

Page 31: ...e mounting position of the sensor is not critical Mount the sensors in the switchgear cubicles in such a way that the detecting surface covers the space to be supervised as completely as possible The sight must be free between the sensor and the supervised area Refer to the 1S30 Technical Bulletin for details on mounting the various types of 1S30 Arc Fault Sensors NOTE The arc sensor must not be e...

Page 32: ...t drawing in 1S30 Technical Bulletin for details The arc sensor can alternatively be mounted completely in the protected area with the help of a Z shaped or L shaped mounting plate In open spaces such as the bus bar section arc sensors should be mounted a maximum of four meters apart In open spaces e g bus bar sections there should be an arc sensor approximately every 5 meters Due to the wide dete...

Page 33: ...f electric shock Mechanical Adjustments The electrical power to the relay contacts should be removed before checking any mechanical settings to avoid any risk of electric shock Decommissioning Disposal Decommissioning The auxiliary supply circuit in the relay may include capacitors across the supply or to earth To avoid electric shock or energy hazards after completely isolating the supplies to th...

Page 34: ...used by overvoltage surge or transient conditions on the power supply output contacts or arc sensor inputs Relay Case Inspect the terminal base gold contact terminals checking insulation integrity tightness to the 1S20 module Inspect inside the terminal base and use a blower to remove dust Inspect the 1S20 gold terminals for worn distorted or tarnished contacts and if necessary clean the contacts ...

Page 35: ...ht intensity and duration must be employed 20 000 Lux and 2ms is recommended STEP TWO Connect up the 1S20 1S30 with a dropping resistor storage CRO as per the test diagram Activate the 1S30 sensor using a camera flash gun positioned directly in front of the sensor window and check that the 1S30 trip LED activates The operating pulse generated by the 1S30 output should trigger the storage CRO Using...

Page 36: ...NS 1S20 Under Test 1S30 Under Test Activate the 1S30 sensor and ADI using a camera flash gun positioned directly in front of the sensor window and check that the 1S30 trip LED activates The 10 30us wide pulse generated by the ADI should trigger the storage CRO Using the CRO time base measure the time taken for the 1S20 output contact to operate Repeat this test for each output contact and sensor i...

Page 37: ... operate time is 15ms FAULT DIAGNOSIS Step Two Step Three Comments Pass Pass System operational Pass Fail Suspect 1S30 Sensor Repeat test with another 1S30 Fail Fail Suspect 1S20 Arc Fault Monitor Repeat test with another 1S30 Visit www rmspl com au for the latest product information Due to RMS continuous product improvement policy this information is subject to change without notice User_Guide 5 ...

Page 38: ...rmed every twelve months Mechanical inspection Check of connections Insulation resistance test Fault setting tests Speed of operation performance checks 1S20 Speed of Operation Test Jig Manufactured by RMS Visit www rmspl com au for the latest product information Due to RMS continuous product improvement policy this information is subject to change without notice User_Guide 5 Iss D 29 01 08 ...

Page 39: ...her Please State Product Part No Serial Number Copy any message displayed by the relay Describe Defect Describe any other action taken Signature Please Print Name Date For RMS use only Date Received Contact Name Reference No Date Acknowledged Date of Reply Date Cleared Visit www rmspl com au for the latest product information Due to RMS continuous product improvement policy this information is sub...

Page 40: ...supplied in secure individual packing cardboard boxes with moulded styrene inserts suitable for recycling Each product packing box is labeled with the product part number customer name order details Design References The products components produced by RMS are based on many years of field experience since Relays Pty Ltd was formed in 1955 A large population of equipment is in service throughout Au...

Reviews: