background image

One Key Playback 

Press and hold the  M button  for 2 seconds to jump to the most recent recorded media 

file (video, photo, or audio).


Reset 

Press the  reset button  to reset the camera when the camera is working abnormally. 

PLEASE DO NOT 

 press this bu on  unless  the   camera is working abnormally. 


Menu Access 

Press the  M button  (bo om bu on located on the right side of the device from the 

camera screen) to access the bu on.  
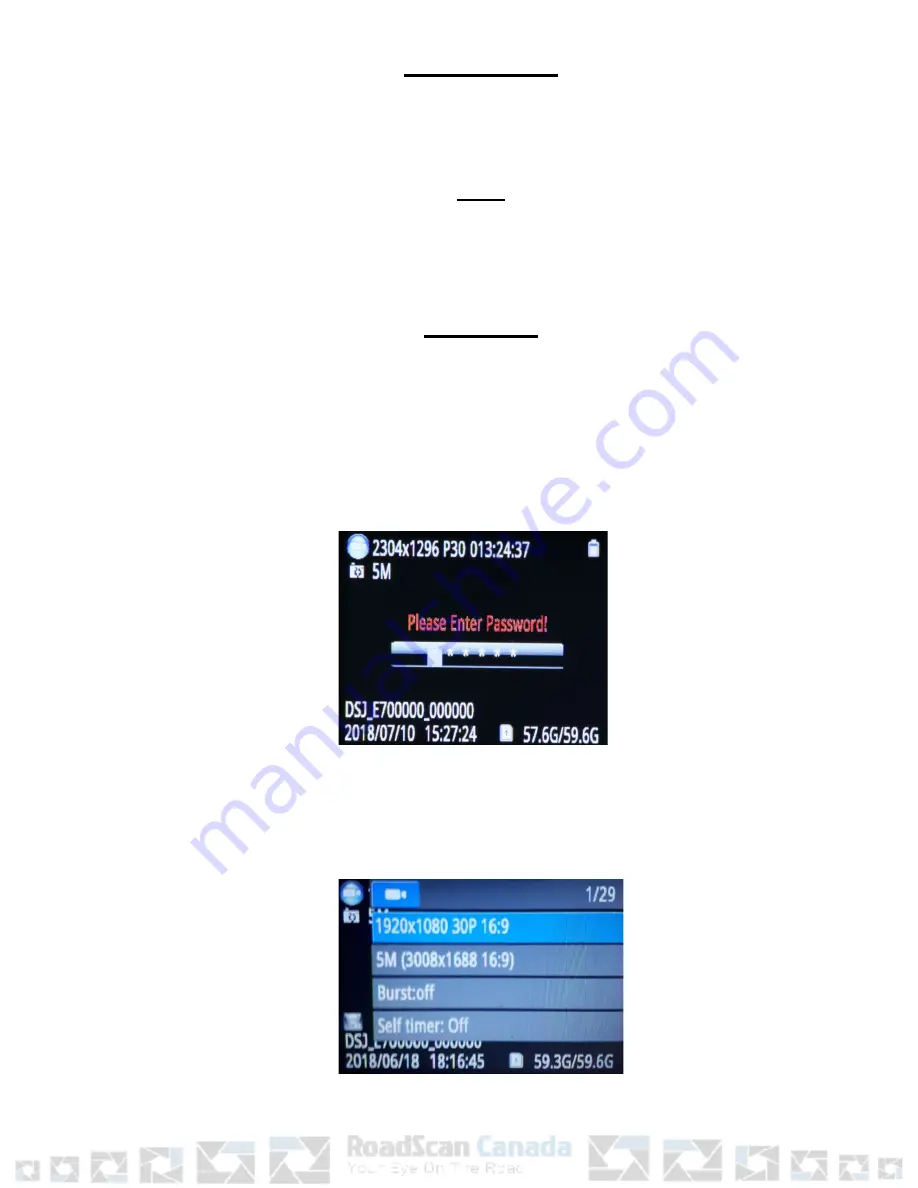
To access the menu, a ‘please enter password!’ prompt will be displayed. The default 

password is ‘0’ – 6  mes, which is just pressing  OK button  - 6  mes. Use the  Scroll Up 

and Down buttons  to scroll through other password entry op ons and Press  OK button 

to select password entries.


      Figure 1


If you make a mistake when entering password , hold the Scroll Up button  to move 

back one entry and  hold Scroll Down button  to move forward one entry. The screen 

below should appear a er password is correctly entered:


    Figure 2 


Page 7


Summary of Contents for PBC3

Page 1: ...RoadScan Canada PBC3 USER INSTRUCTION MANUAL ...

Page 2: ...safety Features Body camera is built with versa le features that designed to work in different condi ons 1 Mul ple Recording Resolu ons 1297p30 1080p30 720p60 720p60 720p30 and 480p30 2 High Resolu on Snapshot 32 megapixels 3 140 degrees of wide view angle 4 On screen display me date memory resolu on ba ery life recording space available 5 Audio alarms on off record stop record low ba ery and low me...

Page 3: ...Page 2 ...

Page 4: ...y 9 Lens SPECS Super High Defini on Lens 11 Video Recording Bu on While camera is power off HOLD to turn on camera and start video recording In standby mode PRESS to turn recording ON or OFF 12 Clip Clip for fixing camera on body 13 HD LCD display 2 0 inches HD LCD color screen 14 Scroll Up Bu on In standby mode HOLD to zoom out In Playback mode PRESS to rewind In Menu PRESS to scroll up In Sub Menus...

Page 5: ...Page 4 ...

Page 6: ...ording has started There will be a flashing red light with a video symbol on the top le corner of the screen to indicate recording The LED will be flashing red To highlight recording while in video mode press the M bu on to highlight a video segment of importance Highlighted video segments cannot be overwri en A gold star symbol will pop up on the camera screen while in highlight mode Highlight mode...

Page 7: ...menus and video photograph or audio file Playback The playback screen can be viewed by pushing the OK button once from the main LCD view screen Use the Scroll up button to tab le and Scroll down button to tab right over either video camera or audio file tabs and press the OK bu on on the selected file tab to view the files Figure 0 From the selected tab to select which file to view you can tab over the...

Page 8: ...he device from the camera screen to access the bu on To access the menu a please enter password prompt will be displayed The default password is 0 6 mes which is just pressing OK button 6 mes Use the Scroll Up and Down buttons to scroll through other password entry op ons and Press OK button to select password entries Figure 1 If you make a mistake when entering password hold the Scroll Up button ...

Page 9: ...camera switches on infrared filter lens video image turns black and white When brightness increases again the IR LED turns off and image becomes colorful again o Manual When night vision is needed Hold the photo bu on to switch to infrared mode 4 IR LED will be turned on video image will turn black and white When night vision is no longer needed hold photo bu on again to switch out of night vision 1...

Page 10: ... device from power source a er charging is complete Opening files on computer 1 Plug the camera into the computer via the USB cable Turn on camera if it is off 2 The LED should be a green and blue light 3 On the camera hit OK 6 mes to unlock the password or the password you may have chosen Figure 3 4 A computer with a bullseye should be on the body camera screen Figure 4 5 The computer should recog...

Page 11: ...6 Locate the drive and open it Figure 5 7 Once opened there should be three folders presented DCIM FILE and LOG 8 Open DCIM then open 100RECOR Figure 6 Page 10 ...

Page 12: ...properly from your computer NOTICE This manual is furnished under license and may be used or copied only in accordance with the terms of such license Except as permi ed by such license no part of this publica on may be reproduced stored in a retrieval system or transmi ed in any form or any means electronic mechanical recording or otherwise including transla on to another language or format withou...

Page 13: ...ouraged to have read through this complete user s manual before using the RSC PBC1 Any unapproved changes or modifica ons will void your warranty Please ensure to have a complete understanding of the following condi ons and restric ons NOTE Please check your Provincial Motor Vehicle Act and Regula ons pertaining to the use of this camera while opera ng your vehicle It is illegal in most areas to op...

Page 14: ...ause electric shock Plugging in the AC adapter unsteadily might cause fire or electric shock DO NOT cover the AC adapter when it is connected to an outlet place the adapter near heaters or put it on the floor which is equipped with a heater The above men oned opera on might cause fire or incidents WARRANTY RoadScan Canada Inc warrants that this product will be free from defects in tle materials and m...

Reviews: