English
English
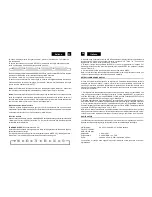
4. When the display shows your desired alarm wake-up mode, press the SELECT button,
the alarm function is now activated and the associated alarm icon will be displayed.
5. To activate the other Alarm (1 or 2), repeat the above procedures.
6. When the alarm time arrives, the selected wake-up mode will be on and the alarm icon in
the display will flash to indicate the alarm is triggered. To stop the alarm sooner, press the
button.
Note 1: If you have activated the alarm function and the wake-up mode is DAB or FM, make
sure that the alarm volume level is set at a sufficient level for you to hear
Note 2: The alarm comes first will have the priority and it would continue for a duration of one
hour, the snooze will just switch off this alarm temporary during this duration, so if the second
alarm comes in this period, it will not function. But if the first alarm is switched off before the
second alarm arrives, then the second alarm will be activated.
Automatic Alarm Repeat
The alarm will automatically repeat each day at the selected time as long as the alarm icon is
displayed. To cancel this function, go to the Alarm Menu and select “Alarm # off” in the associated
“Alarm Source” menu.
Snooze function
When the alarm has triggered, press the SNOOZE button will temporary switch off the alarm
for 5 minutes, the display will show
“Zz” to indicate snooze on. This is repeatable in the one hour alarm duration.
SLEEP FUNCTION (AC operation only)
This function allows you to program the radio to switch off itself after a set period of time.
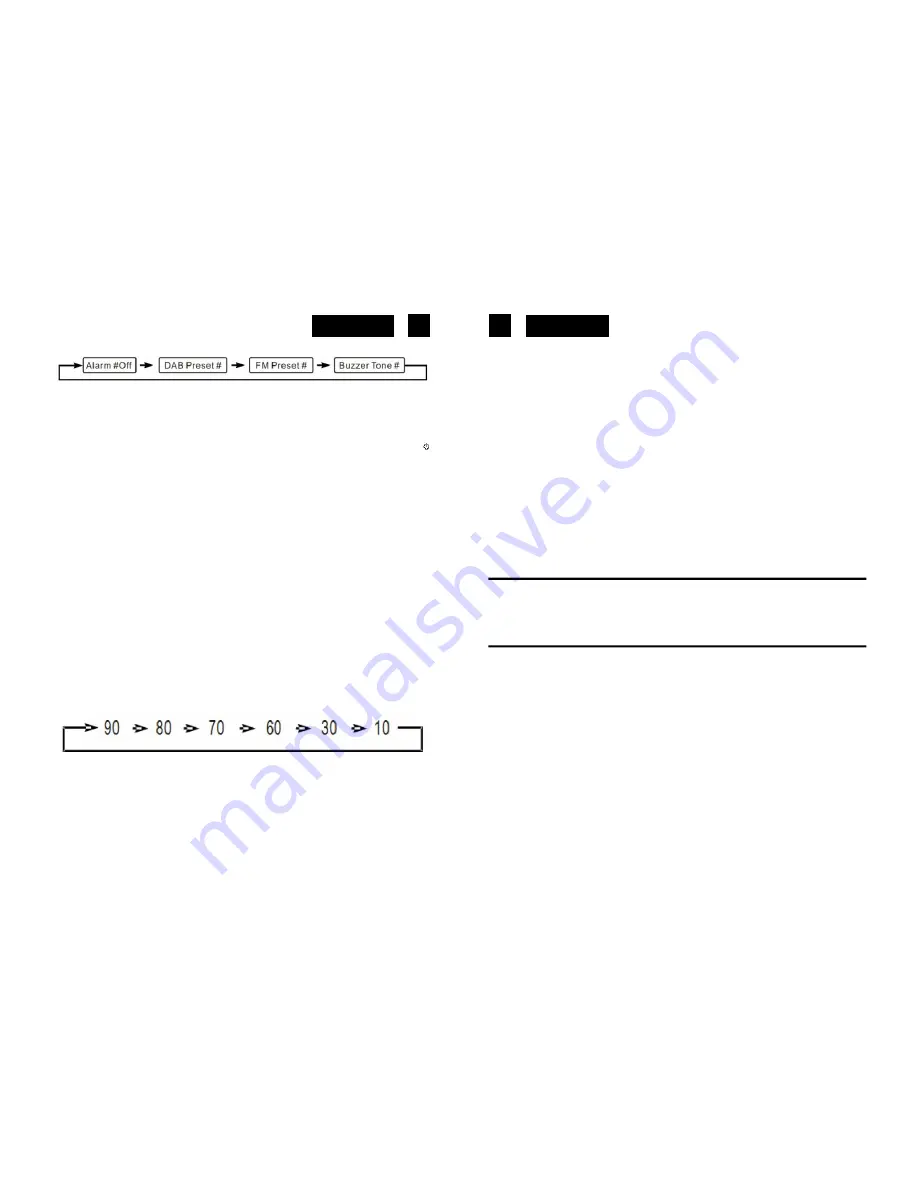
1. To activate the sleep function, repeatedly press the SLEEP button, the display will show
“Sleep Timer” and the time will change in the below sequence on every press:
2. When your desired sleep time appears in the display, release the button and the sleep
function will be activated in two
seconds. The display will show “s#” where “s1” is to represent “10 minutes” sleep time and so
on.
3. When the sleep time counts to zero, the unit will go off. To put the sleep function off during
sleep timer on, repeatedly press the SLEEP button until the display shows “Sleep Timer Off”.
4. To check the sleep timer status, press the SLEEP button once.
Note: The sleep function can be activated only in AC operation, there is no sleep function in
battery operation.
DISPLAY BACKLIGHT
There are backlight levels for you to set in AC operation mode, it is defaulted to be “Low” in
standby and “High” during operation. This is resumed only when the factory reset has taken
place. Despite of the backlight setting in either standby or operation, press on any of the keys
will turn on the backlight to “High” for 5 seconds.
1. To set the backlight during operation, first press the MENU button once, when you see
“Backlight” appears in the display, press the SELECT button to enter into the “Backlight” menu.
(if you are in DAB mode, repeatedly turn the SELECT control followed by pressing on the
SELECT button to enter into the “Backlight” menu).
2. Repeatedly turn the SELECT control to select the backlight level - High / Medium / Low /
Off, when your desired level appears in the display, release the control.
3. To set the backlight in standby, first press the MENU button once, and when the display
shows “Standby Backlight”, press the SELECT button followed by turning the SELECT control
to select between “Low” & “Off”.
Note: There is no backlight setting in battery operation, during this mode, when the radio is
switched to on, the display backlight will be dimmed in a few seconds and it will be turned on to
full brightness for 10 seconds on any operation of the keys or controls.
HEADPHONES
Headphones should have a 3.5mm diameter stereo plug and an impedance of 8-32 ohms. When
headphones are connected (8), the speaker is automatically disconnected.
SPECIFICATIONS
Power Supply
AC:
230V ~ 50Hz
DC:
6V, 4 x UM3 Battery
Radio Frequency Coverage
FM:
87,5 - 108 MHz
DAB:
174 - 240 MHz
Speaker
4 Ohms, 3-5 W
Ouput power:
0.8 W RMS, 10% THD
General
Headphone:
3.5mm jack plug, 8-32W
Impedance
32 Ohms
Specifications and the design are subject to possible modifications without notice due to improvement.
7
8


