background image


5


English


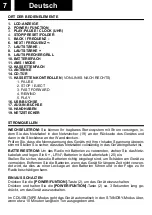
USB OPERATION


1.


Select 

USB

” 

mode by pressing the 

[FUNCTION] 

(2) button;


2.


Plug an USB device into the 

[USB SOCKET] 

(16);


3.


Playback will start automatically from the first track.


4.


 During  the  playback  of  MP3  disc,  you  can  press  and  hold 

[PRESET/FOLDER/

STOP] 

(4)button, the display will show "FOLd" then press 

[SKIP+/

-

(5/6) button to 

choose folder


PROGRAMMING


The PROGRAMMING operation is the same as that of CD

-

MP3.


Note: 

Some mp3 player may not be able to play via the usb socket. this is not a maul

-

function of the system.


Note: 

To avoid damage to USB memory, remove it only when the radio is turned off.


AUX IN OPERATION


1.


Select 

AUX

” 

mode by pressing the 

[FUNCTION] 

(2)button; 


2.


Use one male to male 3.5mm jack cable (not included) to connect any external 

audio device to the AUX

-

IN socket (17).


Note: 

Music control (play, pause, etc) must be done from your external device.


Summary of Contents for RCR-4625NU

Page 1: ...www roadstar com RCR 4625NU Portable Stereo System User manual Bedienungsanleitung Manuel d instructions Manuale d istruzioni Manual de instrucciones Gebruiksaanwijzing Návod k použití Návod na použitie ...

Page 2: ...avor leer el manual antes de poner en funcionamiento el equipo y guardar esta do cumentación en case de que se necesite nuevamente Ihr neues Gerät wurde unter Beachtung der strengen ROADSTAR Qualitätsvorschriften gefertigt Wir danken Ihnen für den Kauf unse res Produktes und wünschen Ihnen optimalen Hörgenuss Bitte lesen Sie diese Bedienung sanleitung durch und heben Sie sie auf um jederzeit darin...

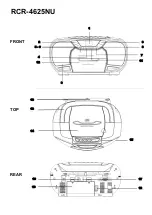
Page 3: ...RCR 4625NU TOP FRONT REAR 1 2 5 6 4 12 8 9 3 7 11 13 18 14 15 16 10 17 19 ...

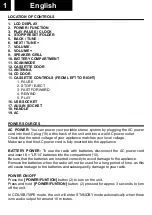
Page 4: ... voltage of your appliance matches your local voltage Make sure that the AC power cord is fully inserted into the appliance BATTERY POWER To use the radio with batteries disconnect the AC power cord and insert 6 LR14 batteries into the compartment 10 Be sure that the batteries are inserted correctly to avoid damage to the appliance Remove the batteries when the radio will not be used for a long pe...

Page 5: ... be routed so that they are not likely to be walked on or pinched by items placed upon against them OBJECT AND LIQUID ENTRY Care should be taken so that objects do not fall and liquids are not spilled into the enclosure through openings DAMAGE REQUIRING SERVICE The appliance should be serviced by qualified service personnel when The power supply cord or plug has been damaged Objects have fallen in...

Page 6: ... Preset 1 Press and hold the SCAN MODE 11 button on unit for about 2 3 seconds to start the automatic preset process 2 Display will show the memory sequence number and radio stations will be auto matically preset into the sequence number Note Each sequence number means 1 preset station while during automatic preset process 3 Once all the stations were automatic preset press the PRESET FOLDER STOP ...

Page 7: ...partment and lift the CD out carefully 4 During the playback of MP3 disc you can press and hold PRESET FOLDER STOP 4 button the display will show FOld then press SKIP TUNING SKIP TUNING 5 6 buttons to chose folder Programmed Play This can be used to program any desired sequence of tracks 1 Press the PRESET FODER STOP 4 button 2 Press the SCAN MODE 11 button P01 Storage space and the notification P...

Page 8: ...hoose folder PROGRAMMING The PROGRAMMING operation is the same as that of CD MP3 Note Some mp3 player may not be able to play via the usb socket this is not a maul function of the system Note To avoid damage to USB memory remove it only when the radio is turned off AUX IN OPERATION 1 Select AUX mode by pressing the FUNCTION 2 button 2 Use one male to male 3 5mm jack cable not included to connect a...

Page 9: ...r and check the terms and conditions of the purchase contract This product should not be mixed with other commercial wastes for disposal CORRECT DISPOSAL OF THIS PRODUCT Waste Electrical Electronic Equipment WARNINGS The exclamation point within the triangle is a warning sign alerting the user of important in structions accompanying the product The lightening flash with arrowhead symbol within the...

Page 10: ... Geräts mit Ihrer lokalen Spannung überein stimmt Stellen Sie sicher dass das Netzkabel vollständig in das Gerät eingesetzt ist BATTERIESTROM Um das Radio mit Batterien zu verwenden ziehen Sie das Netz kabel ab und legen Sie 6 LR14 Batterien in das Batteriefach 20 ein Stellen Sie sicher dass die Batterien richtig eingelegt sind um Schäden am Gerät zu vermeiden Entfernen Sie die Batterien wenn das ...

Page 11: ...nstände eingeklemmt werden EINTRITT VON FREMDKÖRPERN UND FLÜSSIGKEIT Es ist darauf zu ach ten dass keine Objekte auf das Gerät fallen und dass keine Flüssigkeiten durch Öffnungen in das Gehäuse dringen BESCHÄDIGUNGEN BEI DENEN WARTUNG ERFORDERLICH IST Das Gerät sollte von qualifiziertem Wartungspersonal gewartet werden wenn Das Netzkabel oder der Netzstecker beschädigt wurde Gegenstände auf das Ra...

Page 12: ...lten Sie die SCAN MODUS 11 Taste etwa 3 Sekunden lang gedrückt um den automatischen Scan zu starten Voreingestellter Sender Automatisch voreingestellt 1 Halten Sie die SCAN MODUS 11 Taste am Gerät etwa 2 3 Sekunden lang gedrückt um den automatischen Voreinstellungsprozess zu starten 2 Auf dem Display wird die Speicher Sequenznummer angezeigt und die Radio sender werden automatisch in die Sequenznu...

Page 13: ...rtslauf des Bandes zu starten CD MP3 BETRIEB Wählen Sie den CD Modus mit der Taste POWER FUNKTION 2 bis Cd auf dem Display angezeigt wird 2 Öffnen Sie das CD Fach indem Sie den Deckel mit der Um eine CD zu entneh men drücken Sie bitte die Taste STOP PRESET FOLDER 4 öffnen Sie das CD Fach und heben Sie die CD vorsichtig heraus 3 Während der Wiedergabe einer MP3 Disc können Sie die Taste STOP PRESET...

Page 14: ...ergabe startet automatisch ab dem ersten Titel 4 Während der Wiedergabe einer MP3 Disc können Sie die Taste Ordner STOP 4 drücken und gedrückt halten auf dem Display wird FOLD angezeigt drü cken Sie dann die Taste BACK NEXT 5 6 um den Ordner PROGRAMMIERUNG Der Vorgang PROGRAMMIEREN ist derselbe wie der von CD MP3 Hinweis Einige mp3 Player können möglicherweise nicht über den usb Anschluss abgespie...

Page 15: ...nutzer auf wichtige Bedienungs und Wartungsanwei sungen Service in diesem Handbuch hin die unbedingt zu befolgen sind Um die Gefahr elektrischer Schläge auszuschliessen Gehäuse auf keinen Fall abnehmen Im Innem befinden sich keine vom Benutzer selbst instandsetz baren Teile Reparaturen dürfen nur von einer autorisierten Fachwerkstatt durchgeführt werden Dieses Gerät ist für 230V 50Hz Netzspannung ...

Page 16: ... nominale de l appareil correspond à la tension locale Vérifier que le cordon d alimentation CA est complètement inséré dans l appareil PILES ÉLECTRIQUE Pour faire fonctionner la radio avec des piles débrancher le cordon d alimentation CA et insérer 6 piles LR14 dans le compartiment 10 S assurer que les piles sont correctem insérées pour éviter d endommager l appareil Retirer les piles lorsque la ...

Page 17: ...on doi vent être acheminés de telle sorte qu ils ne risquent pas d être écrasés ou pincés par des objets placés dessus ou contre eux PÉNÉTRATION DES OBJETS ET DES LIQUIDES Veillez à ce que les objets ne tombent pas et à ce que les liquides ne soient pas déversés dans l enceinte par le biais des orifices DÉGÂTS NÉCESSITANT RÉPARATION L appareil ne doit être réparé que par un technicien qualifié lor...

Page 18: ... Appuyez et maintenez le bouton SCAN 11 enfoncé pendant environ 3 secondes pour lancer le balayage automatique Station préréglée Préréglage automatique 1 Appuyez et maintenez le bouton SCAN MODE 11 de l appareil pendant envi ron 2 à 3 secondes pour lancer le processus de préréglage automatique 2 L écran affichera le numéro de séquence de la mémoire et les stations de radio seront automatiquement p...

Page 19: ...NCTIONNEMENT DU CD MP3 1 Sélectionnez le mode CD à l aide du bouton STANDBY FONCTION 2 jus qu à ce que Cd s affiche à l écran 2 Insérez un CD audio avec la face imprimée vers le haut puis fermez le couvercle du compartiment du CD 3 Pour retirer un CD appuyez sur le bouton PRESET FOLDER STOP 4 ouv rez le compartiment à CD et retirez le CD avec précaution 4 Pendant la lecture d un disque MP3 vous po...

Page 20: ... maintenir enfoncé le bouton PRESET STOP 4 l écran affichera FOLD puis appuyer sur le bouton RET PROC 5 6 pour choisir le dossier PROGRAMMATION L opération de PROGRAMMATION est la même que celle du CD MP3 Note Certains lecteurs mp3 peuvent ne pas être capables de lire via la prise usb Ceci n est pas une fonction principale du système Note Pour éviter d endommager la mémoire USB ne la retirez que l...

Page 21: ...es dans le mode d emploi Le symbole éclair à l intérieur d un triangle sert à avertir l utilisateur de la présence du courant à l inté rieur du l appareil qui pourrait constituer un risque Afin de minimiser les risques ne pas ouvrir le boîtier ni ôter le dos de l appareil En case de panne faites appel aux techniciens qualifiés pour les réparations L appareil ne renferme aucune pièce reparable par ...

Page 22: ...o corrisponda a quello della tua rete di alimentazio ne Assicurarsi che il cavo sia inserito completamente nel connettore FUNZIONAMENTO CON BATTERIE Per utilizzare la radio con le batterie discon nettere il cavo di alimentazione e inserire 6 x LR14 nell apposito compartimento 20 Assicurarsi che le batterie siano inserite con la giusta polarità per evitare di dannegg giare la radio Rimuovere le bat...

Page 23: ...OTEZIONE DEL CAVO D ALIMENTAZIONE Il cavo d alimentazione deve essere posizionato in modo da non venir danneggiato schiacciato tagliato ENTRATA DI OGGETTI E LIQUIDI Fare attenzione a non fare entrare liquidi o oggetti dalle fessure della radio DANNI CHE RICHIEDONO ASSISTENZA La radio deve essere controllata da personale qualificato in caso di Il cavo d alimentazione o il connettre è stato danneggi...

Page 24: ...ondi per avviare la scansione automatica Stazione preimpostata Preimpostazione automatica 1 Premere e tenere premuto il tasto SCAN MODE 11 sull unità per circa 2 3 secondi per avviare il processo di preimpostazione automatica 2 Il display mostra il numero di sequenza di memoria e le stazioni radio vengono automaticamente preimpostate nel numero di sequenza Nota Ogni numero di sequenza significa 1 ...

Page 25: ...n disco MP3 è possibile tenere premuto il tasto PRESET FOLDER STOP 4 il display mostrerà FOld quindi premere i tasti SKIP TUNING SKIP TUNING 5 6 per scegliere la cartella PROGRAMMAZIONE Questo può essere utilizzato per programmare qualsiasi sequenza di tracce desidera ta 1 Premere il tasto PRESET FOLDER STOP 4 2 Premere il tasto SCAN MODE 11 Sul display appare la scritta P01 spazio di memoria e la...

Page 26: ...E L operazione di PROGRAMMAZIONE è la stessa di quella del CD MP3 Nota Alcuni lettori MP3 potrebbero non essere capaci di riprodurre i file tramite la presa USB Questo non è dovuto ad un malfunzionamento del sistema Nota Per evitare danni alla memoria USB rimuoverla solo quando la radio è spenta ASCOLTO MUSICA DA INGRESSO AUX IN 1 Selezionare la modalità AUX usando il tasto FUNZIONE 2 2 Usa un cav...

Page 27: ...ioni contiene delle importanti istruzioni per l uso e la manutenzione Il simbolo del fulmine all interno di un triangolo avverte l utente della presenza di una pericolosa tensio ne all interno dell apparecchio Per ridurre i rischi di scosse elettriche non aprire l apparecchio L apparecchio non contiene parti ripa rabili dall utente In caso di guasto fare appello a tecnici qualificati per le ripara...

Page 28: ...tro extremo a una toma CA en la pared Compruebe que la tensión de su aparato sea la misma que la que se usa en su zona Asegúrese de que el cable de corriente esté conectado correctamente al aparato FUNCIONAMIENTO CON PILAS Para que la radio funcione con pilas desconecte el cable de corriente alterna e introduzca 6 pilas LR14 en el compartimento 20 Asegúrese que las pilas estén colocadas correctame...

Page 29: ...e de manera que no puedan ser pisados o aplastados por objetos colocados sobre contra ellos ENTRADA DE OBJETOS Y LÍQUIDOS Debe tener mucho cuidado de que no caigan objetos y de que no entren salpicaduras de líquidos dentro del aparato a través de las aberturas DAÑOS QUE REQUIEREN REPARACIÓN El aparato debe ser reparado solo por personal técnico cualificado cuando El cable de suministro eléctrico o...

Page 30: ...onada Preselección automática 1 Mantenga pulsado el botón SCAN MODE 11 de la unidad durante unos 2 3 segundos para iniciar el proceso de preselección automática 2 La pantalla mostrará el número de secuencia de la memoria y las emisoras de radio se preseleccionarán automáticamente en el número de secuencia Nota Cada número de secuencia significa 1 emisora preseleccionada durante el proceso de prese...

Page 31: ...rante la reproducción de un disco MP3 puede mantener pulsado el botón PRESET FOLDER STOP 4 la pantalla mostrará FOld y a continuación pulse los botones SKIP TUNING y SKIP TUNING 5 6 para elegir la carpeta Juego programado 1 Esto puede ser usado para programar cualquier secuencia de pistas que se desee 2 Pulse el botón PRESET FOLDER STOP 4 3 Pulse el botón SCAN MODE 11 P01 Espacio de almacenamiento...

Page 32: ...algunos reproductores de mp3 no puedan reproducirse a través del conector usb esto no es una función de maul del sistema Nota Para evitar daños a la memori USB quítela solo cuando la radio esté apagada FUNCIONAMIENTO MEDIANTE ENTRADA AUX IN 1 Seleccione el modo AUX usando el boton FUNCIÓN 2 2 Use un conector jack macho macho de 3 5mm no incluido para conectar cualquier dispositivo de audio externo...

Page 33: ...cia de instrucciones importantes de funcionamiento y mantenimiento en la documentación adjunta con el equipo El símbolo del rayo con punta de flecha dentro de un triángulo adverte al usuario de la presencia de ten siones peligrosas en el equipo Para reducir los riesgos de descargas eléctricas no retire la cubierta La unidad no hay en su enterior componentes que pueda manipular el usuario Encargue ...

Page 34: ...de muur te steken Controleer of de nominale spanning van uw apparaat overeenkomt met uw lokale voltage Zorg ervoor dat het netsnoer volledig in het apparaat is aangebracht BATTERIJSTROOM om de radio met batterijen te gebruiken haalt u de stekker uit het stopcontact en plaatst u 6 LR14 batterijen in het vakje 20 Controleer ter voorkoming van schade aan het apparaat of de batterijen correct zijn gep...

Page 35: ...at ze worden bekneld door items die er op tegen worden geplaatst BINNENDRINGEN VAN VOORWERPEN OF VLOESTOFFEN Let erop dat voorwerpen of vloeistoffen niet door openingen in de behuizing naar binnen kunnen komen SCHADE WAARVOOR TECHNISCHE SERVICE NODIG IS In de volgende gevallen is er service door een gekwalificeerde technicus nodig het netsnoer of de stekker is beschadigd er zijn voorwerpen of vloe...

Page 36: ... ingedrukt om het automatisch scannen te starten Vooraf ingestelde zender Automatisch vooringesteld 1 Houd de knop AMS 11 op het apparaat ongeveer 2 3 seconden ingedrukt om de automatische voorkeuzeprocedure te starten 2 Het display toont het volgnummer van het geheugen en de radiozenders worden automatisch in het volgnummer voorgeselecteerd Opmerking Elk volgnummer betekent 1 voorgeselecteerde ze...

Page 37: ...erste nummer te spelen 4 Tijdens de weergave van een MP3 disk kunt u de PRESET FOLDER STOP 4 toets ingedrukt houden en op het display verschijnt FOld waarna u op de SKIP TUNING SKIP TUNING 5 6 toetsen drukt om de map te kiezen Geprogrammeerd afspelen Dit kan worden gebruikt om elke gewenste volgorde van tracks te programmeren Druk op de toets SPRESET FOLDER STOP 4 Druk op de knop AMS 11 P01 Opslag...

Page 38: ...nen mogelijk niet via de USB aansluiting spelen dit is geen maul functie van het systeem Let op verwijder het alleen wanneer de radio is uitgeschakeld om schade aan het USB geheugen te voorkomen AUX IN GEBRUIKEN 1 Kies AUX mode door FUNCTIE 2 te gebruiken 2 Gebruik een mannelijke naar mannelijke 3 5 mm jackkabel niet meegeleverd om een extern audioapparaat op de AUX IN aansluiting aan te sluiten 1...

Page 39: ...k en het onderhoud De bliksemschicht in een gelijkzijdige driehoek is bedoeld om de gebruiker te waarschuwen voor de aanwezigheid van gevaarlijke spanning binnen in het apparaat Om het risico op elektrische schokken te reduceren dient het apparaat niet te worden geopend Het apparaat bevat geen onderdelen die gerepareerd kunnen worden door de gebruiker In het geval van een defect dient contact opge...

Page 40: ...napětí vašeho spotřebiče odpovídá místnímu napětí Zkontrolujte zda je napájecí kabel zcela zasunut do přístroje BATERIE Chcete li rádio používat s bateriemi odpojte napájecí kabel a vložte do prostoru 6 LR14 baterie 20 Ujistěte se že jsou baterie správně vloženy aby nedošlo k poškození spotřebiče Pokud nebudete rádio delší dobu používat vyjměte baterie protože by nezpůsobily únik baterií a následn...

Page 41: ...y tak aby se po nich neprocházelo aby nedošlo k jejich přitlačení věcmi které jsou na nich položené nebo jsou k nim přitlačené VNIKNUTÍ PŘEDMĚTŮ A TEKUTIN Je třeba dávat pozor aby se zabránilo pádu předmětů a vylití tekutin do uzávěrů přes otvory POŠKOZENÍ VYŽADUJÍCÍ SERVIS Zařízení musí projít servisem ze strany kvalifikovaného personálu v případě že Došlo k poškození napájecího kabelu nebo jeho ...

Page 42: ...Automatické předvolby 1 Stisknutím a podržením tlačítka KAZETOVÉ DVEŘE 11 na jednotce asi 2 3 sekundy zahájíte proces automatického přednastavení 2 Na displeji se zobrazí pořadové číslo paměti a rádiové stanice budou automaticky přednastaveny na pořadové číslo Poznámka Každé sekvenční číslo znamená 1 předvolenou stanici zatímco během automatického přednastaveného procesu 3 Jakmile byly všechny sta...

Page 43: ...utomaticky od první skladby 4 Během přehrávání disku MP3 můžete stisknout a podržet tlačítko PRESET FOLDER STOP 4 na displeji FOld a poté stisknutím tlačítka SKIP TUNING SKIP TUNING 5 6 pro výběr složky Programované přehrávání 1 To lze použít k programování libovolné požadované skladby Stiskněte tlačítko PRESET FOLDER STOP 4 2 Stiskněte tlačítko KAZETOVÉ DVEŘE 11 Na displeji se zobrazí P01 Úložný ...

Page 44: ...MP3 Poznámka Některé přehrávače mp3 nemusí podporovat všechny typy USB Poznámka Abyste předešli poškození paměti USB vyjměte ji pouze při vypnutém rádiu AUX IN 1 Stisknutím tlačítka FUNCTION 2 vyberte režim AUX 2 Pro připojení externího audio zařízení k zásuvce AUX IN 17 použijte jack 3 5 mm není součástí dodávky Poznámka Ovládání hudby přehrávání pauza atd musí být provedeno z externího zařízení ...

Page 45: ...e na důležité pokyny pro obsluhu a ošetřování přístroje uvedené v jeho doprovodné dokumentaci čeština Symbol blesku uvnitř trojúhelníka na zadní straně skříňky přístroje upozorňuje uživatele na existenci životu ne bezpečného napětí na některých dílech uvnitř skříňky přístroje Nevyjímejte přístroj ze skříňky riziko úrazu elektrickým proudem Uvnitř skříňky nejsou díly které by mohl opravit nebo seří...

Page 46: ...ne Skontrolujte či menovité napätie vášho spotrebiča zodpovedá miestnemu napätiu Skontrolujte či je napájací kábel úplne zasunutý do prístroja BATÉRIE Ak chcete rádio používať s batériami odpojte napájací kábel a vložte do priestoru 6 LR14 batérie 20 Uistite sa že sú batérie správne vložené aby nedošlo k poškodeniu spotrebiča Ak nebudete rádio dlhší čas vyberte batérie pretože by nespôsobili únik ...

Page 47: ...byť vedené tak aby sa po nich nešliapalo a aby neboli pritlačené žiadnymi predmetmi VNIKNUTIE PREDMETOV A TEKUTÍN Dávajte pozor aby vám cez otvory v kryte nespadol do vnútra žiadny predmet a aby ste nevyliali žiadnu tekutinu POŠKODENIE VYŽADUJÚCE SERVIS Na zariadení musí byť vykonaný servis kvalifikovaným technikom v prípade ak Došlo k poškodeniu napájacieho kábla alebo jeho zástrčky Došlo k pádu ...

Page 48: ...odejna prednastavitev 1 Pritisnite in držite gumb SCAN MODE 11 na enoti približno 2 3 sekunde da začnete postopek samodejne prednastavitve 2 Na prikazovalniku se prikaže zaporedna številka pomnilnika in radijske postaje bodo samodejno prednastavljene na zaporedno številko Opomba Vsaka zaporedna številka pomeni 1 prednastavljeno postajo med samodejnim prednastavljenim postopkom 3 Ko so bile vse pos...

Page 49: ... začne automaticky od prvej skladby 4 Med predvajanjem MP3 disk lahko pritisnete in pridržite PRESET FOLDER STOP 4 gumb zaslon bo prikazal FOld nato pritisnite SKIP TUN SKIP TUN 5 6 gumbi da izberete mapo Programirana igra o se lahko uporablja za program vsako želeno zaporedje skladb 1 Pritisnite gumb PRESET FOLDER STOP 4 2 Pritisnite gumb SCAN MODE 11 P01 prostor za shranjevanje in obvestilo PROG...

Page 50: ...P3 Poznámka Niektoré prehrávače mp3 nemusia podporovať všetky typy USB Poznámka Aby ste predišli poškodeniu pamäte USB vyberte ju len pri vypnutom rádiu AUX IN 1 Stlačením tlačidla FUNCTION 2 vyberte režim AUX 2 Pre pripojenie externého audio zariadenia k zásuvke AUX IN 17 použite jack 3 5 mm nie je súčasťou dodávky Poznámka Ovládanie hudby prehrávanie pauza atď Musí byť vykonané z externého zaria...

Page 51: ... prístroj v blízkosti zdrojov tepla Vysokými teplo tami je výrazne skracovaná životnosť elektronických komponentov prístroja Tento symbol na výrobku jeho příslušenství nebo obalu označuje že při pozdější likvidaci výrobku z ja kýchkoliv důvodů nesmí být s výrobkem zacházeno jako s domovním odpadem Výrobek zlikvidujte jeho předáním na sběrné místo pro likvidaci použitých elektrických a elektronický...

Page 52: ...onibile al seguente indirizzo Internet http roadstar com images ce RCR 4625NU pdf o eseguendo la scansione del seguente codice QR Por la presente Roadstar Management SA declara que el equipo de radio tipo RCR 4625NU cumple con la Directiva 2014 53 EU El texto completo de la declaración de conformidad UE está disponible en la siguiente dirección de Internet http roadstar com images ce RCR 4625NU pd...

Page 53: ...rectiva 99 44 CE Para maiores informações consulte o sito www roadstar com ou solicite os ao endereço de correio electrónico aftersales roadstar com ΕΛΛΗΝΙΚΑ Γενικοί Οροι Εγγύησης Roadstar Η Εταιρεία Roadstar εγγυάται για τα προϊόντα της για τυχόν κατασκευαστικά λάθη στα υλικά και ή στην εργασία κατά την διάρκεια της περιόδου που ισχύει η εγγύηση όπως καθορίζεται στο κεφάλαιο 4 Εάν το προϊόν δεν λ...

Page 54: ...is a registered Trademark of Roadstar S A Switzerland All rights reserved Roadstar Management SA via Passeggiata 7 CH 6883 Novazzano Switzerland VER 1 0 13 05 2020 ...

Reviews: