background image

19

No.

2028

Betriebsanleitung, Operating instructions instructions, Notice d’utilisation

RB 15/4 Kit

Fahrwerkseinstellungen:

Hinweis: 

Das Chassis ist werksseitig grundeingestellt.

Wenn Sie sich mit den Fahreigenschaften  vertraut
gemacht haben, können Sie das Modell durch
Veränderungen an den Fahrwerkseinstellungen auf Ihre
Bedürfnisse abstimmen.

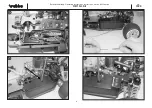
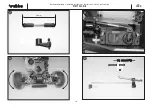
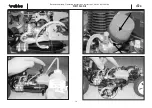
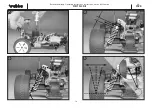
Bild 29, Einstellen der Bremskraft:

- Rechtsdrehen der Rändelmutter – Fahrzeug bremst

früher und stärker.

- Linksdrehen der Rändelmutter – Fahrzeug bremst spä-

ter und schwächer.

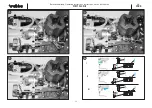
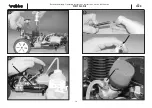
Bilder 30 und 31, Einstellen der Stoßdämpfer:

- Beachten Sie, daß alle folgenden Einstellungen an bei-

den Seiten einer Achse durchgeführt werden müssen,
um den beschriebenen Effekt zu erzielen.

- Durch Verwendung von Ringen verschiedener Höhe auf

dem Stoßdämpferzylinder verändern Sie die
Bodenfreiheit des Modells, nicht die Federhärte. Die
Einstellung der Bodenfreiheit richtet sich nach der
Beschaffenheit des befahrenen Untergrundes und soll-
te immer möglichst gering gehalten werden, ohne daß
das Chassis beim Durchfedern den Boden berührt.

- Die Federhärte können Sie durch den Austausch der

serienmäßigen Federn gegen die Tuningfedern
No.20170084 (Ø 1,3mm) oder No.20170085 (Ø 1,4mm)
verändern.

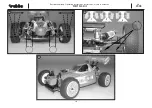
- Am Einfachsten lässt sich die Federcharakteristik durch

einen geänderten Befestigungswinkel der
Stossdämpfer erreichen. Im Lieferzustand sind die
Stossdämpfer des Modells so montiert, das sich die
Fahreigenschaften für einen relativ unebenen
Untergrund eignen. Man spricht von einem weichen
Dämpfungsverhalten.

- Montiert man die Stossdämpfer steiler, wird das

Dämpfungsverhalten härter und eignet sich besonders
für glatte und ebene Pisten.

Chassis adjustments:

Note:

the chassis is factory-adjusted to suit normal ope-

rating conditions. Once you have become familiar with its
running characteristics and handling you may wish to
make adjustments to the chassis settings to suit your dri-
ving style.

Fig. 29, adjusting braking power:

- Turn the knurled nut to the right: the car brakes earlier

and more strongly.

- Turn the knurled nut to the left: the car brakes later and

less strongly.

Figs. 30 and 31, adjusting the shock absorbers:

- Note that all the following adjustments must be carried

out at both sides (ends) of the same axle in order to
achieve the effect described.

- Rings of different height can be fitted to the shock

absorber cylinders. This alters the model's ground clea-
rance - not the hardness of the suspension. Ground
clearance only needs to be adjusted to suit the surface
quality of the track you are using. It should always be
set to the lowest possible clearance at which the chas-
sis does not quite touch the ground at maximum sus-
pension travel.

- The stiffness of the suspension can be altered by remo-

ving the standard springs and fitting the upgrade
springs No. 20170084 (1.3 mm Ø) or No. 20170085 (1.4
mm Ø).

- The simplest means of adjusting the car’s suspension

characteristics is to alter the mounting angle of the
shock absorbers. As supplied, the model’s shock
absorbers are positioned to provide good handling on a
relatively uneven surface. This is termed soft damping
characteristics.

- If you re-position the shock absorbers at a steeper

angle, the damping characteristics become stiffer; this
is particularly suitable for smooth, flat tracks.

Réglage du train de roulement :

À noter :

le réglage initial du châssis est effectué à l’usi-

ne. Une fois que vous vous êtes familiarisé avec les réac-
tions du modèle sur la piste, il est possible de l’adapter à
vos caractéristiques de pilotage pour en tirer le meilleur.

Fig. 29, réglage de l’effort de freinage:

- tourner l’écrou moleté vers la droite – le modèle freine

plus tôt et de manière plus intense.

- tourner l’écrou moleté vers la gauche – le modèle freine

plus tard et de moins efficacement.

Figures 30 et 31, régler les amortisseurs:

- Observer que les réglages décrits ci-dessous doivent

être réalisés des deux côtés de l’axe pour otenir l’effet
souhaité.

- En utilisant des bagues de hauteur différente sur le

vérin d'amortisseur, il est possible de modifier la garde
au sol du modèle mais pas la dureté de l'amortisse-
ment. La garde au sol doit être ajustée à la configurati-
on de la chaussée et demeurer toujours la plus petite
possible sans toutefois que le châssis ne touche le sol
en phase d’amortissement.

- Il est possible de modifier la dureté de l’amortissement

en remplaçant les ressorts de série par des ressorts de
compétition réf. 20170084 (Ø 1,3mm) ou réf. 20170085
(Ø 1,4mm).

- La manière la plus simple de modifier la caractéristique

d’amortissement est de modifier l’angle de fixation des
amortisseurs. Dans l’état dans lequel ils sont livrés, les
amortisseurs sont réglés pour une chaussée relative-
ment plane. On parle alors d’un amortissement souple.

- Si on réduit l’angle d’attaque des amortisseurs, leur

amortissement devient plus dur ce qui l’approprie aux
pistes lisses et planes.

Summary of Contents for RB 15/4 Kit

Page 1: ...1 10 RB 15 4 Kit No 2028 Betriebsanleitung Operating instructions Notice d utilisation ...

Page 2: ...Betriebsanleitung Operating instructions instructions Notice d utilisation RB 15 4 Kit 2 No 2028 ...

Page 3: ...ad lock fluid 5074 Air filter oil 70081000 Tank filler bottle 7565 Roktan S 10 glow fuel 5315 Polycarbonate paints To choice Small pointed nose pliers Cross point screwdriver Allen key size 1 5 Glowplug spanner 6095 Replacement parts upgrade parts Pages 23 31 show overall views of replacement parts for the model and motor and upgrade parts Building and operating instructions Note tools and some of...

Page 4: ...Betriebsanleitung Operating instructions instructions Notice d utilisation RB 15 4 Kit 4 No 2028 1 2 3 4 ...

Page 5: ...sc or lever Press the rubber grommets into the mounting lugs of the servo Screw the front servo mount to the steering servo Fig 3 installing the steering servo Install the steering servo Fix the front servo mount to the chassis using the countersunk screw Attach the servo to the rear mount using a self tapping screw Fig 4 preparing the throttle servo Undo the servo output screw and lift off the ou...

Page 6: ...5 6 7 8 6 Betriebsanleitung Operating instructions instructions Notice d utilisation RB 15 4 Kit No 2028 ...

Page 7: ...lit pins and lift off the lid of the RC box Install the switch in the rectangular hole in the cover Figs 7 and 8 receiver and batterie box Connect the servo lead and switch to the receiver Install the dry or rechargeable cells taking care to main tain correct polarity Connect the battery box to the switch harness Fig 5 mise en place du servo des gaz Installer le servo des gaz dans le compartiment ...

Page 8: ...Betriebsanleitung Operating instructions instructions Notice d utilisation RB 15 4 Kit 12 9 8 No 2028 10 11 ...

Page 9: ...d it out through the hole in the lid Figs 10 and 11 the aerial Close the cover again Slip the wire aerial attached to the receiver into the aeri al sleeve Push the aerial sleeve into the aerial base Fig 12 Switch the transmitter on first Turn on the receiving system by operating the switch Set both servos to neutral centre from the transmitter Switch off in the reverse order i e receiver first Fig...

Page 10: ...Betriebsanleitung Operating instructions instructions Notice d utilisation RB 15 4 Kit 13 10 No 2028 14 15 16 50 mm ...

Page 11: ...vo output screw Fig 15 checking the steering When you turn the steering wheel to the right left the front wheels must also turn to the right left If this is not the case operate the servo reverse switch of the transmitter channel 1 steering Fig 8 throttle brake pushrod Cut away the short arm from the throttle brake lever Assemble the throttle brake pushrod as shown in Fig 16 Drill 2 holes in the l...

Page 12: ...Betriebsanleitung Operating instructions instructions Notice d utilisation RB 15 4 Kit 17 18 12 No 2028 19 20 I II III ...

Page 13: ...on centre the carburettor should be completely closed apart from a narrow slit approx 0 5 mm and the brake should not engage If necessary adjust the position of the collets on the throttle pushrod until this is the case Fig 19 Move the throttle brake lever of the transmitter fully for ward to the Brake position This action compresses the spring on the throttle pushrod The throttle barrel in the ca...

Page 14: ...Betriebsanleitung Operating instructions instructions Notice d utilisation RB 15 4 Kit 21 22 14 No 2028 23 24 ...

Page 15: ...r through the fuel line see arrow Fig 24 page 16 Push the glow driver onto the glowplug Check that the throttle lever is at the idle position then start the motor by pulling the pull cord starter Never pull out the star ter cord more than about 2 3 of its full length If the motor does not start after four or five attempts or is very difficult to turn over carry out the following pro cedure There m...

Page 16: ...Betriebsanleitung Operating instructions instructions Notice d utilisation RB 15 4 Kit 16 No 2028 27 28 26 25 L HD ...

Page 17: ...lencer A rich mixture is achieved by unscrewing the main needle valve HD in small increments The new motor has to be run in for about five comple te tankfuls of fuel before it is capable of producing full power Allow the motor to cool down thoroughly bet ween runs The motor should be given a light load even when running in so place the model on an even surface and drive it around gently Once the m...

Page 18: ...Betriebsanleitung Operating instructions instructions Notice d utilisation RB 15 4 Kit 18 No 2028 29 30 31 32 ...

Page 19: ...orber cylinders This alters the model s ground clea rance not the hardness of the suspension Ground clearance only needs to be adjusted to suit the surface quality of the track you are using It should always be set to the lowest possible clearance at which the chas sis does not quite touch the ground at maximum sus pension travel The stiffness of the suspension can be altered by remo ving the stan...

Page 20: ...Betriebsanleitung Operating instructions instructions Notice d utilisation RB 15 4 Kit 20 No 2028 33 34 35 1 2 3 ...

Page 21: ...ck A carefully adjusted chassis is just as important as a powerful motor if you are looking for fast lap times Fig 34 adjusting toe in The toe in setting of the front axle affects the model s straight running characteristics and its steering respon se With positive toe in drawing 1 the car has very smooth steady straight running characteristics and responds relatively softly to steering commands I...

Page 22: ...e warm soapy water and allow it to dry The bodywork can now be painted using rocol or PC paint Order No according to colour Peel off the external protective film Remove the tape again when the paint has dried Remove decal make slightly wet with soapy water and position decals on bodywork then smooth out air bubbles with a soft cloth Apply the decals to the spoiler Place the spoiler on the supports...

Page 23: ...oded view chassis Vue eclatée châssis TP selbstschneidende Schraube self tapping screw vis autotaradeuse TP FH Senkkopf Schraube countersunk screw vis à tête bombée Cap Inbusschraube socket head cap screw vis six pans creux Set Inbus Stiftschraube socket head grubscrew vis sans tête six pans creux E Sicherungsring circlip circlip ...

Page 24: ...Betriebsanleitung Operating instructions instructions Notice d utilisation RB 15 4 Kit 24 No 2028 ...

Page 25: ...Betriebsanleitung Operating instructions instructions Notice d utilisation RB 15 4 Kit 25 No 2028 ...

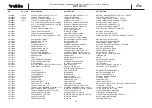
Page 26: ...0171001 20171035 20171034 20171033 20171017 20171017 Betriebsanleitung Operating instructions instructions Notice d utilisation RB 15 4 Kit 26 No 2028 Explosionszeichnung Verbrennungsmotor Exploded view glowplug motor Vue eclatée moteur thermique S7025 20280028 Schraubenset siehe Explo Zeichn Chassis Screw set see exploded view chassis Jeu de vis cf vue eclatée du châssis Motor komplett No 2017103...

Page 27: ...EUX MASSELOTTES AVEC RESSORT 20170022 12024 SCHWUNGRAD FLY WHEEL VOLANT 20170023 12025 KURBELWELLENADAPTER 5MM PILOT SHAFT ADAPTATEUR DE VILEBREQUIN 20170024 12074 TREIBSTOFFSCHLAUCH FUEL TUBE 50CM FLEXIBLE À CARBURANT 20170025 12075 LUFTFILTER AIR FILTER FILTRE À AIR 20170026 M1044 HAUPTZAHNRAD 44 Z 44T SPUR GEAR COURONNE PRINCIPALE 44 DENTS 20170027 M1104 KAROSSERIESPLINTE 8 ST BODY PINS 8 GOUPI...

Page 28: ... TERRAIN 20280005 S7002 QUERLENKERHALTER UNTEN 2 ST LOWER SUS HOLDER F R BRAS D OSCILLATION TRANSVERSAL INFÉRIEUR 2 PIÈCES 20280006 S7003 QUERLENKER VORNE UNTEN 2 ST FRONT LOWER SUS ARM BUGGY 2 BRAS D OSCILLATION TRANSVERSAL AVANT INFÉRIEUR 2 PCS 20280007 S7004 QUERLENKER HINTEN UNTEN 2 ST REAR LOWER SUS ARM BUGGY 2 BRAS D OSCILLATION TRANSVERSAL ARRIÈRE INFÉRIEUR 2 PCS 20280008 S7005 QUERLENKER V...

Page 29: ... VERGASER KOMPLETT CARBURETOR COMPLETELY SET CARBURATEUR COMPLET 20171011 BUCHSE UND KOLBEN CYLINDER SLEEVE PISTON 3P 15S COUSSINET ET PISTON 20171012 PLEUEL KOLBENBOLZEN CONNECTING ROD GUDGEON PIN BIELLE AXE DE PIED DE BIELLE 20171013 KURBELWELLE CRANKSHAFT VILEBREQUIN 20171014 KONUS DRIVE COPPER WASHER CÔNE 20171015 SCHWUNGRADMITNEHMER DRIVE GEAR ENTRAÎNEUR DU VOLANT 20171016 ZYLINDERKOPFDICHTUN...

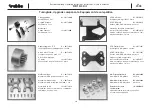
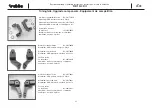
Page 30: ...t Porte frein en alu réf 20172014 aluminium fraisé sur machines à commande numérique anodisé 1 kit CFK RC Platte No 20172016 Kohlefaser CNC gefräst 1 Stück CFRP RC plate No 20172016 Carbon fibre CNC machined pack of 1 Platine de réception en plastique renforcé fibre de carbone réf 20172016 fibre de carbone fraisée sur machines à com mande numérique 1 pièce CFK Zentral Platte No 20172017 Kohlefaser...

Page 31: ...lter vorne No 20172019 Aluminium CNC gefräst eloxiert 2 Stück Aluminium front stub axle holder No 20172019 Aluminium CNC machined eloxided pack of 2 Porte fusée d essieu en alu avant réf 20172019 aluminium fraisé sur machines à commande numérique anodisé 2 pièces Alu Achsschenkel vorne No 20172021 Aluminium CNC gefräst eloxiert 2 Stück Aluminium front stub axle No 20172021 Aluminium CNC machined e...

Page 32: ...er robbe Modellsport GmbH Co KG Errors and omissions excepted Modifications reserved Copyright robbe Modellsport 2005 Copying and re printing in whole or in part only with prior written approval of robbe Modellsport GmbH Co KG Sous réserve de d erreur et de modification technique Copyright robbe Modellsport 2005 Copie et reproduction même d extraits interdites sans autorisation écrite expresse de ...

Reviews: