DE/EN/FR
3
BAU- UND BETRIEBSANLEITUNG / INSTRUCTIONS AND USER MANUAL / MANUEL D´UTILISATION
M o d e l l s p o r t
09
13
10
14
11
15
12
16
KIT
KIT
PNP
PNP
RTF
RTF
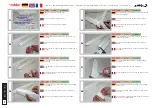
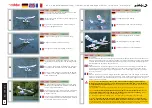
Das ABS-Plättchen gedrückt halten bis der Sekunden-
kleber ausgehärtet ist.
Das Schwimmer-Dekor mit der Schere wie abgebildet
ausschneiden …
Maintenez la plaque ABS pressée jusqu‘à ce que la
super-colle ait durci.
Découpez les décalques du flotteur avec les ciseaux
comme indiqué ...
Keep the ABS-plate pressed until the superglue has
hardened.
Cut out the float decals with the scissors as shown ...
KIT
KIT
PNP
PNP
RTF
RTF
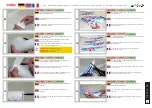
Der Überstand muss sein, damit beim Wasserstart der
Wasserfilm abreißt.
... Darauf achten, dass ein ca. 2-3 mm transparenter
Rand erhalten bleibt.
Le dépassement doit être suffisant pour rompre le film
d‘eau lors du démarrage sur l‘eau.
... Veillez à ce qu‘il reste un bord transparent
d‘environ 2-3 mm.
The overhang must be sufficient to break off the
water film during the water start.
... Make sure that an approx. 2-3 mm transparent
edge remains.
KIT
KIT
PNP
PNP
RTF
RTF
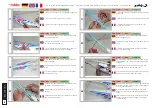
Das Anbringen der ABS-Plättchen am Schwimmer-
Ende erfolgt im gleichen Ablauf.
Die Trägerfolie wie abgebildet segmentweise lösen
und abschneiden.
Le montage de la plaque ABS à l‘extrémité du flot
-
teur s‘effectue selon la même procédure.
Retirez la feuille de support segment par segment
comme indiqué et coupez-la.
Mounting the ABS plate at the end of the float is
carried out in the same procedure.
Loosen the carrier foil segment by segment as shown
and cut it off.
KIT
KIT
PNP
PNP
RTF
RTF
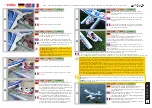
Hier bleibt der Überstand der Abrisskante ebenfalls
erhalten.
Das Dekor wird mit der vorderen Trägerfolie am
Schwimmer ausgerichtet …
Ici, la projection du bord d‘arrachage est également
conservée.
Les décalcomanies sont alignées avec le support
avant du flotteur ...
Here the projection of the tear-off edge is also
retained.
The decals are aligned with the front carrier foil on
the float ...
Achtung:
Bitte nicht abschneiden!
Caution:
Please do not cut off!
Attention:
Ne coupez pas!


