7
4.2 Lamp adjustment
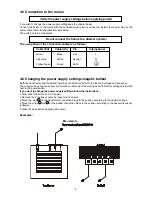
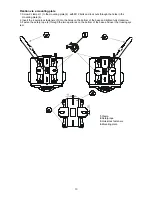
The lampholder is aligned at the factory. Due to differences between lamps, fine adjustment may improve light
performance.
Strike the lamp, cancel all effects, open the shutter and set the dimmer intensity onto 00 % and focus the light
on a flat surface (wall) or use function “
LAAd
” in the
Special functions
. As the optimum distance of the lamp
from lens was adjusted during the installing or changing the lamp (by turning the screw
“A”
), it is necessary
to adjust only the second position by turning the screw
“B”
, in order to center the hot-spot (the brightest part
of the beam).
If the hot spot seems to be too bright, you can lower its intensity by moving the lamp closer to the reflector. Do
so by turning the srew
“A”
until the light is evenly distributed.
If the light on the edge seems to be brighter as in the center, the lamp is too close at the reflector. In this case,
you need to move the lamp away from the reflector until the light is evenly distributed and the beam appears
bright enough.
4.3 Installation of an optional lens
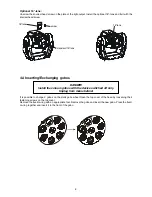
The device is delivered with a 15°-standard lens. If you wish to insert an optional 12° or 18°-lens (it is not the
standard part of delivery), please follow the instructions below:
Optional 12°-lens:
Remove the fixation-ring of the 15°-lens with an appropriate tool. Remove the lens. Install the optional 12°-lens
and fix it with the fixation-ring.
Incorrect
optimum distance
-.5 mm
Correct
rear panel of the moving head
Screw "B"
Screw "A"
5°- lens
°- lens


