12
3.6 Installing the Automatic Distance Meter (ADM)
Disconnect the fixture from mains before installing ADM.
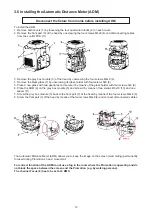
To install the ADM
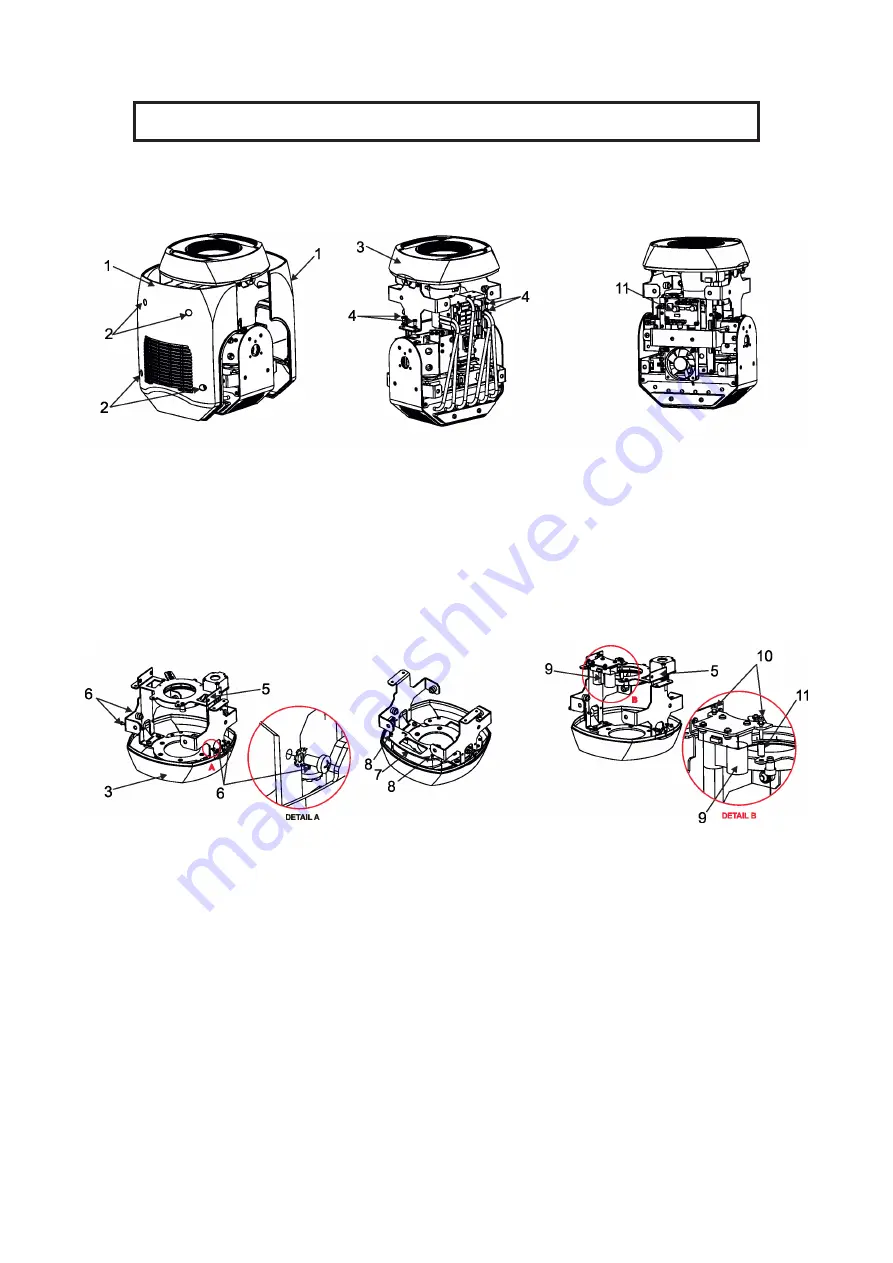
1. Remove both covers (1) by loosening the four quarter-turn locks (2) on each cover.
2. Remove the front part (3) of the head by unscrewing the four screws M4x8 (4) and disconnecting cables
from the control PCB (11)
3. Remove the grey box module (5) of the head by unscrewing the four screws M4x8 (6).
4. Remove the black glass (7) by unscrewing its glass holder with four screws 3x8 (8).
5. Place a new glass with two apertures and secure it by means of the glass holder with four screws 3x8 (8).
6. Place the ADM (9) on the grey box module (5) and screw it by means of two screws M3x18 (10) and one
spacer (11) .
7. Screw the grey box module (5) back to the front part (3) of the head by means of the four screws M4x8 (6).
8. Screw the front part (3) of the head by means of the four screws M4x8 (4) and connect disconnected cables.
The Automatic Distance Meter (ADM) allows you to keep the image on the screen (wall, ceiling) permanently
focused during Promotion´s head movement.
For correct function of the ADM do not use a fog in the room where the Promotion is operating and do
not block the space between the screen and the Promotion (e.g. by walking persons).
The channel Focus (8) has to be set at 0 DMX.
Summary of Contents for Robin ProMotion ADM
Page 1: ...1 Version 1 7 ...
Page 50: ...40 ...


