background image

3

Part no. CB-209-1410 04/28/2021

Craft Series: Pivot Metal Mirror

© 2021 Robern, Inc. 701 N. Wilson Ave. Bristol, PA  19007  U.S.A.
800.877.2376      

www.robern.com


Installation instructions 

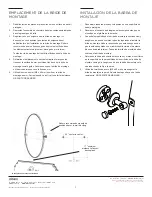
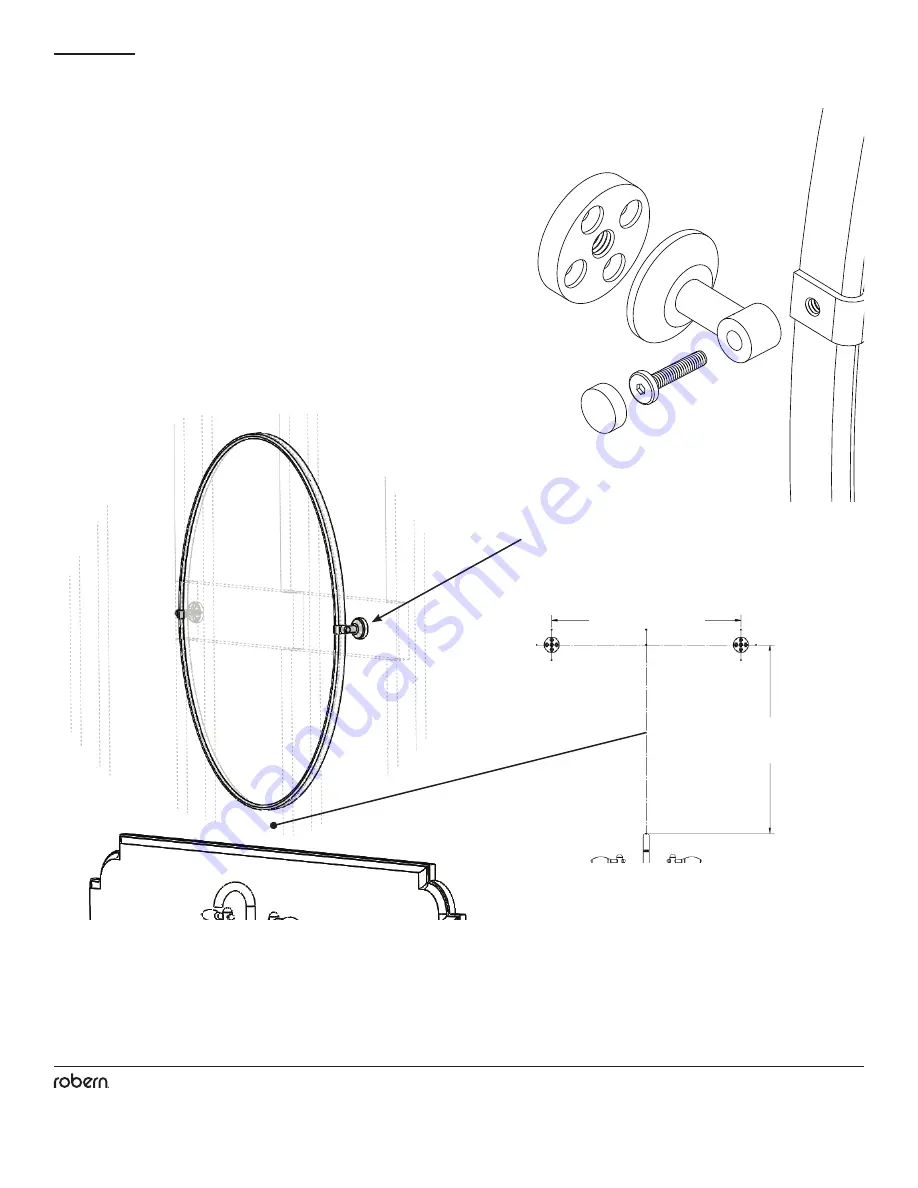
25" center to center

17" minimum

distance to faucet/

backsplash

LOCATING THE MOUNTING FLANGE

1.  Unpack all parts and place them on a protected work surface. 
2.  Disassemble hinge assembly into the components shown in the 

graphic to the right.

3.  Refer to the mounting 

fl

 ange requirements (below) making sure 

that all requirements are met when installing the mounting 

fl

 ange. 

Robern recommends that both pivot mounts are secured into 
structural members (stud, internal wall blocking). All mounting 
screws must be used in mounting 

fl

 ange.

4.  Determine the exact location of the 

fi

 xture and mark the holes on 

the wall surface using the holes in the mounting 

fl

 ange as a guide. 

Make sure that the mounting 

fl

 ange is level when securing it to the 

wall.

5.  Use the steel screws (M5 x 40mm) to secure the mounting 

fl

 ange to 

the wall. Tighten until there is strong resistance. DO NOT OVER-
TIGHTEN.

Robern recommends mounts be 
positioned over in-wall blocking.  

* Backsplash and faucet not included

Summary of Contents for CRAFT CM2436H84

Page 1: ...e An improper installation voids the warranty Carefully inspect the mirror for damage prior to installation Installed products cannot be returned If you experience any problems with your Robern produc...

Page 2: ...21 Craft Series Pivot Metal Mirror 2021 Robern Inc 701 N Wilson Ave Bristol PA 19007 U S A 800 877 2376 www robern com Installation instructions TOOLS NEEDED PARTS 8 M5 x 50mm Screws Pivot Metal Mirro...

Page 3: ...sure that all requirements are met when installing the mounting flange Robern recommends that both pivot mounts are secured into structural members stud internal wall blocking All mounting screws must...

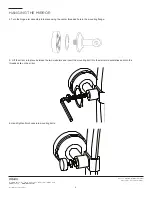
Page 4: ...com Installation instructions HANGING THE MIRROR 4 Turn the hinge arm assembly into place using the center threaded hole in the mounting flange 5 Lift the mirror into place between the two wall arms a...

Page 5: ...of merchantability ROBERN shall not be liable for any consequential damages arising out of or in connection with the use or performance of its products Some states do not allow limitations on how long...

Page 6: ...ones contiene informaci n sobre c mo montar su espejo de la serie Craft de Robern Guarde estas instrucciones para uso y referencia futuros Una instalaci n incorrecta anula la garant a Inspeccione cuid...

Page 7: ...c 701 N Wilson Ave Bristol PA 19007 U S A 800 877 2376 www robern com Instructions d installation Instrucciones de instalaci n PI CES PIEZAS OUTILS N CESSAIRES HERRAMIENTAS NECESARIAS Miroir en M tal...

Page 8: ...est de niveau lorsque vous la fixez au mur 5 Utilisez les vis en acier M5 x 40 mm pour fixer la bride de montage au mur Serrez jusqu ce qu il y ait une forte r sistance NE PAS TROP SERRER 1 Desembale...

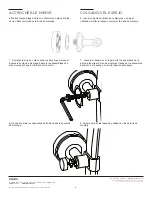
Page 9: ...e montage 7 Soulevez le miroir en place entre les deux bras muraux et ins rez le boulon de montage travers les assemblages de bras muraux et dans le clip filet sur le miroir 8 Serrez la main les capuc...

Page 10: ...n le remplacement ou l ajustement appropri son choix des produits fabriqu s par cette soci t qui pr sentent des d fauts importants de mat riaux ou de fabrication qui sont signal s la soci t ROBERN par...

Reviews: