3
Part no. 209-1397 09/20/2021
Craft Series Engineered Stone Top
© 2021 Robern, Inc. 701 N. Wilson Ave. Bristol, PA 19007 U.S.A.
800.877.2376
www.robern.com
ASSEMBLY
6
7
8
3
4
5
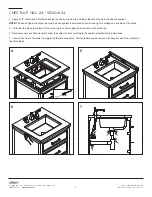
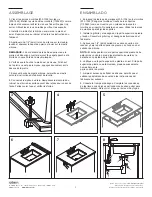
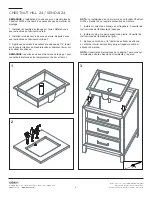
3. Thread the wing nuts [203-1336] onto the screws [203-1542]. Put the screws through the brackets [1193643] as shown and gently
thread the screws in the insert. Do not over tighten. Use the wing nuts to secure the brackets.
4. Install the faucet and drain to the stone top and sink. Refer to the faucet and drain manufacturer's instructions.
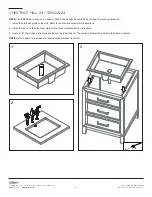
5. Apply a 1/4" (6mm) bead of silicone sealant on vanity and lower the stone top and sink onto the silicone sealant.
NOTE:
The back edge of the stone top must be flush against the wall and equal left and right overhang on each side of the vanity.
6. Verify that the stone top is level. If the stone top is not level, gently press down on the stone top.
7. Wipe away excess silicone sealant. allow the sealant to set according to the sealant manufacturer's instructions.
8. Connect the trap to the drain. Complete the faucet connections. Vanity drawers can be removed for easy access. Run water and
check for leaks.

