background image

10

© 2020 Robern, Inc. 701 N. Wilson Ave. Bristol, PA  19007  U.S.A.

800.877.2376      

www.robern.com


Installation instructions 

Part no. CB-209-1335 04/06/20

Freestanding Cartesian / Profiles Vanity

If you are installing VAELECTRIC, see separate instructions before proceeding further.

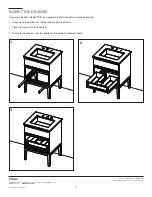
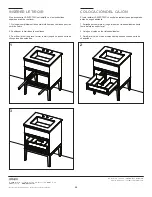
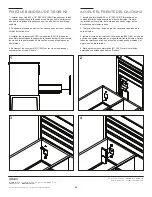
1.  Fully extend the bottom set of slide rails out from the frame.

2.  Place the drawer into the slide rails.

3.  To secure the drawer, close the drawer until a series of clicks are heard.

INSERT THE DRAWER

1

3

2

Summary of Contents for VP24H3D21A11N76

Page 1: ...rical option s may be provided with your vanity s These vanity series needs special site preparation Do not install vanities until all framing plumbing and electrical option rough ins have been completed and wall surface has been finished We recommend using the services of a professional installer Observe all local building codes Save these instructions for future use and reference An improper ins...

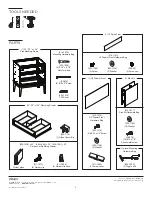
Page 2: ...Divider glass 211 1073 4 Divider clip 211 1098 4 Divider clip shoe 225 1039 24 225 1040 30 225 1041 36 Divider Set Plumbing Drawer 203 1293 2 Toggle bolt 203 1198 18 Washer SS676 18 10 x 1 2 Sheet metal screw Optional Mounting Hardware Bag 1 Side kit 216 1077 Side Kit Hardware Bag 216 1074 H2 Drawer Front Hardware Bag 203 1198 4 Washer 203 1219 4 8 32 x 1 2 Screw 211 1095 2 Screw cover 1 H2 Drawer...

Page 3: ...nd selectable night light side kits included Consult the Robern Price Book for a complete list of model numbers MODEL NUMBERS Model Numbers Category V Vanity Product M Cartesian P Profiles Width 24 24 1 8 613 mm 30 30 1 8 765 mm 36 36 1 8 918 mm Height H3 22 5 572 mm Depth D21 21 3 4 552 mm Drawer Style A H1 False Front H2 Plumbing Drawer H3 Side Kit Pair SS Legs Glass Finish Decorative Glass Ligh...

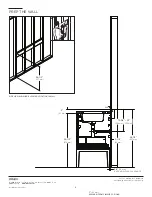
Page 4: ...instructions Part no CB 209 1335 04 06 20 Freestanding Cartesian Profiles Vanity PREP THE WALL 36 1 2 927 mm SIDE VIEW SHOWING BLOCKING LOCATION IN WALL 3 1 4 83 mm 34 1 2 876 mm 36 1 2 927 mm 1 25 mm MINIMUM FROM FINISHED CEILING 2X6 13 3 4 22 349 mm 559 mm 2 51 mm 3 4 19 mm BASE MOULDING CLEARANCE ...

Page 5: ...he outlet must be wired to a 120vac 20 amp GFCI circuit We do not recommend using a GFCI outlet because resetting it under the vanity will be inconvenient The night light has no switch A switch can be wired to one receptacle in the outlet to operate the night light All applicable electrical codes in your area must be followed The outlet can be installed to the left or right of center depending on ...

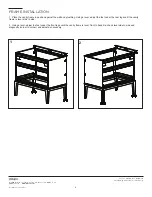
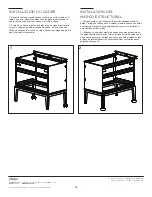
Page 6: ...Vanity FRAME INSTALLATION 1 Place the vanity frame in position against the wall and plumbing Using a level adjust the feet under the rear legs until the vanity frame is level side to side 2 Using a level adjust the feet under the front legs until the vanity frame is level front to back Re check level side to side and diagonally corner to corner and adjust as necessary 1 2 ...

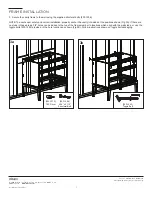
Page 7: ...d correct installation properly anchor the vanity into studs at the positions shown Fig 3A If there are no studs in these areas 3 8 holes can be added to the top of the frame member in locations which align with the wall studs or use the toggle bolts 203 1293 provided in the hole locations as shown Fig 3B Follow instructions shown on toggle bolt packaging 203 1293 Toggle Bolt 203 1256 5 16 x 2 1 2...

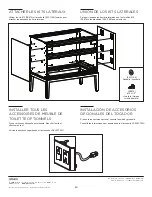
Page 8: ...anding Cartesian Profiles Vanity ATTACHING THE SIDE KITS INSTALLING ANY OPTIONAL VANITY ACCESSORIES Use the 10 screws SS676 and washers 203 1198 provided to attach the side glass panels If you have the optional night light plug the unit in and test See separate instructions for VAELECTRIC accessory 203 1198 Washer SS676 10 x 1 2 Sheet metal screw ...

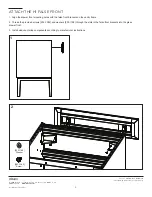
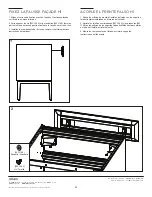
Page 9: ...les Vanity ATTACH THE H1 FALSE FRONT 1 Align the drawer front mounting holes with the false front brackets on the vanity frame 2 Thread the provided screws 203 1382 and washers 203 1198 through the slots in the false front brackets into the glass drawer front 3 Install sink countertop components according to manufacturer instructions 1 203 1198 Washer 203 1382 Screw 2 ...

Page 10: ...04 06 20 Freestanding Cartesian Profiles Vanity If you are installing VAELECTRIC see separate instructions before proceeding further 1 Fully extend the bottom set of slide rails out from the frame 2 Place the drawer into the slide rails 3 To secure the drawer close the drawer until a series of clicks are heard INSERT THE DRAWER 1 3 2 ...
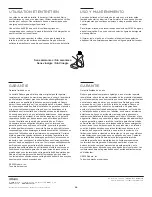
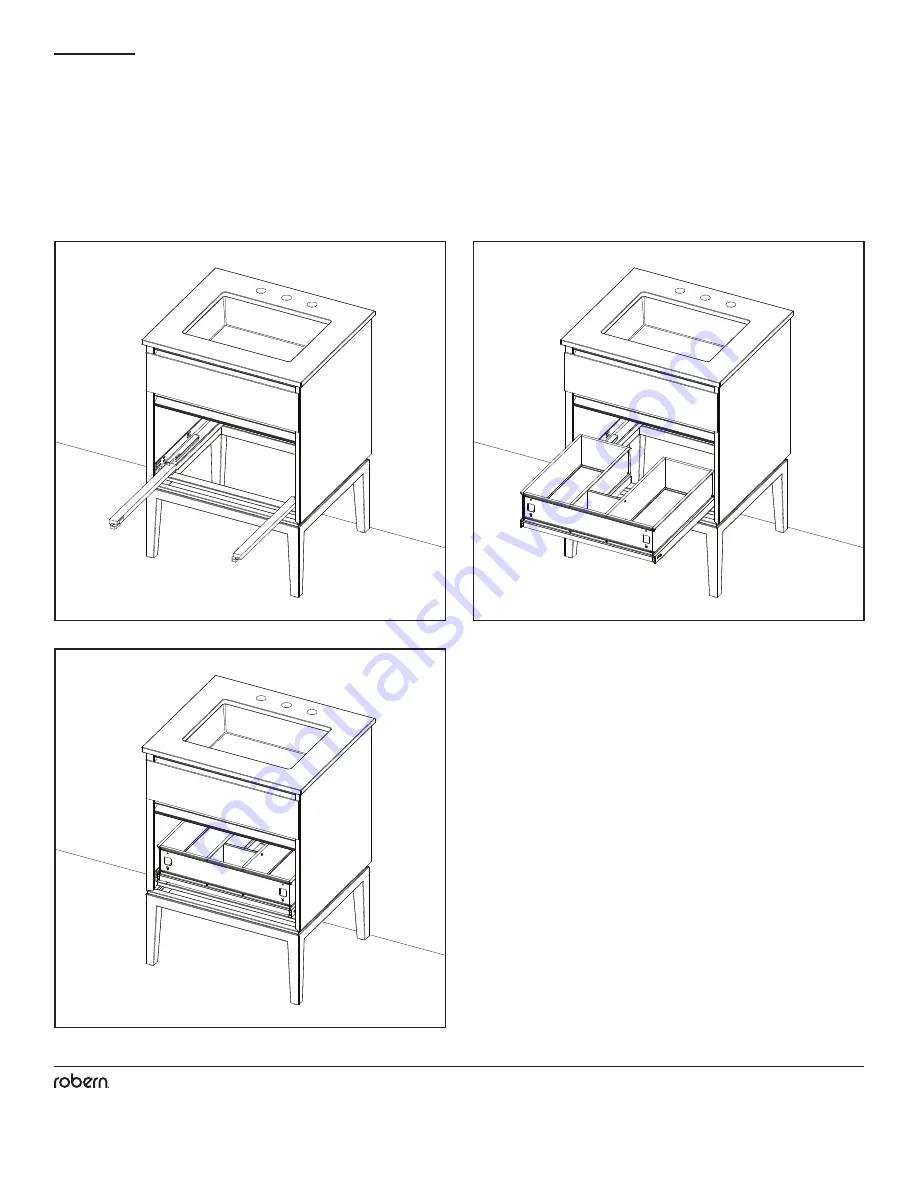
Page 11: ...each bracket in the drawer front Do not thread all the way through so that the screws can be hung on the keyholes in the next step 2 Hang the drawer front on the two keyholes on each side of the drawer box 3 Install the remaining screws WITH washers 203 1198 into the two remaining threads in the drawer front bracket Tighten all screws after the drawer front is level and even with the side kits 4 S...

Page 12: ...e date of delivery Robern is not responsible for installation costs The warranty is void in the event the product is damaged in transit or if damage or failure is caused by abuse misuse abnormal usage faulty installation damage in an accident improper maintenance or any repairs other than those authorized by Robern At the expiration of the one year warranty period Robern shall be under no further ...

Page 13: ... les services d un installateur professionnel Respecter tous les codes de construction locaux Conserver ces instructions pour un usage et une référence ultérieurs Une installation non appropriée annule la garantie Les meubles de toilette installés ne peuvent pas être retournés En cas de problèmes avec vos meubles de toilette communiquer avec le concessionnaire ou directement avec Robern TABLE DES ...

Page 14: ... de clip de séparateurs Sujetador de clips de divisores 225 1039 24 225 1040 30 225 1041 36 Tiroir de plomberie du kit de séparation Cajón de fontanería del juego divisor 203 1293 2 Boulon à ailettes Perno de palanca 203 1198 18 Rondelle Arandela SS676 18 10 x 1 2 Vis à tôle Hoja de tornillo de metal Kit de montage optionnel Bol sa con accesorios de montaje opcional 1 Kit latéral Kit lateral 216 1...

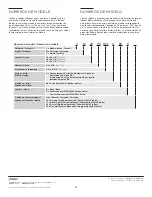
Page 15: ...anería H2 y luz nocturna opcional kit montaje lateral incluido Consulte el listado de productos Robern para obtener una lista completa de los números para cada modelo NUMÉROS DE MODÈLE NÚMEROS DE MODELO Numéros de modèle Números de modelo Catégorie Categoría V Meuble lavabo Tocador Produit Producto M Cartesian Cartesian P Profils Profiles Largeur Ancho 24 24 1 8 613 mm 30 30 1 8 765 mm 36 36 1 8 9...

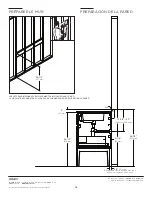
Page 16: ... installation Instrucciones de instalación 16 PRÉPARER LE MUR PREPARACIÓN DE LA PARED 36 1 2 927 mm VUE LATÉRALE INDIQUANT L EMPLACEMENT DE BLOCAGE DANS LE MUR LA VISTA LATERAL MUESTRA EL LUGAR PARA LOS MADEROS DE REFUERZO EN LA PARED 3 1 4 83 mm 34 1 2 876 mm 36 1 2 927 mm 2X6 13 3 4 22 349 mm 559 mm 2 51 mm 3 4 19 mm DÉGAGEMENT DE LA BASE DE MOULAGE ESPACIO DEL MOLDE DE LA BASE ...

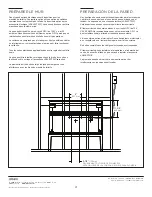
Page 17: ...tre en fonction du côté sur lequel l accessoire VAELECTRIC sera situé La plomberie doit être située tel qu indiqué pour empêcher une interférence avec les tiroirs du meuble de toilette Hay dos tipos de opciones eléctricas disponibles para los tocadores La primera es una opción de luz nocturna que se ordena con el tocador La segunda es un accesorio eléctrico VAELECTRIC Ambas opciones pueden conecta...

Page 18: ...ous les pieds avant jusqu à ce que le cadre du meuble lavabo soit à niveau de face et de dos Vérifiez à nouveau le niveau d un côté à l autre et en diagonale coin à coin et ajustez si nécessaire 1 Coloque el marco del tocador en la posición deseada contra la pared y la tubería Utilizando un nivelador ajuste las bases que están por debajo de las patas posteriores hasta que el marco del tocador esté...

Page 19: ...é Fig 3B Suivez les instructions indiquées sur l emballage des boulons à ailettes 3 Ajuste el marco del tocador a la pared utilizando los pernos estruc turales proporcionados 203 1256 NOTA Para garantizar la seguridad del usuario y su correcto montaje enganche correctamente el tocador en los broches según la posición que se indica figura 3A Si no existen broches en estas áreas podrá añadir orifici...

Page 20: ...téraux Para unir los paneles de vidrio laterales use los tornillos 10 SS676 y las arandelas 203 1198 que se incluyen 203 1198 Rondelle Arandela SS676 10 x 1 2 Vis à tôle Hoja de tornillo de metal INSTALLER TOUS LES ACCESSOIRES DE MEUBLE DE TOILETTE OPTIONNELS INSTALACIÓN DE ACCESORIOS OPCIONALES DEL TOCADOR Si une veilleuse optionnelle est présente brancher l unité et effectuer un test Voir les in...

Page 21: ...ts avant dans la façade en verre du tiroir 3 Installez les composants de l évier du comptoir conformément aux instructions du fabricant 1 Alinee los orificios de montaje frontales del cajón con los soportes falsos frontales instalados en el marco del tocador 2 Apriete los tornillos suministrados 203 1382 y las arandelas 203 1198 en los orificios de los soportes falsos frontales hasta acoplarlos en...

Page 22: ...inférieur des coulisses pour les sortir du cadre 2 Positionner le tiroir dans les coulisses 3 Pour fixer le tiroir en place fermer le tiroir jusqu à ce qu une série de clics puisse être entendue Si va a instalar VAELECTRIC consulte las instrucciones por separado antes de seguir adelante 1 Extienda por completo el juego inferior de rieles deslizantes hacia fuera del marco estructural 2 Coloque el c...

Page 23: ...ns le support de la façade du tiroir Serrer toutes les vis une fois que la façade du tiroir est de niveau et égale avec les kits latéraux 4 Enclencher les couvre vis 211 1095 sur les vis en les pressant doucement au niveau Robern 1 Instale dos tornillos 8 32 x 1 2 203 1219 SIN arandelas en la parte inferior de cada soporte en el frente del cajón No meta los tornillos por completo de forma que se p...

Page 24: ...tions de la présente garantie La permission de renvoyer de la marchandise sous les termes de cette garantie doit être autorisée par Robern et les frais de renvoi doivent être prépayés par l acquéreur Les réclamations effectuées sous cette garantie doivent être envoyées directement à votre concessionnaire 2020 Robern Inc Tous droits réservés Los lados del tocador los frentes de los cajones y el int...

Reviews: