background image

III


TECHNICAL DATA / UTILISATION


User's instructions  ..............................................................................................Section - 1


Consignes d'utilisation .................................................................................... Section - 2


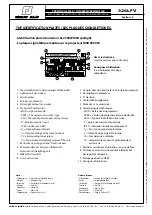
The identification plates ...................................................................................Section - 3


Les plaques signalétiques .............................................................................. Section - 3


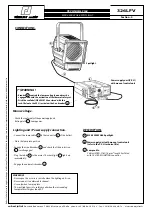
Connections - PSU with manual control unit ..............................................Section - 4


Raccordement - Alimentation avec commande manuelle  ............... Section - 5


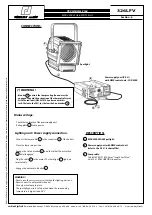
Connections - PSU with DMX control unit ....................................................Section - 6


Raccordement - Alimentation avec commande DMX  ........................ Section - 7


SPARE PARTS LIST / NOMENCLATURE


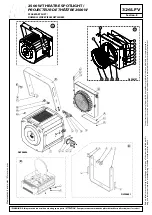
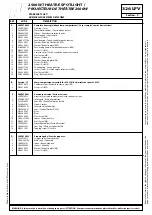
Complete lighting unit  ..............................................................................Section - 8 & 9


Projecteur complet  ...................................................................................Section - 8 & 9


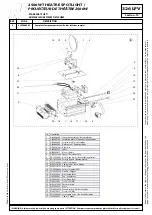
Complete lamp compartment...................................................................... Section - 10


Boîtier inférieur complet...............................................................................Section - 10


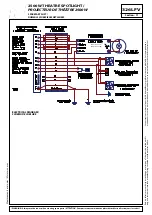
Electrical diagram - Spotlight  ...................................................................... Section - 11


Schéma électrique - Projecteur ..................................................................Section - 11


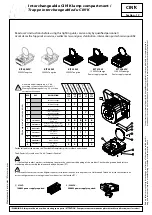
Interchangeable CIN’K lamp compartments  ........................................... Section - 12


Trappes interchangeables du CIN’K ..........................................................Section - 12

CONTENTS

  / SOMMAIRE

Summary of Contents for CIN'K 326 LFV

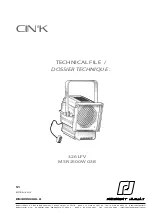
Page 1: ...n Thelle phone 33 0 3 44 26 51 89 fax 33 0 3 44 26 90 79 info robertjuliat fr Robert Juliat U S A 48 Capital Drive Wallingford CT 06492 phone 203 294 0481 fax 203 294 0482 info robertjuliatamerica com TECHNICAL FILE DOSSIER TECHNIQUE EDITION 16 03 10 V1 326 LFV MSR 2500W G38 ...

Page 2: ...s will continue to improve Thank you ROBERT JULIAT Vous venez de prendre possession de votre nouveau projecteur et nous vous remercions de votre choix Le résultat que vous en obtiendrez dépendra pour beaucoup du soin que vous apporterez à son entretien aussi nous vous conseillons de lire ces quelques pages qui ont été écrites à votre intention et de les conserver en cas de nécessité Ne manquez pas...

Page 3: ...tion 5 Connections PSU with DMX control unit Section 6 Raccordement Alimentation avec commande DMX Section 7 SPARE PARTS LIST NOMENCLATURE Complete lighting unit Section 8 9 Projecteur complet Section 8 9 Complete lamp compartment Section 10 Boîtier inférieur complet Section 10 Electrical diagram Spotlight Section 11 Schéma électrique Projecteur Section 11 Interchangeable CIN K lamp compartments S...

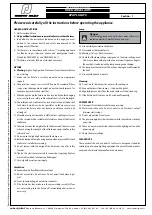
Page 4: ...helightingfixturewhenthelampison 14 Boththelampandlamphousingheatupwhenpowered Waituntil thefixtureiscoldbeforeservicing 15 Do not tamper with the design of the fixture nor any of its safety features 16 Tighten the electrical mains cable connections regularly Replace mainscablewithanidenticaloneifdamaged 17 Useonlywithcorrectpowersupply Ventilation 18 Keepwellawayfromflammablematerial 19 Do not us...

Page 5: ...ntée sur le projecteur MSR 2500W 1 Le sigle nom du constructeur et l origine du produit 2 Description du projecteur 3 N de série 4 Conformité Européenne 5 Poids net sans accessoire 6 Caractéristiques techniques MOD Référence du projecteur VERS Version du projecteur et type de douille Alim Type d alimentation nécessaire P puissance maximum autorisée IP 20 utilisation intérieure uniquement UL Tensio...

Page 6: ...ing unit Power supply connection Connect the lamp cable C to the connector 5 of the ballast Place the lamp into position Engage the circuit breaker 3 and check that the protection 4 is well engaged Plug the cable 6 to the mains The checklight 1 lights up immediately Engage the automatic breaker 2 WARNING Never open the accessory cassette when the lighting unit is on Never connect to a dimmable cha...

Page 7: ...7 Lamppower Lighting unit Power supply connection Connect the lamp cable C to the connector 5 of the ballast Place the lamp into position Engage the circuit breaker 3 and check that the protection 4 is well engaged Plug the cable 6 to the mains The checklight 1 lights up immediately Engage the automatic breaker 2 WARNING Never open the accessory cassette when the lighting unit is on Never connect ...

Page 8: ...lité de modifier ses matériels sans avis préalable Les renseignements mentionnés sur cette notice sont donnés à titre indicatif et ne sauraient présenter de caractère contractuel WARNING Always use the codes when ordering spare parts ATTENTION Pour passer une commande de pièces détachées utiliser toujours les codes SPARE PARTS LIST NOMENCLATURE PIÈCES DÉTACHÉES 9 6 7 8 5 4 3 2 1 20 19 18 17 16 RJ2...

Page 9: ...w Vis M4 11 DJ40888801 Cassette cover Cache ventilation de porte accessoire 12 VI04020001 Nut Ecrou M4 13 DU30222021 Spacer Colonnette 14 VI04030011 Washer Rondelle plate Ø4 15 VI04010055 Screw Vis M4 16 VI10010013 Screw Vis M10 17 DJ40517104 Yoke bearing Canon pour lyre 18 VI10010019 Screw Screw Vis tête bombée collet carré M10 19 VI10020002 Nut Ecrou M10 20 DU40064000 Plug Bouchon M10 B Section ...

Page 10: ...r complet 2 10 8 12 3 15 13 25 22 23 4 21 20 17 18 9 1 11 24 6 16 5 14 19 7 Id Description 1 DJ30944800 Lamp compartment Boitier inférieur 2 DJ40945100 Insulation plate Plaque de cloisonnement 3 DJ30845800 Focusing rod Vis de réglage 4 DJ40845900 Guiding rod Tige de guidage 5 DU40247302 Axle Axe 6 DJ40945200 Index 7 MI00000013 Mirror Miroir 8 DU30221920 Spacer Entretoise lisse 9 PD32600003 Gel coo...

Page 11: ...Le constructeur se réserve la possibilité de modifier ses matériels sans avis préalable Les renseignements mentionnés sur cette notice sont donnés à titre indicatif et ne sauraient présenter de caractère contractuel WARNING Always use the codes when ordering spare parts ATTENTION Pour passer une commande de pièces détachées utiliser toujours les codes SPARE PARTS LIST NOMENCLATURE PIÈCES DÉTACHÉES...

Page 12: ...to ensure the correct earth bonding of the product Check with a ground bond tester is mandatory after assembly between cord and yoke screw PT La rondelle contact à picot est obligatoire pour assurer la continuité de terre du produit La vérification à l aide d un testeur de continuité de terre est obligatoire après montage entre le cordon et la vis de fourche PT Assemble and dismantle rep 4 5 6 acc...

Reviews: