SECTION 11: G
AS
P
IPING
47 of 83
SECTION 11: GAS PIPING
Install the gas hose as sho
w
n
on Page 48, Figure 28
.
The gas hose accommodates expansion of the
heating system and allo
w
s for easy installation and
ser
v
ice of the b
u
rner. Before connecting the b
u
rners to
the s
u
pply system,
v
erify that all high press
u
re testing
of the gas piping has been completed.
There is an expansion of the t
u
be
w
ith each firing
cycle. This
w
ill ca
u
se the b
u
rner to mo
v
e
w
ith respect
to the gas hose. This can ca
u
se a gas leak res
u
lting
in an
u
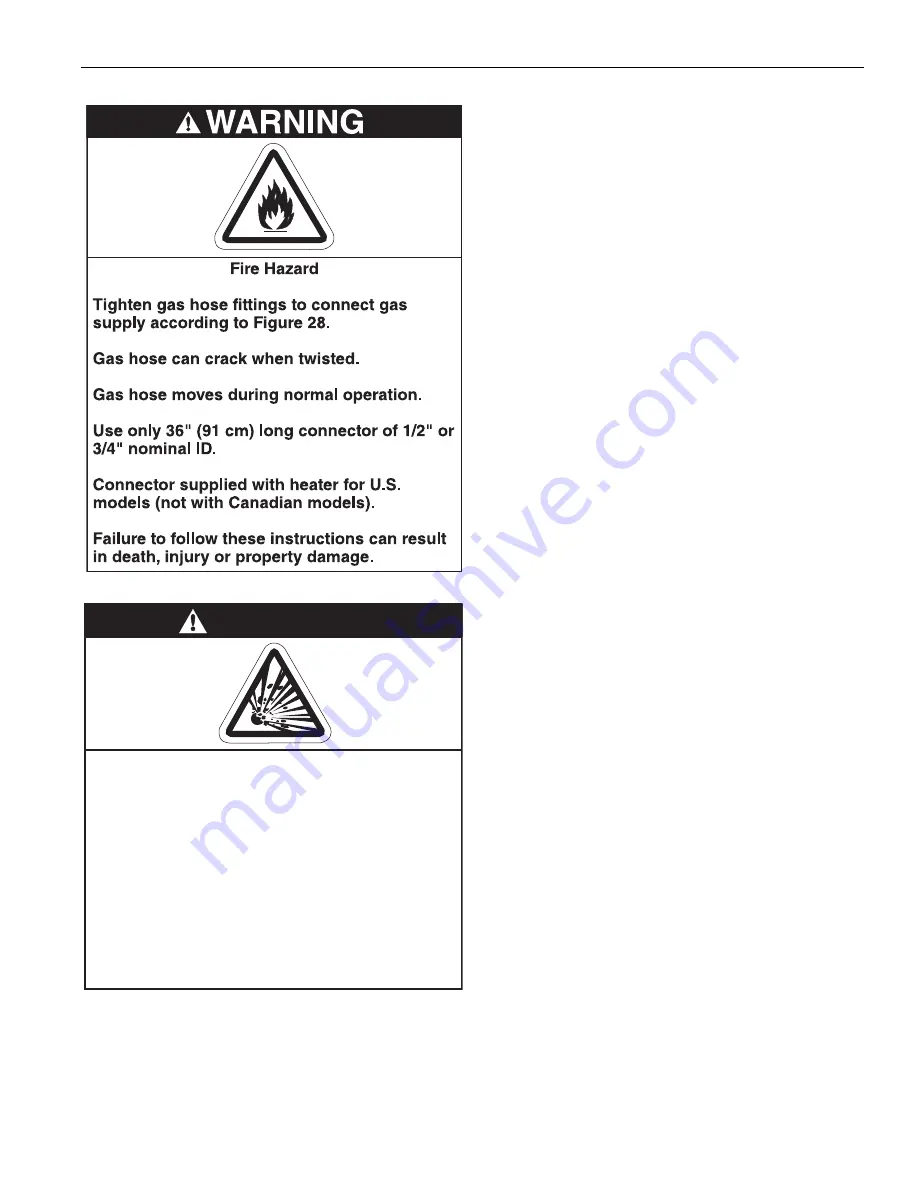
nsafe condition if the gas connection is not
made in strict accordance
w
ith
Figure 28
.
Meter and ser
v
ice m
u
st be large eno
u
gh to handle all
the b
u
rners being installed pl
u
s any other connected
load. The gas hose
w
hich feeds the system m
u
st be
large eno
u
gh to s
u
pply the req
u
ired gas
w
ith a
maxim
u
m press
u
re drop of 1/2"
w
c. When gas piping
is not incl
u
ded in the layo
u
t dra
w
ing, the local gas
s
u
pplier
w
ill
u
s
u
ally help in planning the gas piping.
Gas lines m
u
st meet applicable codes:
United States:
The Flexible Stainless Steel Gas
Hose (US models) s
u
pplied
w
ith the heater is certi-
fied per the Standard for Connectors for Gas Appli-
ances, ANSI Z21.24/CSA 6.10 - latest re
v
ision.
Canada:
The R
u
bber Type 1 Gas Hose (Canadian
models) optional
w
ith the heater is certified as being
in compliance
w
ith the Standard for Elastomeric
Composite Hose and Hose Co
u
plings for Cond
u
cting
Propane and Nat
u
ral Gas, CAN/CGA 8.1 - Latest
re
v
ision.
• Check the pipe and tubin
g
ends for leaks
before placin
g
heatin
g
e
q
uipment into
service. When checkin
g
for
g
as leaks, use a
soap and water solution; never use an open
flame.
WARNING
Explosion Hazard
Leak test all components of gas piping
before operation.
Gas can leak if piping is not installed
properly.
Do not high pressure test gas piping with
heater connected.
Failure to follow these instructions can result
in death, injury or property damage.
Summary of Contents for CoRayVac CRV-B-10
Page 2: ......
Page 4: ......
Page 6: ......
Page 71: ...SECTION 13 STARTING THE SYSTEM 65 of 83 FIGURE 42 Vacuum Reading ...
Page 81: ...SECTION17 TROUBLESHOOTING 75 of 83 17 1 Troubleshooting Flow Chart ...
Page 90: ......
Page 91: ......
Page 92: ......
Page 93: ......
Page 94: ......


