


SECTION 16: O
PERATION
AND
M
AINTENANCE
73 of 83
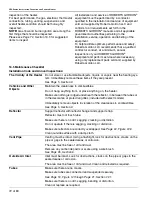
Gas Line
Check for gas leaks.
See Page 48, Figure 28
.
Combustion Chamber
Window
Make s
u
re it is clean and free of cracks or holes.
Clean or replace as req
u
ired.
Blower Scroll, Wheel and
Motor
Compressed air or a
v
ac
uu
m cleaner may be
u
sed to clean d
u
st and dirt.
Burner Head and Orifice
Clear of obstr
u
ctions. (E
v
en spider
w
ebs
w
ill ca
u
se problems).
Caref
u
lly remo
v
e any d
u
st and debris from the b
u
rner.
Electrode
Replace if there are cracked ceramics, excessi
v
e carbon resid
u
e, or erosion
of the electrode.
The electrode gap sho
u
ld be 1/8" (3 mm).
Thermostat or Sensor
There sho
u
ld be no exposed
w
ire or damage to the thermostat or sensor.
See Page 49, Section 12
.
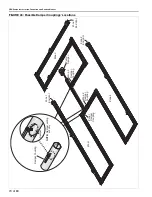
Suspension Points
Make s
u
re the heater is hanging sec
u
rely. Look for signs of
w
ear on the chain
or ceiling.
See Page 19, Figure 14
.
Filter
Check for dirt or d
u
st. Clean or replace as req
u
ired.
Decorative and Protective
Grille (optional)
The grille m
u
st be sec
u
rely attached.
Check that side reflector extensions are installed correctly and sec
u
red in
place if necessary. (Decorati
v
e grille only.)
See Page 31, Section 8.6.1
through Page 33, Section 8.7.3
Make s
u
re shield is installed correctly and sec
u
red in place if necessary.
(Decorati
v
e grille only.)
See Page 31, Section 8.6.2
.
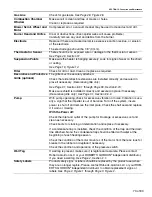
Pump
With p
u
mp operating, check for excessi
v
e
v
ibration or noise. Vibration is
u
s
u
-
ally a sign that the impeller is o
u
t of balance. T
u
rn off the system, ins
u
re
po
w
er is sh
u
t off and remo
v
e the inlet plate. Check the shaft seal and replace
it if
w
orn or missing.
With the Power off:
Check the inlet and o
u
tlet of the p
u
mp for blockage or excessi
v
e soot and
clean as necessary.
Check boots for cracking or deterioration and replace if necessary.
If a condensate trap is installed, check the condition of the trap and the drain
line attached. Note: the condensate trap sho
u
ld be filled
w
ith
w
ater at the
beginning of each heating season.
Check the condition of the motor mo
u
nts. Lift the motor from the rear; look for
breaks in the r
u
bber and replace if necessary.
Check the condition and operation of the press
u
re s
w
itch.
Wall Ta
g
If
w
all tag is present, make s
u
re it is legible and acc
u
rate. Please contact
Roberts-Gordon LLC or yo
u
r ROBERTS GORDON
®
independent distrib
u
tor,
if yo
u
need a
w
all tag.
See Page 4, Section 2.1
.
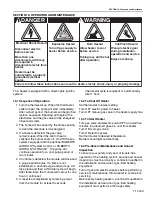
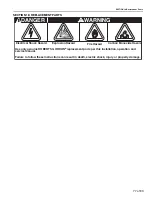
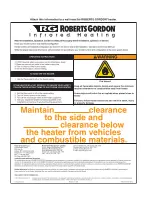
Safety Labels
Prod
u
ct safety signs or labels sho
u
ld be replaced by the prod
u
ct
u
ser
w
hen
they are no longer legible. Please contact Roberts-Gordon LLC or yo
u
r ROB-
ERTS GORDON
®
independent distrib
u
tor to obtain replacement signs or
labels.
See Page 2, Figure 1
through Page 3, Figure 2
.
Summary of Contents for CoRayVac CRV-B-10
Page 2: ......
Page 4: ......
Page 6: ......
Page 71: ...SECTION 13 STARTING THE SYSTEM 65 of 83 FIGURE 42 Vacuum Reading ...
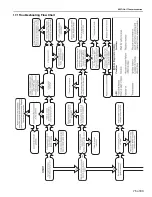
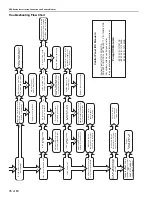
Page 81: ...SECTION17 TROUBLESHOOTING 75 of 83 17 1 Troubleshooting Flow Chart ...
Page 90: ......
Page 91: ......
Page 92: ......
Page 93: ......
Page 94: ......


