SECTION 8: P
ROGRAMMING AND
T
ROUBLESHOOTING THE
S
YSTEM
61
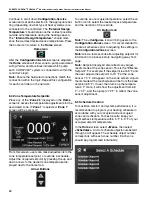
Select
<Schedule Object #1>
, to access the Calen-
dar View screen.
Calendar View
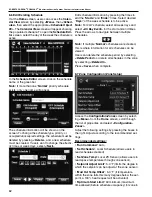
To add a schedule, press the plus icon on the bottom
right of the screen.
Plus Icon
• The default Schedule Name is "Schedule 1". Edit
the name by pressing the box to bring up the key
board. Enter new schedule name if desired and
press
<Done>
when complete.
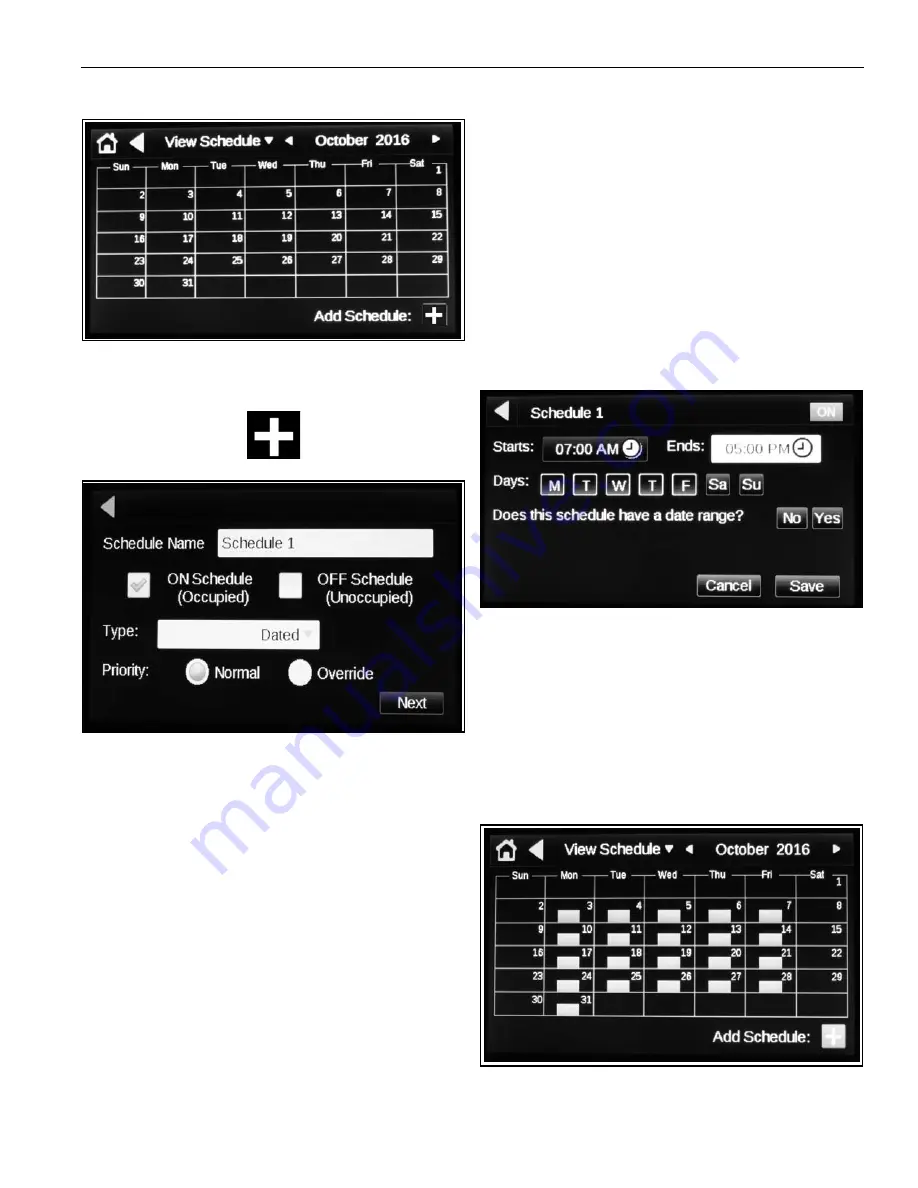
Note:
When viewing schedules (shown in the follow-
ing screens) only the name of the one, priority 'nor-
mal' schedule will appear. However, all programmed
information is effective.
• Choose whether or not this is an occupied schedule
by selecting the box to the left of
'ON Schedule
(Occupied)'
. A check mark will appear in the box
indicating that you have selected that option. Select
the box to the left of
'OFF Schedule (Unoccupied)'
if the schedule is for unoccupied times.
• Next, choose the
'Type'
of schedule by pressing the
drop down menu. Options include: Dated, Weekly,
Continuous. Select
'Weekly'
to create a complete 7-
day schedule.
Note:
'Dated'
will allow users to set a specific time
and date for the system to be active. The date can be
set to a single day or a specific day each month or
each year.
'Continuous'
will allow users to select a
start time and date and end time and date for the
system to be active continuously.
• For
'Priority'
, select
'Normal'
to create an occu-
pied/unoccupied status in the applicable zone, for a
certain time duration, for certain days dependent on
the type of schedule selected.
Note:
The time slot must be vacant for the schedule
to be effective. Choosing
'Override'
will reverse a
normal schedule which is in place by turning an
occupied time to unoccupied or vice versa.
Press
<Next>
when complete
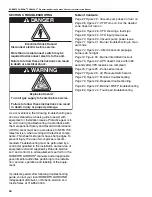
Press the times to edit the
'Starts:'
and
'Ends:'
times. Select desired
'Days:'
of the week schedule is
to be active.
Optional:
Users can input a date range by pressing
<Yes>
and selecting
'Starts:'
and
'Ends'
dates.
Note:
For 24/7 schedule, select all week days and
select
<All Day Event>
for the start and end times.
Press
<Save>
when complete.
The
Calendar View
screen populates the schedule.
Summary of Contents for CORAYVAC
Page 2: ......
Page 4: ......
Page 69: ...SECTION 8 PROGRAMMING AND TROUBLESHOOTING THE SYSTEM 65 THIS PAGE LEFT INTENTIONALLY BLANK ...
Page 71: ...SECTION 9 TROUBLESHOOTING 67 FIGURE 26 Vacuum pump does not turn on ...
Page 75: ...SECTION 9 TROUBLESHOOTING 71 FIGURE 31 Burner troubleshooting in manual mode ...
Page 77: ...SECTION 9 TROUBLESHOOTING 73 After 45 second prepurge burners do not light continued ...
Page 81: ...SECTION 9 TROUBLESHOOTING 77 FIGURE 36 Air Pressure Switch alarm ...
Page 83: ...SECTION 9 TROUBLESHOOTING 79 FIGURE 38 Repeater troubleshooting ...
Page 85: ...SECTION 9 TROUBLESHOOTING 81 BACnet MS TP troubleshooting continued ...
Page 109: ...SECTION 13 TOUCHSCREEN TREE 105 Touchscreen Tree Overview continued ...
Page 111: ...SECTION 13 TOUCHSCREEN TREE 107 FIGURE 47 Maintenance Unit FIGURE 48 Alarms ...
Page 113: ...SECTION 13 TOUCHSCREEN TREE 109 FIGURE 51 Configuration Zones FIGURE 52 Configuration Unit ...
Page 115: ...SECTION 13 TOUCHSCREEN TREE 111 FIGURE 55 Touchscreen System FIGURE 56 Touchscreen Setup ...
Page 118: ...ROBERTS GORDON CORAYVAC MODULATING HEATING CONTROL CONTROLLER INSTALLATION MANUAL 114 ...

