background image

21

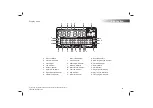
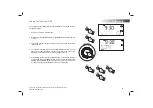
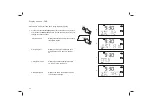
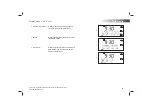
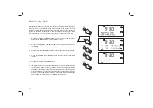
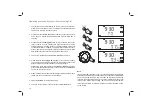
Display options - FM

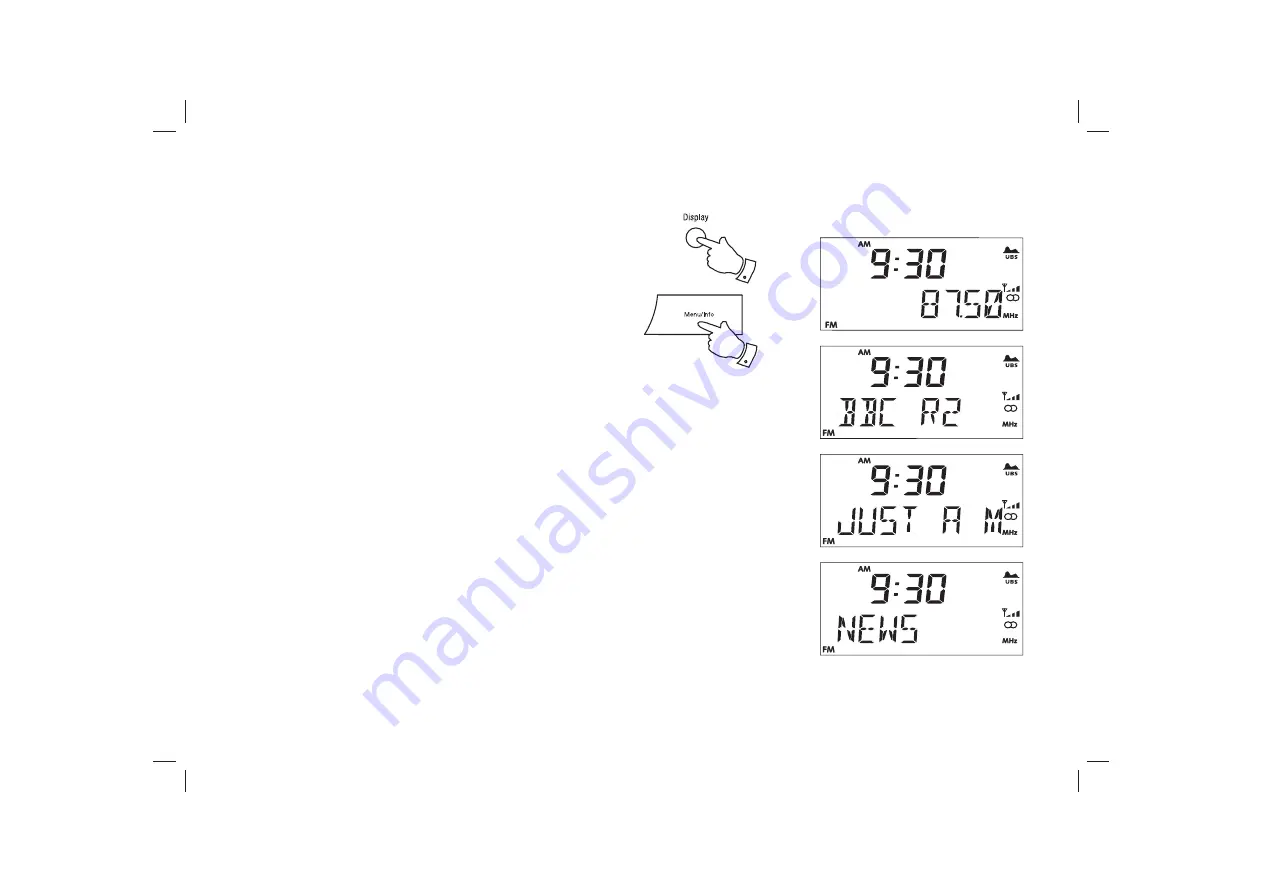
Your sound system has a range of display options for FM mode:-
The Radio Data System (RDS) is a system in which inaudible digital 
information is transmitted in addition to the normal FM radio programme. 
RDS offers several useful features. The following are available on your 
sound system.
 
1.  Press and release the 

Display 

button (on the remote control) or press 

and release the 

Menu / Info 

button (on the sound system) to cycle 

through the various options.

 a. 

Frequency 


Displays the frequency of the station being 


  listened 

to.


b. Station name  

Displays the name of the station being    


  listened 

to.


c. Scrolling text   

Displays scrolling text messages such as  


artist/track name, phone in number, etc


d. Programme type 

Displays the type of station being  


listened to e.g. Pop, Classic, News, etc.

Note:

 If no RDS information is available, the radio will be unable to display 

the station name, radio text and programme type information. If the signal 
is too weak then the radio will display only the FM frequency and the 
optional Stereo indicator.

1

1

a

b

c

d

Summary of Contents for SOUND 70

Page 1: ...Please read this manual before use ROBERTSEnjoy Listening CD USB SD DAB FM Digital Sound System with dock for iPod and iPhone ...

Page 2: ...CD MP3 WMA 28 36 Compact discs 28 29 Playing a CD 30 32 Repeat intro and shuffle options 33 34 Creating a playlist program play 34 35 Display options 36 Contents Using SD cards or USB memory devices 37 38 SD USB file and folder selection 37 38 iPod and iPhone docking 39 41 Navigating your iPod 40 Playing a file on your iPod 40 41 Clock and Alarms 42 51 Alarms 42 44 Cancelling alarms 44 Controlling...

Page 3: ... CD MP3 WMA player describes how to play digital audio CDs or MP3 WMA files which have previously been recorded to CD R or CD RW The section for SD USB media describes playback using SD card and USB memory devices The section for iPod and iPhone docking describes how to use your Sound 70 to play audio files or video soundtracks directly from your iPod and iPhone The section titled Clock and Alarms...

Page 4: ...ion or video soundtracks from your iPod and iPhone Clock display with time and day when in standby Note Transparent or partly transparent CDs may not always be playable Unusually thin Eco CDs cannot be played Some copy protected CDs may not be playable An alarm with snooze feature to wake you to either buzzer radio CD SD card USB memory device or iPod with humane wake system on buzzer alarm Adjust...

Page 5: ... Volume button 2 Tuning Down Rewind button 3 Function button 4 On Off button 5 Stop button Front 1 2 3 4 5 6 7 9 10 11 12 13 14 6 LCD display 7 Dock connector for iPod and iPhone 8 CD open button 9 Infra red sensor 10 Play Pause button 11 EQ button 12 Menu Info button 13 Access to further controls 14 Tuning Up Fast forward button 8 ...

Page 6: ...Controls Front further controls 15 SD card slot 16 USB socket 15 16 17 18 17 Intro Repeat Timer button 18 Program Random Time Preset button 5 ...

Page 7: ... Introduction Controls Rear view 19 AC mains socket 20 USB socket for software upgrades 21 DAB FM wire aerial 22 Left Auxiliary input socket USB AUX IN L R SPEAKER L R 19 20 21 23 Right Auxiliary input socket 24 Left speaker output 25 Right speaker output 26 Speakers x 2 not shown 22 24 25 23 ...

Page 8: ...7 button 13 Preset 1 6 button 14 Preset 4 9 button 1 2 3 4 5 6 7 8 9 10 11 12 13 14 16 15 17 18 19 20 21 22 23 24 25 26 27 28 15 Battery compartment 16 Preset 5 button 17 Preset 5 10 button 18 Preset 3 8 button 19 Mute button 20 Folder Down button 21 Volume Up button 22 Select button 23 Tuning Up Fast forward button 24 Tuning Down Rewind button 25 Dimmer button 26 Program Random button 27 Nap Slee...

Page 9: ...ure the and the ends of the batteries are positioned as shown inside the compartment Close the battery cover 3 If the remote is not to be used for an extended period of time it is recommended that the batteries are removed IMPORTANT The batteries should not be exposed to excessive heat such as sunshine fire or the like After use disposable batteries should if possible be taken to a suitable recycl...

Page 10: ...Connect the plug of the speaker wire into the socket on the rear of sound system marked L for the left hand speaker Connect the plug of the speaker wire into the socket on the rear of sound system marked R for the right hand speaker The placement of the loudspeakers will depend upon the layout of the room Location is not critical but do not place them in direct sunlight or over sources of heat suc...

Page 11: ...h indicator H FM stereo indicator A I MHz kHz indicator J Sleep indicator K Radio Alarm indicator L Random indicator M Buzzer Alarm indicator N File Intro indicator O Nap indicator P RDS text indicator B C D E F G H I J K M L N O P Q R S T V W X U Q Repeat indicators R RDS Program type indicator S FM RDS indicator T DAB indicator U FM indicator V Single line text display W Play Pause indicators X ...

Page 12: ...s plug is used as the means of connecting the sound system to the mains supply The mains socket used for the sound system must remain accessible during normal use In order to disconnect the sound system from the mains completely the mains plug should be removed from the mains socket outlet completely 5 When your sound system is first switched on the clock display will show 0 00 and the unit will e...

Page 13: ...on will be selected 5 The first station in the list of stations found will be played The display will show the station name When the auto tune is complete the first station in numeric alpha order 0 9 A Z will be selected 6 If the station list is still empty after the Autotune your radio will display No DAB 7 If no signals are found it may be necessary to relocate your sound system to a position gi...

Page 14: ...show TUNING while your radio finds the new station 4 Adjust the Volume to the required settings Note If after selecting a station the display continues to show No DAB it may be necessary to relocate your sound system to a position giving better reception Secondary services DAB 1 Certainradiostationshaveoneormoresecondaryservicesassociated with them The secondary service will then appear immediatel...

Page 15: ...nd new stations using the sound system press and release the rotary control 4 Your radio will perform a scan of the band III DAB channels As new stations are found the station counter on the right hand side of the display will increase and stations will be added to the list 5 Alternatively press and hold the Menu button on the sound system or press and release the Menu button on the remote then pr...

Page 16: ... on the sound system to cycle through the various options a Station name Displays the station name for the currently tuned DAB station b Scrolling text Displays scrolling text messages such as artist track name phone in number etc c Programme type Displaystypeofstationbeinglistenedto e g Pop Classic News etc d Multiplex Name Displays the name of multiplex to which current station belongs 1 1 ...

Page 17: ...ay modes DAB cont e Channel frequency Displayschannelnumberandfrequency for the currently tuned DAB station f Bit rate Displays the digital bit rate for the currently tuned DAB station g Signal error Displays signal error for the currently tuned DAB station The lower the number the better the DAB signal e f g ...

Page 18: ... on the sound system 2 Press the Tuning Up or Down buttons until MANUAL appears on the display 3 Press and release the Select button to enter the manual tuning mode 4 Press the Tuning Up or Down buttons to select the desired DAB channel 5 Press and release the Select button 6 If a signal is present this will be indicated on a signal strength display The minimum signal marker shows the minimum sign...

Page 19: ...onbuttonuntiltheDABmodeisselected 3 Press and release the Menu button on remote control or press and hold the Menu button on the sound system 4 Press the Tuning Up or Down buttons until DRC VAL appears on the display Press and release the Select button The display will show the current DRC value 5 PresstheTuningUporDownbuttonstoselecttherequiredDRCsetting default is 0 6 PressandreleasetheSelectbut...

Page 20: ...5 Press and hold the Tuning Down button for 2 3 seconds to cause your radio to search from high frequency to low frequency and to stop automatically when it finds a station of sufficient strength Alternatively press and release the Tuning Up or Down button then press and release the Auto button on the remote or the Auto Tune control on the sound system 6 When the end of the waveband is reached you...

Page 21: ...the wire aerial located on the rear of your sound system Place the wire antenna so that it is as straight as possible extending either above or below the sound system 2 Press and release the On Off button to switch on your sound system 3 Press and release the Function button until the FM mode is selected 4 Repeatedly press and release the Tuning Up or Down buttons to tune to a station The frequenc...

Page 22: ...und system to cycle through the various options a Frequency Displays the frequency of the station being listened to b Station name Displays the name of the station being listened to c Scrolling text Displaysscrollingtextmessagessuchas artist track name phone in number etc d Programme type Displays the type of station being listened to e g Pop Classic News etc Note If no RDS information is availabl...

Page 23: ...s and release the Menu button on remote control or press and hold the Menu button on the sound system 4 Press the Tuning Up or Down buttons until AUDIO appears on the display Press and release the Select button 5 To switch to mono to reduce the hiss from a weak FM signal press the Tuning Up or Down buttons until MONO appears on the display Press and release the Select button to confirm the setting...

Page 24: ...ystem 2 Press the Function button to select the desired waveband DAB or FM 3 Tune to the required station as previously described 4 Press and hold down the required Preset button until the display shows for example P 1 SAVED The currently tuned station will be stored under the chosen preset button 5 Presets 6 to 10 are obtained by breifly pressing the 5 button and then pressing and holding Preset ...

Page 25: ...ne to the required station as previously described 4 PressandreleasetheProgrambutton Thedisplaywillshow forexample EMPTY 1 if no station has been stored to that preset 5 Use the Tuning Up or Down buttons to select the desired preset station number under which you wish to store the station 6 Press and hold the Program button until the display shows for example P 1 SAVED The station will be stored u...

Page 26: ...TY 1 if no station has been stored to that preset If a preset has been stored then the display will show either the station name for DAB stations or the frequency for FM stations 4 Presets 6 to 10 are obtained by briefly pressing the 5 button and then briefly pressing Preset button 1 5 e g preset 7 can be recalled by briefly pressing the 5 button then briefly pressing Preset button 2 5 Your radio ...

Page 27: ...B or FM 3 Press and release the Program button The display will show for example 1 Empty if no station has been stored to that preset If a preset has been stored then the display will show either the station name for DAB stations or the frequency for FM stations 4 Press the Tuning Up or Down buttons to select the desired preset station 5 Press and release the Select button Your radio will tune to ...

Page 28: ...elease the Menu button on remote control or press and hold the Menu button on the sound system 4 Press the Tuning Up or Down buttons until LANGUAGE shows on the display Press and release the Select button to enter the language adjustment menu 5 Press the Tuning Up or Down buttons until your desired language appears on the display 6 PressandreleasetheSelectbuttontoconfirmyourchoice Thedisplay will ...

Page 29: ...ting equipment or in motor cars parked in the sun CD R CD RW discs Your Sound 70 can playback CD DA format audio CD R CD RW discs that have been finalised upon completion of recording Finalising enables a CD R CD RW disc to playback on audio players such as your Sound 70 A disc which has not been finalised may have information added to it using a computer but may not always be playable You may hav...

Page 30: ...sound system reads MP3 or WMA files with a maximum of 255 files per folder An MP3 or WMA CD may not contain more than 512 files or albums in total MP3 or WMA files must be created with an audio sample rate of 44 1kHz this is normal for files created from CD audio content Both MP3 and WMAfiles may be recorded on to the same media When burning CD R and CD RWs with audio files various problems may ar...

Page 31: ...sound system 2 Press and release the Function button until the CD mode is selected The CD player will scan the contents of the CD and READING will appear on the display Audio CD the total number of tracks and total playing time will then be displayed MP3 WMA CD The total number of files and folders will then be displayed 3 Press the Play Pause button to start playback The display will show the fir...

Page 32: ...ously stopped Note that if mains power is removed and restored the Bookmark setting will be cancelled and the CD will then play from the beginning 1 When the CD is playing press the Stop button once The display will then show Audio CD The elapsed playing time and RESUME MP3 WMA CD The elapsed playing time and RESUME You can then put the radio into standby or select an alternative function 2 To res...

Page 33: ...indicator will flash on the display then press either the Tuning Up or Down buttons to change to the desired track the indicator will flash on the display 3 You can also skip albums or tracks when the player is in stop mode using either the Folder Up or Down buttons or the rotary control on the sound system Note The rotary contol can only be used to skip folders when the CD is in stop mode If the ...

Page 34: ... Audio CD Repeat 1 Repeat ALL Normal Play MP3 WMA CD Repeat 1 Repeat Folder Repeat ALL Normal Play 2 The display will show the currently selected repeat mode CD Intro function 1 When in the stop mode press and release the Intro Repeat button on the remote or the Intro Repeat Timer button on the sound system once to play the first 10 seconds of each of the tracks on the disc INTRO appears on the di...

Page 35: ...o return to normal play RANDOM will disappear from the display Creating a play list program play By programming the player you can play up to 60 tracks in any desired order 1 Whilst the CD is in Stop mode press and release the Prog Random button on the remote or the Prog Random button on the sound sytem The display will show P 01 2 Select the first track using the Tuning Up or Down buttons PROG wi...

Page 36: ...ugh the currently entered program 2 At any point you may change the number of a previously entered track by using the or buttons followed by the Prog Random button to store the new entry and to show the next entry in the program 3 If the program step number flashes it is because no track has yet been stored for that entry in the program You may extend a previously entered program by selecting a ne...

Page 37: ...ease the Menu Info button on the sound system to select the required display option The display options are Title Artist and Album 1 1 Display options Audio CD When inAudio CD mode your sound system has a range of display options 1 Press and release the Display button on the remote control or press and release the Menu Info button on the sound system to select the required display option The displ...

Page 38: ...ound 70 has been tested with a range of USB memory devices of up to 32GB capacity and SD cards up to 2GB and SDHC cards up to 32GB are supported However there are many different card variants available and not all cards can be guaranteed to work in the Sound 70 Memory must use the FAT or FAT 32 filing system in order to operate in the Sound 70 Audio formats supported for playback are MP3 and WMA P...

Page 39: ...d mode is shown on the display 5 Playback control bookmark and program play using an SD card or USB memory device is similar to CD MP3 WMAmode see page 30 36 MP3 or WMA files are played back in the order that they are written to the media by your computer except when the shuffle mode is used 6 If there is no SD card or USB memory device inserted the display will show NO SD or NO USB 7 Place the un...

Page 40: ... correct adaptor fitted to the sound system Throughout this section of this book iPod means iPod or iPhone Docking your iPod 1 Ensure that the sound system is in standby 2 Place the iPod docking adaptor see above into the iPod docking recess so that it is securely seated 3 Carefully place your iPod onto the Universal Dock connector 4 Press and release the On Off button to switch on your sound syst...

Page 41: ...el menu item you may then navigate further using the Folder Up or Down or the rotary Select Auto Tune control and Select buttons Playing a file on your iPod 1 When you have found the required item use the Select button to start the iPod playing 2 Adjust the volume to the required setting using the Volume Up and Down buttons or the rotary volume control on your sound system 3 To pause playback pres...

Page 42: ...m is reached Display modes iPod When in iPod mode your sound system has a range of display options 1 Press and release the Display button on the remote control to select the required display option Alternatively whilst your iPod is playing a track the display options will scroll across the screen The display options are Title Artist and Album 1 1 1 ...

Page 43: ...at the clock time is set see page 49 50 2 With your sound system in standby mode press and hold the Intro Repeat button on remote control or the Intro Repeat Timer button on the sound system 3 Press the Tuning Up or Down buttons to choose whether to set the alarm to On or Off If Off is selected the unit will exit the alarm menu 4 With On selected on the display press and release the Select button ...

Page 44: ...ption will flash on the display 9 Press the Tuning Up or Down buttons to select the required day option on the display Your alarm can be set to the following options Once will sound at one time only Daily will sound everyday Weekdays will sound only on weekdays Weekends will sound only on weekends 10 Press and release the Select button The alarm volume will flash on the display The sound system us...

Page 45: ...nds The alarm will sound at the selected times for up to 60 minutes unless cancelled The volume used for the alarm will be specified during the alarm setting procedure If the radio cannot connect to the last listened radio station the buzzer will be used instead Note If the radio is switched on because of a radio alarm you can only use the volume and on off controls When the buzzer alarm activates...

Page 46: ...rolling alarms in standby When your sound system is in standby the alarms can be controlled using the Intro Repeat Timer button This avoids the risk of disturbance to someone who is asleep 1 To change the states of the alarm when in standby press and release the Intro Repeat button on the remote or the Intro Repeat Timer button on the sound system The display will cycle through alarm disabled and ...

Page 47: ...ooze function 1 When the alarm sounds pressing the rotary control on the sound system or the Snooze button on the remote will silence the alarm for 5 minutes SNOOZE will show on the display This sequence can be repeated during the 60 minute alarm period 2 To cancel the Snooze function press the On Off button 1 1 2 ...

Page 48: ...p timer to be set to 00 which will cancel the sleep function 3 The display will exit the sleep options The sleep symbol will show on the display 4 Your sound system will switch off after the preset sleep time has elapsed 5 To cancel the sleep timer and switch off your sound system before the chosen sleep time has elapsed press and release the On Off button To cancel the sleep timer without switchi...

Page 49: ...n 10 and 120 minutes A further press will cause the nap timer to be set to OFF which will cancel the nap function 3 The display will exit the nap options The nap symbol will show on the display 4 When the selected nap timer has elapsed the buzzer will sound 5 To cancel the nap timer and switch off your sound system before the chosen nap time has elapsed press and release the On Off button To disab...

Page 50: ... clock format can only be set while the unit is in standby mode 1 To set the clock format press and release the Prog Random on the remote or the Prog Random Time button on the sound system to display either 12 or 24 hour format 2 If the 12 hour clock format is chosen the radio will then use the 12 hour clock for setting of alarms and will display a 12 hour clock with an AM or PM indicator on the d...

Page 51: ...remote or press and hold the Prog Random Time button on the sound system The clock hour digits will flash on the display 2 Press and release the Tuning Up or Down buttons to choose the clock hour and then press and release the Select button to enter the hour setting The clock minute digits will then flash on the display 3 Press and release the Tuning Up or Down buttons to choose the clock minute a...

Page 52: ...sted when the radio is in standby or when the unit is in use 1 In order to adapt the intensity of the display to suit the ambient room lighting press the Dimmer button on the remote to select the dimmer brightness from High Mid Low and an almost off night time setting 1 ...

Page 53: ... are listening to The Sound 70 has six preset equalizer options Alternatively you may set the treble and bass levels to your own preferences 1 Press and release the On Off button to switch on the sound system 2 Press and release the Equalizer button until the desired equalizer option is selected a Classic b Pop c Jazz d Rock e UBS extra bass f Normal For details on setting the bass and treble sett...

Page 54: ...izer button until USER is shown on the display 3 Press and hold the Equalizer button The current bass setting will show on the display 4 To adjust the Bass setting press the Tuning Up or Down buttons until the desired level is displayed 5 After several seconds the display will exit the equalizer menu 1 2 3 4 4 2 3 ...

Page 55: ...hown on the display 3 Press and hold the Equalizer button The current bass setting will show on the display 4 To access the Treble setting press and release the Equalizer button again The current Treble setting will show on the display 5 To adjust the Treble setting press the Tuning Up or Down buttons until the desired level is displayed 6 After several seconds the display will exit the equalizer ...

Page 56: ...n to mute the sound output 2 Press and release the Mute button again or one of the Volume buttons to un mute the sound output USB socket for software upgrade In the event that any software update is made available for your sound system information on how to update your sound system will be made available via our website at http www robertsradio co uk 1 2 ...

Page 57: ...und system has ensure your sound system is in DAB or FM mode 2 Press and release the Menu button on remote control or press and hold the Menu button on the sound system 3 Press the Tuning Up or Down buttons until SW VER appears on the display Press and release the Select button 4 The display shows the software version information 5 Press and release the Menu button to exit the software menu 2 5 3 ...

Page 58: ...ntoconfirmtheresetoperation 6 Afullresetwillbeperformed Thestationlistandpresetswillbeerased The alarm will be cancelled audio equalizer and display brightness settings will have been set to their default values The clock will be reset and the unit will behave as when first switched on see page 12 In case of malfunction due to electrostatic discharge reset the product usingtheaboveprocedure Insome...

Page 59: ...se standard phono cables to connect and external audio source for example iPod MP3 or CD player to AUX IN L and AUX IN R terminals 2 Press and release the On Off button to switch on the sound system 3 Press and release the Function button until AUX is displayed 4 Adjust the volume setting on your iPod MP3 or CD player if necessary to ensure an adequate signal level and then use the Volume Up or Do...

Page 60: ... dripping or splashing and that no objects filled with liquids such as vases shall be placed on the sound system It is recommended to operate the product such that there is a minimum distance 10cm recommended to adjacent objects in order to ensure good ventilation The ventilation of the product should not be restricted by covering it or its ventilation openings with items such as newspapers tablec...

Page 61: ... the right to amend the specification without notice Specifications Power Requirements Mains 100 240V 50 60Hz Battery Remote control 2 x AAA Frequency Coverage FM 87 5 108MHz DAB 174 928 239 200MHz Circuit features Output Power 2 x 5 watts Auxiliary in socket Aerial System FM Wire aerial DAB Wire aerial Information ...

Page 62: ...spose of the plug immediately to avoid a possible shock hazard by inadvertent connection to the mains supply If this product is not supplied with a mains plug or one has to be fitted then follow the instructions given below IMPORTANT DO NOT make any connection to the larger terminal which is marked with the letter E or by the safety earth symbol or coloured Green or Green and yellow The wires in t...

Page 63: ...iPhone mean that an electronic accessory has been designed to connect specifically to iPod or iPhone respectively and has been certified by the developer to meet Apple performance standards Apple is not responsible for the operation of this device or its compliance with safety and regulatory standards Please note that the use of this accessory with iPod or iPhone may affect wireless performance In...

Page 64: ...he dealer from whom the instrument was purchased It is likely that your Roberts dealer will be able to attend to any defect quickly and efficiently but should it be necessary the dealer will return the instrument to the Company s service department for attention In the event that it is not possible to return the instrument to the Roberts dealer from whom it was purchased please contact Roberts Rad...

Reviews: