59
Clock and Alarms
Automatically updating the clock
Your audio system will normally update the clock automatically when connected
to the internet. If you enter a time setting manually, the audio system will calculate
a local time offset which is then stored in memory. Whenever it synchronises the
clock using the internet, including after a power failure, your audio system will then
set the clock automatically using this information.
Alternatively you may specify that the time is not automatically updated. In this case
the clock must always be set manually after a power interruption.
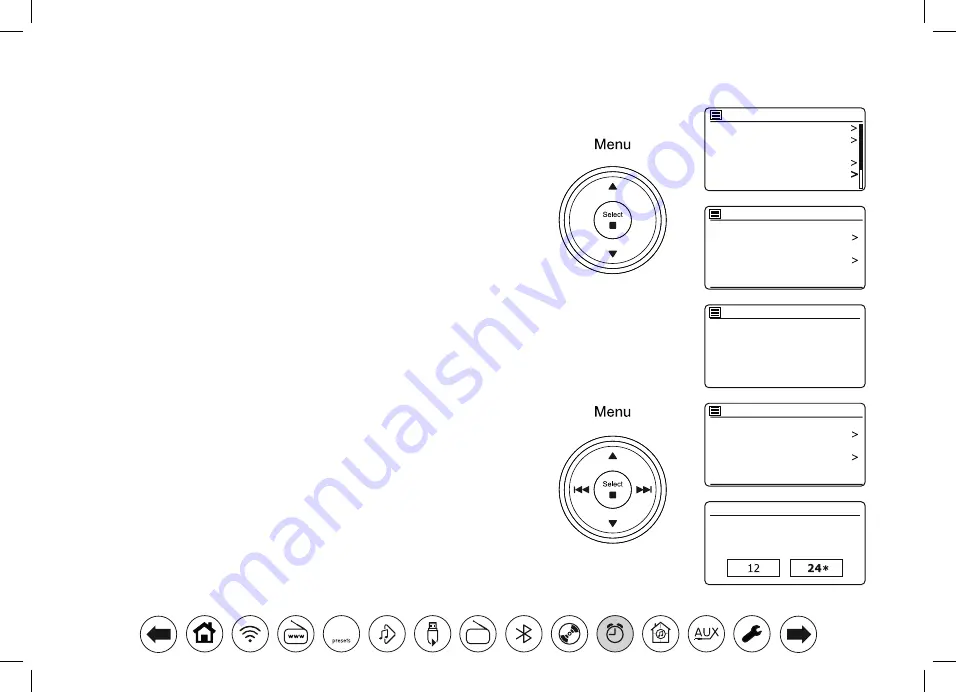
1. With your audio system switched on, press
Menu
.
2. Choose
'System settings'
,
'Time/Date'
,
'Auto update'
and then choose an update
option from
'Update from DAB'
,
'Update from FM'
,
Update from Network'
or
'No update'
as required.
Setting the clock format
The clock display used in Standby mode and on the playing mode screens can be
set to 12 or 24 hour format. The selected format is then also used when setting
the alarms.
1. With your audio system switched on, press
Menu
.
2. Choose
'System settings'
,
'Time/Date', Set format'
and then select either 12 or
24 hour. The current clock display format is marked with an asterisk.
If the 12 hour clock format is chosen, the audio system will then use the 12 hour
clock for the setting of alarms, and will display a 12 hour clock with an AM or
PM indicator when in standby mode.
Set Time/Date
Auto update
Set format
Set timezone
Daylight savings
Time/Date
Auto update
Update from DAB
Update from FM
Update from Network
No update
*
Set Time/Date
Auto update
Set format
Set timezone
Daylight savings
Time/Date
Date/Time
12/24 hour format
Backlight
Equaliser
Streaming audio quality
Network
Time/Date
Inactive Standby
System settings


