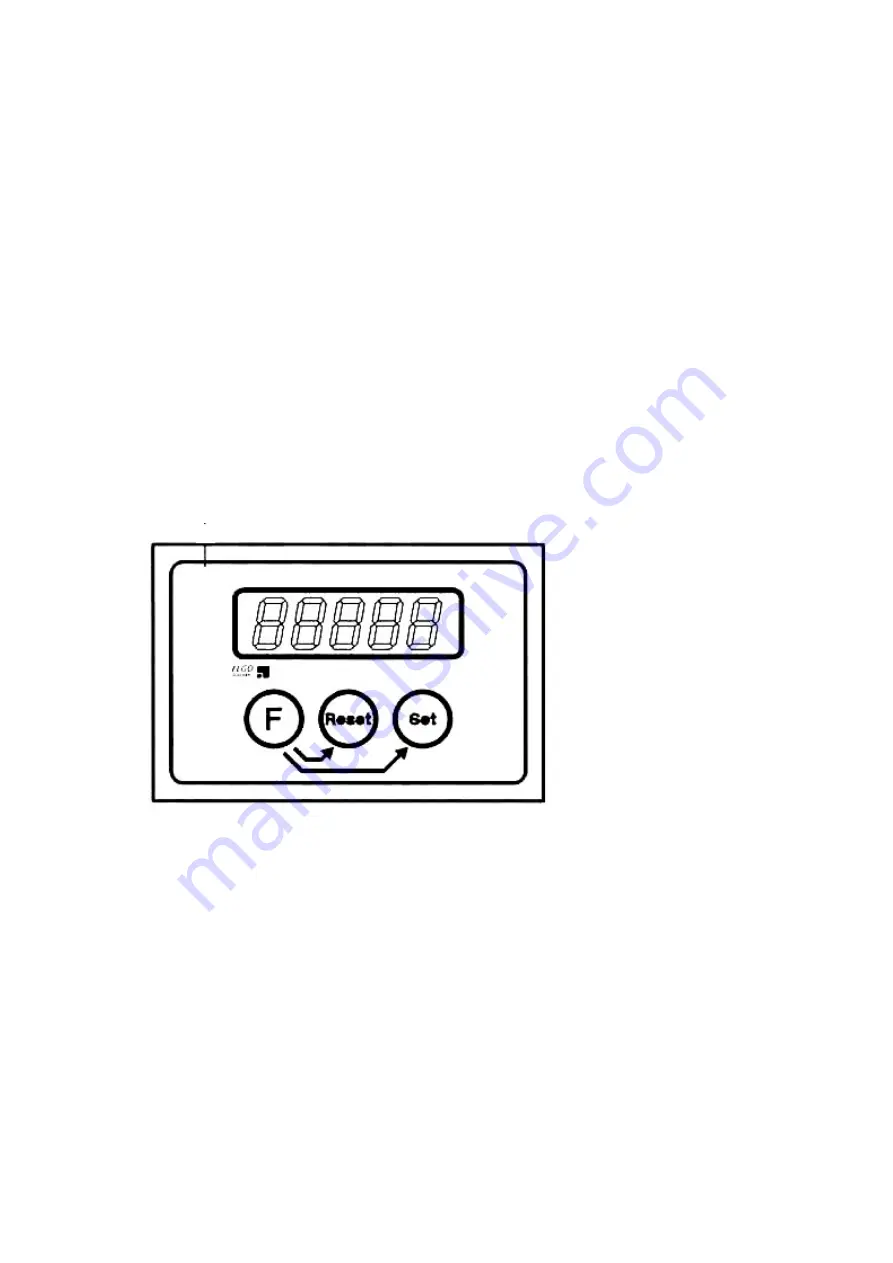
Calibration of the digital read out (fig. 6)
It is highly recommended that each time the planer knives are changed, the digital
read out is calibrated, this to avoid measurement errors.
Calibration is done as follows:
- set the thicknesser table at a random height and thickness a sample.
- now measure exactly the thickness of the sample.
- now the digital read out has to be set at the same measure, and this can be
achieved as follows: press simultaneously the buttons F and SET on the read-out:
Now the read-out begins to count up at 3 progressive speed rates:
- Rate 1: at 1Hz for 10 sec.
- Rate 2: at 10 Hz for 10 sec.
- Rate 3: at 1000 Hz for as long as the 2 buttons F and SET are held.
- Shortly before the desired value is reached, release the two buttons and press the
same two buttons so as to approach the desired value with the slowest rateof 1 Hz.
The thicknessser now is calibrated over the full 300 mm capacity.
To set the read-out at 0, simultaneously press Set and RESET.
fig.6
Important
Before starting to work on the thicknesser always ensure that the anti-kickback
protection fingers are clean and hang down freely in position under their own weight.
These anti-kickback fingers should be inspected on a regular base, and kept clean and
free of any resin deposits whatsoever.
Ensure the correct position and locking of the dust chute.
Roller supports should be used when long workpieces are machined.
Ensure the ticknesser table is well cleaned, since a smooth table surface is essential
for good operation of the thicknesser.
and RESET.
14
F
Summary of Contents for D 630
Page 7: ...General dimensions 7 ...
Page 8: ...8 ...
Page 20: ...20 ...
Page 21: ...21 ...
Page 22: ...22 ...
Page 23: ...23 ...
Page 24: ...24 ...
Page 25: ...25 ...
Page 26: ...26 ...
Page 27: ...27 ...
Page 28: ...28 ...
Page 29: ...29 ...
Page 30: ...30 ...
Page 31: ...31 ...
Page 32: ...32 ...
Page 33: ...33 ...
Page 34: ...34 ...
Page 35: ...35 ...
Page 36: ...36 ...
Page 37: ...37 ...
Page 38: ...38 ...
Page 39: ...39 ...
Page 40: ...40 ...


