background image


English

14


Silverline - PS 3200 

V0713

Starting up the machine 

(PS Version)

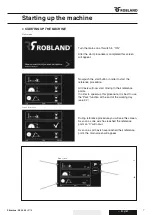
Turn the main switch (6.1) to “1” and ensure that the star-delta switch (4) is put in position “star”.

To start the main saw motor push the start button (3).  

-   After about 8 seconds put the star-delta switch (4) in position “delta”. This time delay is needed to 

let the motor gain its full speed before switching over to “delta”. When you forget to switch over from 
“star” to “delta”, the motor will reach its full speed but will have no power and will be damaged. 

-   The scorer motor is started by pushing the start button (6); this is only possible with the main saw 

motor running.

By pushing the stop button (5) the scorer motor is stopped, when the emergency stop button (1) is 
pushed both motors are stopped.

-   The main saw motor is equipped with an automatic brake which slows down the motor within 10 

seconds as soon as the machine is shut off.

wArning: 

When the machine access door is open, it is impossible to start up the machine.
The RPM indicator lights at the front of the main switch panel show the speed of the saw 
spindle as soon as the machine is switched on with the main switch (1).
All fuses can be found inside the electrical switch panel and each time this panel is opened the 
machine has to be disconnected from its power supply.

Calibration of the scale on  
the parallel fence 

(Fig.25)

Each time a new sawblade is fitted the parallel fence scale has to be calibrated to the new 
sawblade.
By cutting a sample and measuring its exact length, the scale can be adjusted so that the exact 
measure corresponds with the front side of the fence.
After the screw (1) has been loosened the scale can be adjusted. To avoid the fence contacting the 
sawblade while it is revolving, the stop ring (2) has to be adjusted.
Slide the fence to about 10 mm from the sawblade.
Now slide the stopring (2) across the round guide bar (3) until it comes up against the 
casting of the fence. Tighten the lock screw on the stop ring.  

Fig.5

Fig.6

Summary of Contents for PS 3200

Page 1: ...Robland BVBA Kolvestraat 44 BE 8000 Brugge T 32 50 458 925 F 32 50 458 927 www robland com line Manual...

Page 2: ...13 Language choise 13 Settings of time and date 13 Select working in MM or Inch 13 Starting up the machine 14 Calibration of the scale on the parallel fence 14 Option A5216 Retro fit digital read out...

Page 3: ...English 2 Silverline PS 3200 V0713...

Page 4: ...power supply Knives and tools which are not correctly sharpened or are in bad condition not only diminish the quality of the work but also increase the risk of accidents Always wear suitable clothing...

Page 5: ...utting panels or solid wood on the sliding table Prohibited use Following tasks are prohibited on the panelsaw submerged cuts by removing the riving knife and or guard all types of cuts without using...

Page 6: ...10 Dimensions sliding table 3200 x 420 option 3800 mm Dimensions cross cut table 760 x 1505 Length cross cut fence 2200 telescopes teleskopisch 3360 mm Scoring saw Diameter saw blade and bore 125 x 20...

Page 7: ...s The machine has overload protections on both saw and scoring motors Should the motor be shut off by one of these protectors it is necessary to wait a few minutes untill the overload has cooled down...

Page 8: ...In order to speed up this procedure it is best to use the Park function at the end of the working day see 2 2 During reference procedure you will see this screen As soon as one axis has reached the r...

Page 9: ...you get the main screen Now you will see an arrow appear and the start buton starts flashing The axis starts moving as soon as the start button is pushed The values of one or more axis can be adjusted...

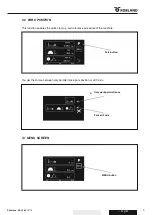
Page 10: ...position 3 1 Menu screen This function enables the quick start up and reference procedure of the machine You get the choise between only parallel fence park position or all 3 axis Park button Only par...

Page 11: ...the value field under diameter B or b you can change the value The machine will take in account these stored values when after sharpening the saw blade these values have changed you can adapt these va...

Page 12: ...oove cutter selected the whole saw unit can only be moved up and down It is impossible to groove at an angle This procedure is the same as for changing the saw blade The differences are The table inse...

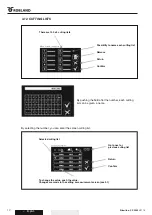
Page 13: ...e number you can enter the screen cutting list There are 100 x 5 cuting lists Possiblity to name each cutting list Remove Return Confirm Menu screen cuting lists Go to next or previous cuting list Ret...

Page 14: ...e language and confirm First select the field Choose day date with arrows and Change the value with the arrows up and down Confirm in order to store the value Select the wanted system and confirm in o...

Page 15: ...hut off WARNING When the machine access door is open it is impossible to start up the machine The RPM indicator lights at the front of the main switch panel show the speed of the saw spindle as soon a...

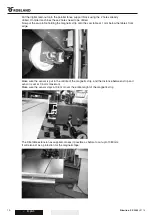
Page 16: ...the 2 holes already drilled On older machines these 2 holes need to be drilled Now put the alu profile holding the magnetic strip onto the saw table at 1 mm below the table s front edge Make sure the...

Page 17: ...gnetic strip onto the saw table at 1 mm below the table s front edge Make sure the sensor is put in the middle of the magnetic strip and the distance between strip and sensor is set at 0 5 mm maximum...

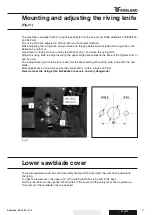
Page 18: ...assuring the upper edge never exceeds the base of the highest tooth in use by 3 mm The 4 adjustment grub screws 2 are used for the exact setting of the riving knife in line with the saw blade After a...

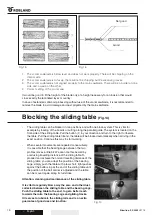
Page 19: ...e of the sliding table Pull the button 1 in your direction and turn to the right to liberate the table Pull the sliding table till end the table will be blocked automatically when arriving in the exac...

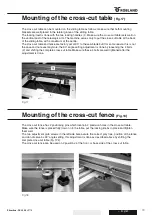
Page 20: ...case and not exact anymore the 90 angle setting adjustment is done by loosening the 4 bolts 2 and shifting the complete cross cut table Make sure these 4 bolts are well tightened after the adjustment...

Page 21: ...at the index fig 19 1 Make a test cut by putting both flip stops at any given position and check if the obtained measures are correct When using the telescopic part of the cross cut fence up to 3360...

Page 22: ...uated scale 3 The guard can not go under the definite measurement Allowing to block the protection to avoid it goes up on its own The handle 2 as well serves as a height stop to avoid that the protect...

Page 23: ...cooling fan and motor itself In particular the sliding table needs care and attention see chapter operating the sliding table Problems causes and solutions 1 The machine does not start when the start...

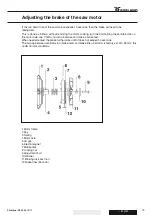
Page 24: ...ntilator fan on the motor axle one 1 16th of a turn clockwise and make a brake test When needed adjust the brake furthermore untill it does not exceed 10 seconds The air gap between ventilator fan bra...

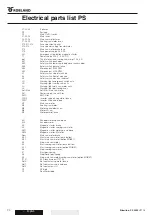
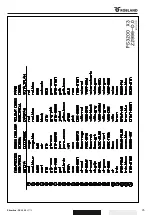
Page 25: ...ng light main saw motor activ LS Warning light positioning axes Soft Start Soft Start main saw motor Dr 1 Power supply line net filter EMC EMC filter FRQ 0 Inverter servo drive parallel fence FRQ1 Inv...

Page 26: ...Silverline PS 3200 V0713 25 English...

Page 27: ...26 V0713 Silverline PS 3200 English...

Page 28: ...Silverline PS 3200 V0713 27 English...

Page 29: ...28 V0713 Silverline PS 3200 English...

Page 30: ...Silverline PS 3200 V0713 29 English...

Page 31: ...30 V0713 Silverline PS 3200 English...

Page 32: ...Silverline PS 3200 V0713 31 English...

Page 33: ...32 V0713 Silverline PS 3200 English...

Page 34: ...Silverline PS 3200 V0713 33 English...

Page 35: ...34 V0713 Silverline PS 3200 English...

Page 36: ...Silverline PS 3200 V0713 35 English...

Page 37: ...36 V0713 Silverline PS 3200 English...

Page 38: ...Silverline PS 3200 V0713 37 English...

Page 39: ...38 V0713 Silverline PS 3200 English...

Page 40: ...Silverline PS 3200 V0713 39 English...

Page 41: ...40 V0713 Silverline PS 3200 English...

Page 42: ...Silverline PS 3200 V0713 41 English...

Page 43: ...42 V0713 Silverline PS 3200 English...

Page 44: ...Silverline PS 3200 V0713 43 English...

Page 45: ...44 V0713 Silverline PS 3200 English...

Page 46: ...Silverline PS 3200 V0713 45 English...

Page 47: ...46 V0713 Silverline PS 3200 English...

Page 48: ...Silverline PS 3200 V0713 47 English...

Page 49: ...48 V0713 Silverline PS 3200 English...

Page 50: ...Silverline PS 3200 V0713 49 English...

Page 51: ...50 V0713 Silverline PS 3200 English...

Page 52: ...Silverline PS 3200 V0713 51 English...

Page 53: ...52 V0713 Silverline PS 3200 English...
Reviews: