34
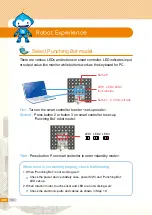
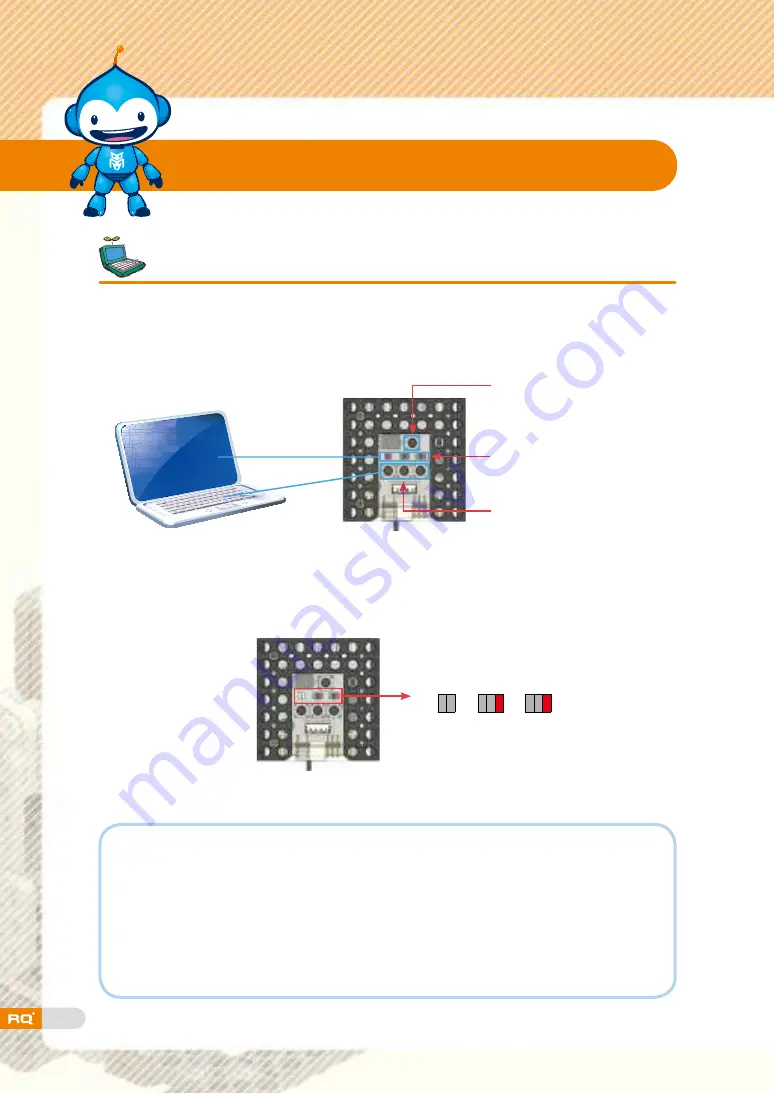
There are various LEDs and buttons in smart controller. LED indicates input
or output value like monitor while buttons work as the keyboard for PC.
Select Punching Bot model.
Robot Experience
First
:
Turn on the smart controller to enter <set-up mode>.
Second
:
Press button 2 or button 3 on smart controller to set-up
'Punching Bot' robot model.
Third
:
Press button P on smart controller to enter <standby mode>.
LED1 LED2 LED3
When robot is not working properly, check the following.
1. When 'Punching Bot' is not working well
:
▶
Check the power device (battery case, power S/W) and 'Punching Bot'
LED set-up.
2. When rotation motor, touch sensor and LED are not working well
:
▶
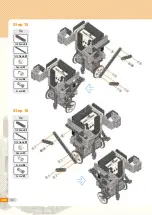
Check the electronic parts and cables as shown in Step 19.
Button P
LED1, LED2, LED3
from left side
Button 1, 2, 3 from left side
Summary of Contents for RQ PLUS 110
Page 1: ......
Page 2: ...List BASICS Punching Bot Cultivator Swing Bot Fish Bot Rolling Bot 06 20 40 58 74 90 ...
Page 25: ...27 Step7 Step8 Step 9 Step 10 Tip Tip Double rivet X2 Double rivet X8 ...
Page 31: ...33 Punching Bot ready completion ...
Page 37: ...39 0 02 ...
Page 50: ...52 Cultivator robot ready completion ...
Page 72: ...74 Living under water fish 4 Fish Bot ...
Page 94: ...96 Tip 5 5 frame X1 Double rivet X8 Step 7 X2 Tip 2s rivet X4 Step 8 X2 ...
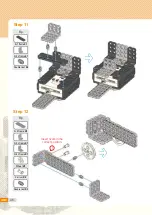
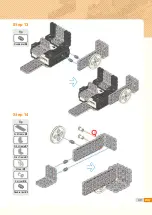
Page 96: ...98 Tip Tip Double rivet X4 Double rivet X4 Step 11 Step 12 Step8 Step8 ...
Page 103: ...105 0 02 ...
Page 107: ...109 0 02 ...
Page 116: ...118 Step8 Tip Double rivet X2 Step 11 Tip Battery case X1 Double rivet X4 Step 12 ...
Page 118: ...120 Cable connection status Bumper car ready Tip Double rivet X4 Step 15 completion ...
Page 152: ...154 Puppy Bot ready completion ...
Page 175: ...177 0 02 ...


