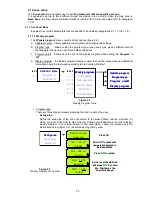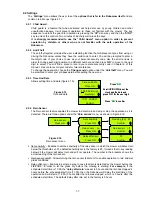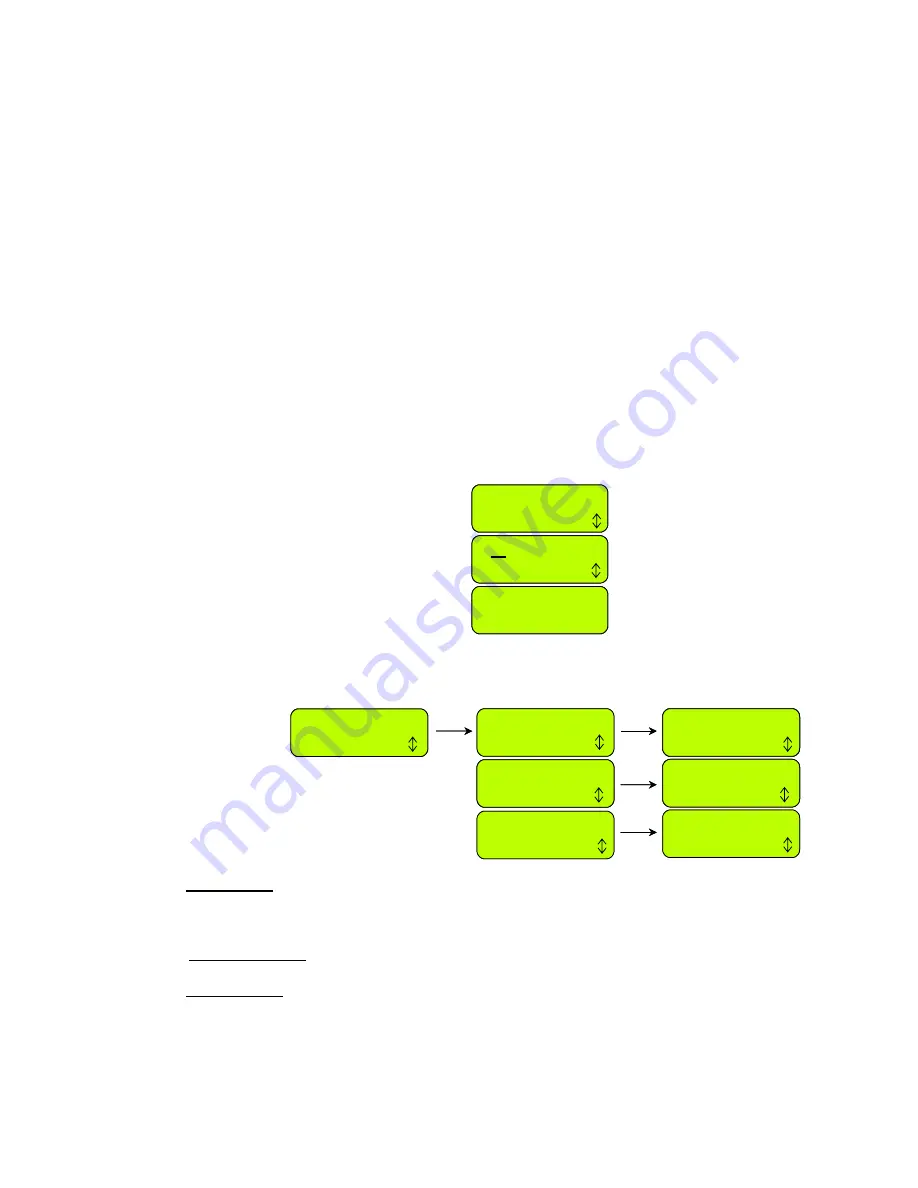
2.2 Settings
The
‘Settings’
menu allows the user to set the
options that refer to the Robomow
itself
and are
common to all zones (figure 2.1).
2.2.1 Child
Guard
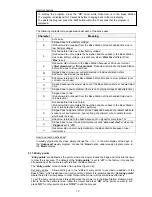
Child guard is a feature that when activated will help deter use by young children and other
unauthorized people. It will prevent operation to those not familiar with the mower. The key
sequence to unlock the guard for operation is pressing the
‘UP’
arrow key and then the
‘STOP’
key to unlock the controls. Two minutes of inactivity will re-lock the keys.
It is strongly recommended to use the “Child Guard” menu option in order to prevent
operation by children or others who are not familiar with the safe operation of the
Robomow.
2.2.2 Anti-Theft
The anti-theft system provides the user a disabling function that will prevent anyone from using or
driving the Robomow unless they have the valid code to enter. You will be prompted to enter a
four-digit code of your choice to use as your personal security code. Use the scroll arrows in
order to change each digit position to a different number and then press
‘GO’
to move to the next
digit to select. You will find a place to record your personal security code in Chapter
6
of this
manual. Be sure to record your code for future reference.
To change the password, choose the
‘Change code’
option under the
‘Anti theft’
menu. You will
be promoted to enter your old password before setting the new one.
Figure 2.16
Rain sensor menu
Time and date
Press GO
Press ‘
GO
’
Scroll UP/DOWN to set the
clock and the date and
press ‘GO’ for the next digit
00:00 dd/mm/yy
Next digit
10:37 23/04/07
Confirm
Press ‘
to confirm
GO
’
Time and date
Press GO
Time and date
Press GO
Press ‘
Scroll UP/DOWN to set the
clock and the date and
press ‘GO’ for the next digit
GO
’
00:00 dd/mm/yy
Next digit
00:00 dd/mm/yy
Next digit
10:37 23/04/07
Confirm
10:37 23/04/07
Confirm
Press ‘
to confirm
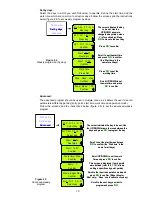
Figure 2.15
Time and date
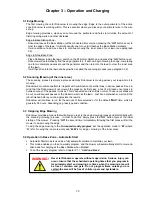
2.2.3 Time And Date
Allows setting time and date (figure 2.15):
GO
’
Set sensitivity
Press GO
Rain sensor
Press GO
Delay after rain
Press GO
Reading (29) 25
Confirm
Rain sensor on
Press GO
Rain sensor off
Confirm
3h
Confirm
Set sensitivity
Press GO
Rain sensor
Press GO
Rain sensor
Press GO
Delay after rain
Press GO
Reading (29) 25
Confirm
Reading (29) 25
Confirm
Reading (29) 25
Confirm
Rain sensor on
Press GO
Rain sensor on
Press GO
Rain sensor off
Confirm
Rain sensor off
Confirm
3h
Confirm
2.2.4 Rain
Sensor
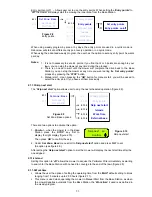
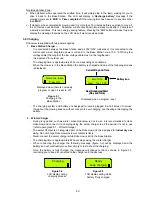
The Rain sensor feature enables the mower to detect rain and skip or stop the operation as it is
detected. There are three options under the
‘Rain sensor’
menu, as shown in Figure 2.16:
Set sensitivity
– Enables to set the sensitivity of the rain sensor in which the mower will detect rain
below the threshold set. The default sensitivity set in the factory is 25, it means that in any reading
below 25 the mower will detect rain and will not operate. The number in the brackets shows the
actual reading of the rain sensor.
Rain sensor on/off
- Allows turning the rain sensor feature off to enable operation in rain and wet
grass conditions.
Delay after rain
– Enables to set time delay, in case that rain is detected by the mower before the
start time, in order to let the grass dry before the mowing is starting.
For example
, if the
scheduled start time is 13:00, the
‘delay after rain’
was set to 5 hours and the rain has stopped 2
hours before the scheduled start time (11:00), then the Robomow will delay the start time of the
operation and will start at 16:00 (5 hours after the rain was stopped, which is 3 hours after the
scheduled start time). The default ‘delay after rain’ set in the factory is 0 hours.
35


