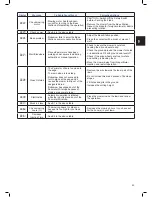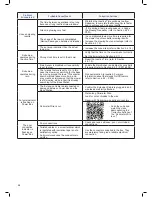
33
EN
Chapter 6 – Robomow Operation
6.1
Automatic Operation
o
Once the One-Time Setup is finished, Robomow will be set to perform automatically the following cycle of
mowing operations:
-
When the battery is fully charged, Robomow will automatically depart from the Base Station.
-
It will mow the lawn.
-
It will start searching for the Base Station, when the battery level gets low (Robomow will not mow when
it is searching for the Base Station).
-
It will recharge the battery and get ready for the next scheduled operation.
-
It will continue mowing until it completes the required number of mowing hours (end of a Mowing Cycle).
Note:
Robomow mows the Edge of the entire lawn only on the first mowing operation of each Mowing Cycle.
In the rest of operations Robomow mows the lawn without the Edge. When Mowing Frequency (p001 in
Section 6.4.2) is set to HIGH, Robomow will mow the Edge twice a week.
o
The required mowing time for a single mowing cycle is automatically derived from the Area setting for your
lawn.
o
In case the required mowing time within a mowing cycle needs to be adjusted (increased/decreased) to
achieve better mowing results, it can be done using the
Mowing Hours
menu – see Section 6.4.2.
o
Robomow usually performs several consecutive mowing operations until it completes a full mowing cycle
required for the lawn. After completing a mowing cycle Robomow will rest until the next cycle should begin.
The interval between mowing cycles is defined by the
Mowing Frequency
menu – see Section 6.4.2. The
default setting is to perform two complete mowing cycles per week (Medium Mowing Frequency)
o
Robomow stays in the Base Station during the default
Inactive Time
(All day Sunday and nighttime daily
23:00 to 06:00). Inactive Time may be changed – see Section 6.4.1.3.
Note!
Robomow has the power to mow high grass. However when mowing high grass during the first use or the first
mowing of the season, initially you will see uneven patches of grass.
Please be patient as it may take a few days to one week to overcome and bring the lawn to an even height and
consistency.
6.2
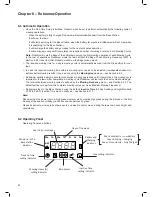
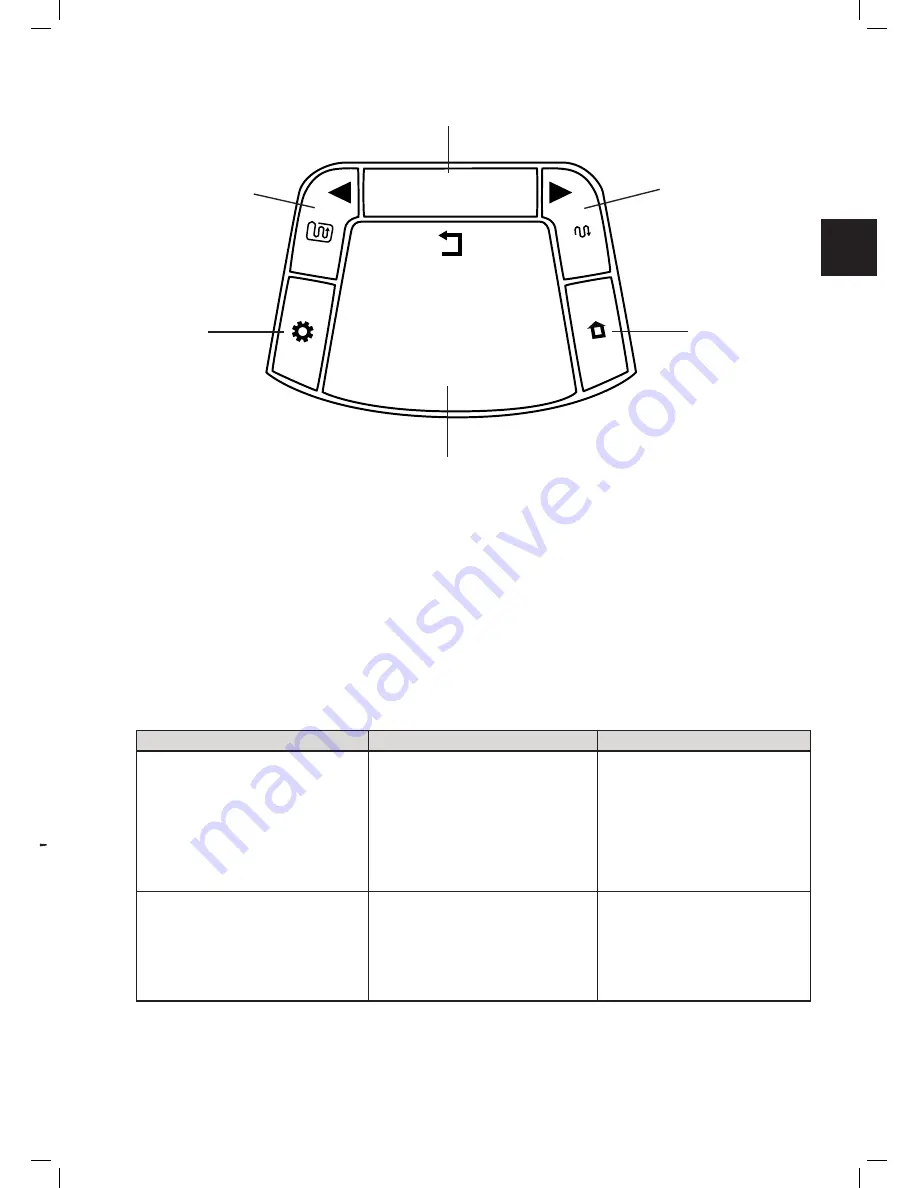
Operating Panel
Operating Panel and buttons:
AM
Mo Tu We Th
Fr
Sa Su
Days of the week
Mower is in the
Base Station
indicator
Day and Time
setting indicator
Mowing Hours (%)
setting indicator
Inactive Time
setting indicator
Rain Sensor
Red lit constantly – Low Battery
Green blinking – Charging
Green lit constantly – Fully Charged
Battery and
Charging
indicator
User / Error messages
Area setting indicator
ok
STOP
Mowing with Edge / Left
arrow
OK to choose /
approve selection
Mowing without Edge /
Right arrow
GO to Base (Home)
Stop (during operation) /
Back while in the menu
Settings
6.3
Manual Operation
Manual Operation is used when you want to manually send the mower to mow your lawn, regardless the
Automatic Operation’s schedule.
To initiate Manual Operation, while Robomow is at the Base Station, press one of the buttons (except the STOP
button) to show the display.
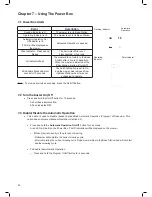
If the battery is fully charged and the Automatic Operation is enabled (see Section 7.3), then the start time of the
next operation is displayed, otherwise the current day and time are displayed.
Once the display is shown, choose the operation mode you want as provided in the table below:
Operation Mode
Child Lock is Off
Child Lock is On
Mowing with Edge
– Mowing
the edge of the entire lawn before
starting to mow the inner area of
a selected zone.
It is recommended to use this
mode once or twice a week,
depending on how fast the grass
is growing.
Press the
‘Edge before mowing’
(left arrow) button once
Press the
‘Edge before mowing’
(left arrow) button then press
OK
Mowing without Edge
– Mowing
only the inner area of a selected
zone without the edge.
It is recommended to use this
mode only in the first operation of
each Mowing Cycle.
Press the
‘Mowing’
(right arrow)
button once
Press the
‘Mowing’
(right
arrow) button then press
OK
Note
– if a Sub-Zone is defined,
L1
(Main Zone) will be displayed when you choose an operating mode. Use the
arrow buttons to scroll and choose the required zone to be mowed and press OK.
Summary of Contents for MC1200
Page 1: ......
Page 58: ...57 EN ...

