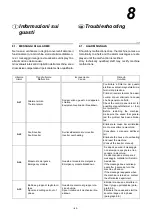
I
– 35 –
Information about machine use
0
241.230
Informazioni sull’uso
0
6
GB
•
Premere il pulsante e sfi-
lare la flangia A;
•
Inserire la bobina sul
mandrino, infilare la flan-
gia e ripremere il pulsan-
te;
•
Bloccare la flangia pre-
mendo l’anello B;
•
Chiudere il riparo;
•
Premere il pulsante di "re-
set";
•
Portare il mandrino in posizione "inizio ci-
clo" (fase rotazione) agendo sul tasto "rota-
zione anello rotante";
•
Aprire il riparo.
•
Svolgere il film ed inserir-
lo tra i rulli seguendo lo
schema di figura (il trat-
teggio indica il lato col-
lante del film);
•
Se necessario regolare la
tensione di avvolgimento
del film (paragrafo 6.4.);
•
Aprire manualmente la
pinza e inserire il lembo
di film tra le ganasce;
•
Richiudere il riparo.
•
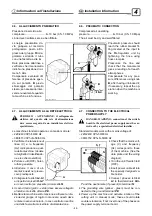
Press the button and re-
move flange A;
•
Place the spool on the
spindle, insert the flange
and press the button
again;
•
Block the flange by press-
ing ring B;
•
Close the safety guard;
•
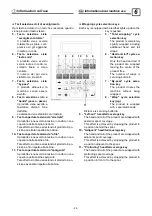
Press the "reset" button;
•
Move the spindle to the "start cycle" posi-
tion (rotation phase) using the "rotating ring
rotation" button;
•
Open the guard.
•
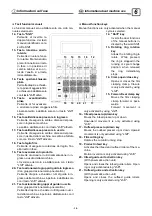
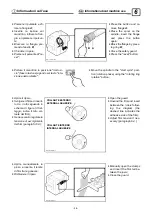
Unwind the film and insert
between the rollers follow-
ing the diagram (the
dashed line indicates the
adhesive side of the film);
•
Adjust film tension if nec-
essary (paragraph 6.4.);
•
Manually open the clamps
and insert the film tail be-
tween the jaws;
•
Close the guard.
IDM - 2412300390.tif
A
B
COLLANTE ESTERNO
EXTERNAL ADHESIVE
COLLANTE INTERNO
INTERNAL ADHESIVE
IDM - 2412300400.tif
IDM - 2412300410.tif
Summary of Contents for SPIROR HP 400
Page 2: ......
Page 4: ......
Page 6: ......
Page 8: ......
Page 10: ...I 2 EnglishAsiahakemisto 0 241 230 Italiano 0 GB 0 ...
Page 20: ...2 I 12 Technical information 0 241 230 Informazioni tecniche 0 GB ...
Page 24: ...3 I Safety Information 0 Informazioni sulla sicurezza 0 GB 241 230 16 ...
Page 34: ...5 I 26 Information about adjustments 0 241 230 Informazioni sulle regolazioni 0 GB ...
Page 50: ...7 I 42 Information about maintenan 241 230 Informazioni sulla manutenzione 0 GB ...


