7
ENGLISH
12/07/2018
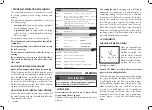
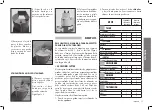
USES
Max. processing
quantity
(in pounds)
Processing
time
(in mn)
CHOP
• MEAT
Hamburgers / steak tartare
2
3
Sausagemeat / tomatoes
2
3
Terrine / pâté
2
4
• FISH
Brandade
2
5
Terrines
2
5
• VEGETABLES
Garlic / parsley /onion / shallots
¾
3
Soup / purées
2
4
• FRUIT
Compotes /purées
2
4
EMULSIFY
Mayonnaise / Ailloli / remoulade sauce
2 ¼
3
Hollandaise / Béarnaise
2 ¼
5
Snail or salmon butter
2 ¼
4
KNEAD
Shortcrust pastry / shortbread
2
4
Flaky pastry
2
4
Pizza dough
2
4
GRIND
Dried fruit
1
4
Ice
1
4
Breadcrumbs
1
4
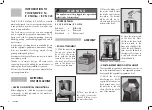
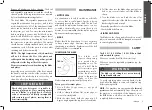
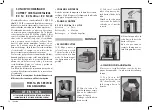
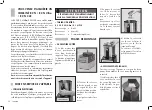
5) Place the vegetable
preparation top onto
the vegetable prepara-
tion bowl attachment,
and rotate it back to the
right until it locks onto
the bowl tabs.
OPERATING INSTRUCTIONS
THE UNIT SHOULD BE OFF EXCEPT WHEN
PROCESSING IS UNDERWAY
It is recommended that the machine be operated
on a 50 % duty cycle. This is easily accomplished
since the preparation time (cleaning, coring,
peeling, and loading) takes longer than the
processing time. This will yield the longest life for
your machine.
• BOWL ATTACHMENT
The cutter bowl is used for grinding, kneading,
pureeing, blending, mixing, and emulsifying. Before
placing the product into the bowl, some products
such as meats and cheeses should be precut into
1-2 inch portions. When filling the bowl, allow
space above the product for circulation. Fill the
bowl no more than
⅔
full.
There are two ways to run your machine: chopping,
using a quick start/stop action with the
Pulse
button
or running continuously for a fine chop or puree.
To obtain a uniform chop of products such as meats
and cheeses, begin with a uniformly portioned
product.
Pulse
the machine until the desired result is
reached. Then, if a puree or fine chop is desired,
press the
On
button, and allow the machine to run
until the product has the right consistency.
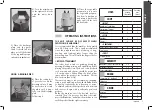
2) Turn the attachment
to the right until it locks
onto the motor base
tabs.
3) Place the discharge
plate onto the motor
shaft. It should fall into
place just off the bottom
of the vegetable prepa-
ration bowl attachment.
USING A REGULAR DISC:
4) Place the cutting disc
of your choice onto the
discharge plate. It may
be necessary to rotate
the plate until it drops
fully onto the discharge
plate.
Follow step 5.
Summary of Contents for R 2 N
Page 4: ......
Page 29: ...27 12 02 2018 TECHNICAL DATA DATOS T CNICOS DONN ES TECHNIQUES...
Page 30: ...28 12 02 2018...
Page 31: ...29 12 02 2018...
Page 32: ...30 12 02 2018...
Page 33: ...31 12 02 2018...
Page 34: ...L1 87 89 L2 Black Yellow Red Blue Century Purple White from power cord White o o L2 L1 Blue...
Page 35: ...R2 R2Ultra Emerson or US Motors R239D Purple White...
Page 36: ......
Page 37: ......


