AirPick - Instruction Manual
4. Software
Info
Unless specified, all units in this section are in hexadecimal values.
Caution
Installation of the new firmware version is mandatory to have the new Object Detection feature and all the updates.
4.1. Overview
Info
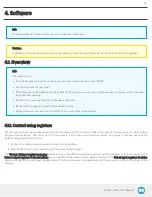
The operator can:
l
Control the vacuum level (continuous vacuum when manual mode is set at 100%)
l
Set the minimum vacuum level
l
The automatic mode operation is set by default. The continuous operation mode can also be choose, when checked in
the Advanced settings.
l
Benefit from a security mode if air leakage is detected
l
Benefit from energy saving with the automatic mode.
l
Apply a timeout manually (ms) or benefit from an automatic timeout delay
4.1.1. Control using registers
The Vacuum Gripper has an internal memory that is shared with the robot controller. One part of the memory is for robot output
(Gripper functionalities). The other part of the memory is for robot input (Gripper status). Two types of actions can thus be
performed by the robot controller:
1. Write in the robot output registers to activate functionalities;
2. Read in the robot input registers to get the status of the Gripper.
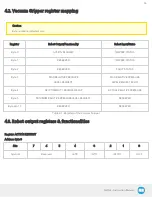
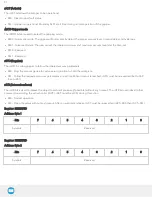
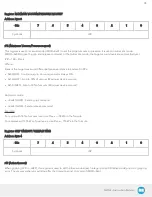
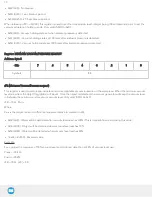
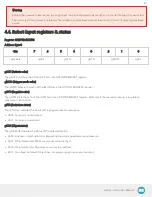
The Vacuum Gripper register mapping section will map the different registers used to control the Gripper or to read its status. The
Robot output registers & functionalities section will detail the output (write) register functions. The Robot input registers & status
section will detail the input (read) register status. The figure below is a representation of the memory and the control logic of the
Gripper.
34
Summary of Contents for AirPick
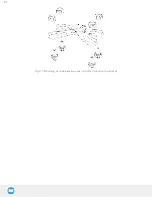
Page 25: ...Fig 3 7 Mounting air nodes suction cups air bolts air nuts on the bracket 25...
Page 27: ...Fig 3 9 Robotiq Vacuum Gripper with pigtail cable and device cable wiring scheme 27...
Page 35: ...Fig 4 1 Vacuum Gripper control logic overview 35...
Page 57: ...7 Click on the New Project icon in the upper left corner of the screen 57...
Page 58: ...AirPick Instruction Manual 8 Enter a name for your program and click on the OK button 9 58...
Page 76: ...Fig 6 5 Minimum and maximum arrangement possibilities of the air nodes position 76...
Page 77: ...AirPick Instruction Manual 6 1 3 Air nodes Fig 6 6 Air nodes dimensions 77...
Page 103: ...AirPick Instruction Manual 12 Appendix Fig 12 1 Pneumatic schema of the AirPick Vacuum Gripper...


