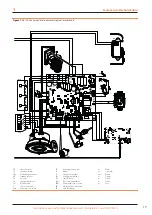
Electrical installer
24
4
If it is necessary to change the type of gas supply to
the boiler, contact the TAC that will make the necessary
changes.
Under no circumstances shall the installer be authorised
to carry out such operations.
Vertical pipes and condensate
▶
Vertical gas pipes must be fitted with siphon and discharge
of the condensate that may form inside the pipe.
▶
If necessary, insulate the piping.
LPG pressure reducers
With LPG the following must be installed:
▶
A first stage pressure reducer, close to the liquid gas tank.
▶
A second stage pressure reducer, close to the appliance.
4
ELECTRICAL INSTALLER
Do not power and/or start the boiler before filling the
hydraulic system, as this may damage the internal hy-
draulic components.
4.1
WARNINGS
General warnings
Read the warnings in Chapter III.1
p. 4, providing im-
portant information on regulations and on safety.
Compliance with installation standards
Installation must comply with applicable regulations in
force, based on the installation Country and site, in mat-
ters of safety, design, implementation and maintenance
of electrical systems.
Installation must also comply with the manufacturer's
provisions.
Live components
After placing the appliance in the final position, and pri-
or to making electrical connections, ensure not to work
on live components.
Earthing
The appliance must be connected to an effective earth-
ing system, installed in compliance with regulations in
force.
It is forbidden to use gas pipes as earthing.
Cable segregation
Keep power cables physically separate from signal ones.
Do not use the power supply switch to turn the ap-
pliance on/off
Never use the external isolation switch to turn the appli-
ance on and off, since it may be damaged in the long run
(occasional blackouts are tolerated).
To switch the appliance on and off, use only the control
device provided for this purpose (remote control or ex-
ternal request).
4.2
ELECTRICAL POWER SUPPLY
The cables inside the boiler must be routed through the
cable glands located in the lower part of the boiler. To do
this, make a hole in the cable gland, slightly smaller than
the cable, so that the air does not pass through.
How to connect the power supply
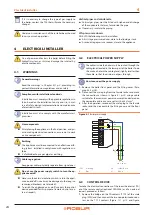
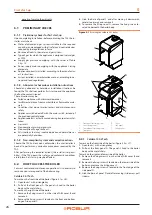
1. Remove the boiler front panel and the fitting cover (Para-
graph 5.2
p. 26).
2. Disconnect the male plug from the female socket and make
the connections as shown in Figure 4.1
suitable for the maximum power consumption declared on
the nameplate and in any case not less than 3x1 mm
2
.
3. After the operation, reconnect the male plug to the female
socket and then reassemble the fitting cover and the front
panel.
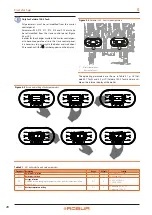
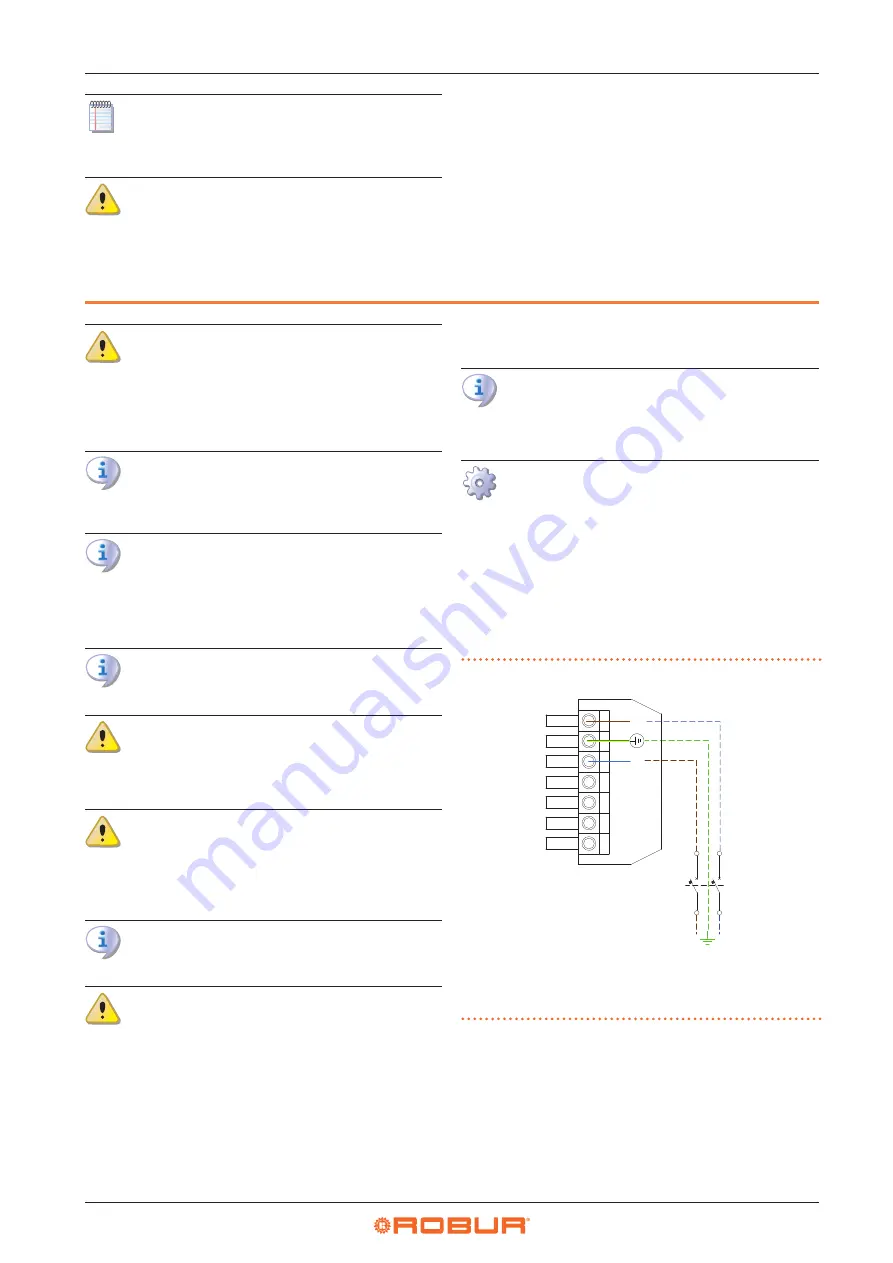
Figure 4.1
Boiler power supply
SPM
Male plug
B
Blue
G/V
Yellow/Green
M
Brown
L
N
1
2
3
4
SPM
L
N
B3
S3
T2
T1
N
T
L
230 V - 50 Hz
B
G/V
M
4.3
CONTROL DEVICE
To make the electrical connections of the room thermostat (TA)
or of the remote control (optional OCDS006) or of an external
request, proceed as follows.
1. Remove the bridge on the TA contacts (T1-T2) of the male
plug (SPM) and then connect the two non-polarized conduc-
tors on the T1-T2 contacts (Figure 1.11
p. 15 and Figure


