background image

11

Before flying the model 

Find a suitable flying site

Perform the range check for your plane

Monitor your flight time

Find a flying site clear of buildings, trees, power lines and other obstructions. Until you know how much area 

will be required and have mastered flying your plane in confined spaces, choose a site which is at least the 

size of two to three football fields - a flying field specifically for R/C planes is best. Never fly near people - 

especially children who can wander unpredictably.

As a precaution, an operational ground rage test should be performed before the first flight each time you go 

out. Performing a rang test is a good way to detect problems that could cause loss of control such as low 

batteries, defective or damaged radio components, or radio interference. This usually requires an assistant 

and should be done at the actual flying site you will be using.

First turn on the transmitter, then install a fully - charged battery into the fuselage. Connect the battery and 

install the hatch.

Remember, use care not to bump the throttle stick. otherwise, the propeller/fan will turn and possibly cause 

damage or injury.

Note: Please refer to your Transmitter Manual that came with your radio control system to perform a ground 

range check. If the controls are not working correctly or if anything seems wrong, do not fly the model until 

you correct the problem. Make certain all the servo wires are securely connected to the receiver and the 

transmitter batteries have a good connection.

Monitor and limit your flight time using a timer (such as on a wristwatch or in your transmitter if available). 

When the batteries are getting low you will usually notice a performance drop before the ESC cuts off motor 

power, so when the plane starts flying slower you should land. Often (but not always) power can be briefly 

restored after the motor cuts off by holding the throttle stick all the way down for a few seconds.

To avoid an unexpected dead-stick landing on your first flight, set your timer to a conservative 4 minutes. 

When your alarm sounds you should land right away.

Summary of Contents for 1100MM MXS 3D

Page 1: ...1100MM MXS 3D 1100 1080 42 5 43 3 1 1 00g 38 8 35 7 30 8 478 7 0 081 4...

Page 2: ...personal property and cause serious injury This is a sophisticated hobby product and NOT a toy It must be operated with caution and common sense and requires in injury or damage to the product or oth...

Page 3: ...airflow over the ailerons for more positive control Tough but lightweight aluminum landing gear and large 2 1 2 wheels make grass takeoffs and landings a breeze A large magnetic hatch makes changing...

Page 4: ...s of the kit and labels If any parts are missing or defective please indentify the name or part number refer to the spare parts list near the end of the manual then contact your local shop or email us...

Page 5: ...M 3 0 X 10mm screwsas shown in Figure 9 6 Find the Y harness and connect it to both aileron servos Connect the Y harness to the receiver then place the receiver into the fuselage as shown in Figure 10...

Page 6: ...ur model Attachthe aileron servo leads to the previously installed Y harness Elevator servo lead goes to elevator channel of your receiver The rudder servo goes to the rudder channel Attach the ESC co...

Page 7: ...le stick to full throttle and plug in the motor battery The motor will beep one time Move the throttle stick to low throttle or the off position The motor is ready to run and the brake will be switche...

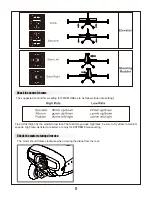
Page 8: ...the plane from the rear The suggested control throw setting for FMS MODEL are as follows dual rate setting Tips At first flight fly the model in low rate The first time you use high rates be sure to f...

Page 9: ...s Arms Press the socket style linkage connector over the corresponding ball end on the control horn The table shows the factory settings for the control horns and servo arms Fly the aircraft at the fa...

Page 10: ...adjusted for your personal preference 1 The recommended Center of Gravity CG location for your model is 85 90mm forward from the leading edge of the main wing as shown with the battery pack installed...

Page 11: ...ed battery into the fuselage Connect the battery and install the hatch Remember use care not to bump the throttle stick otherwise the propeller fan will turn and possibly cause damage or injury Note P...

Page 12: ...so you have enough flight time to make several landing approaches Recharge the battery and repair the model as needed The model s three point landing gear allows the model to land on hard surfaces Ali...

Page 13: ...13 Troubleshooting...

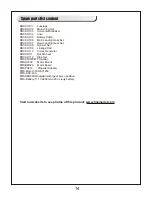
Page 14: ...et ROCKH109 Linkage Rod ROCKH110 Vortex Generator ROCKH111 Decal Sheet ROCKH112 Pipe Set FMSPROP047 Propeller FMSDJ009 Motor Mount FMSBM026 Motor Board FMSPA010 Propeller Adapter FMS Motor 3536 KV1250...

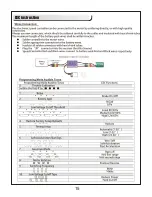
Page 15: ...15 ESC instruction...

Page 16: ......

Reviews: