130
CoaguChek
®
Pro II · Operator’s Manual
15
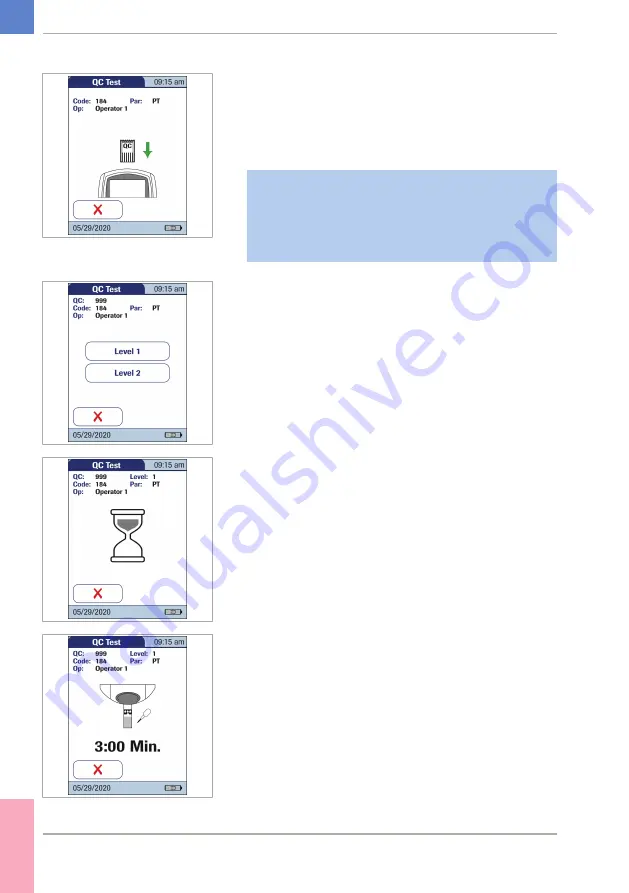
If you are using a new control solution, remove the
strip code chip from the meter and insert the code
chip that came with the control solution instead.
If the code chips get mixed up, check the letter on
the code chips to tell them apart. A capital
S
in front
of the number indicates that this code chip is for test
strips. A capital
C
in front of the number indicates
that it is a control solution code chip.
16
If performing more than one level, select the level
for this measurement.
The hourglass icon shows that the test strip is
warming up. When the warming‑up process is
complete, a further beep (provided the beeper is
enabled) indicates that you can now apply the
control solution.
The dropper icon flashes to indicate that the meter
is ready to perform the test and is waiting for the
sample to be applied.
At the same time a countdown begins. You must
apply the sample within the displayed time,
otherwise you will receive an error message.
5 Control and Proficiency Testing
• 5
Summary of Contents for CoaguChek Pro II
Page 1: ...CoaguChek Pro II Operator s Manual...
Page 15: ...15 CoaguChek Pro II Operator s Manual u Related topics 3 4 Options setup 62 1 Introduction 1...
Page 44: ...44 CoaguChek Pro II Operator s Manual Page intentionally left blank...
Page 122: ...122 CoaguChek Pro II Operator s Manual Page intentionally left blank...
Page 140: ...140 CoaguChek Pro II Operator s Manual Page intentionally left blank...
Page 146: ...146 CoaguChek Pro II Operator s Manual Page intentionally left blank...
Page 168: ...168 CoaguChek Pro II Operator s Manual Page intentionally left blank...
Page 184: ...184 CoaguChek Pro II Operator s Manual Page intentionally left blank...
Page 190: ...190 CoaguChek Pro II Operator s Manual Page intentionally left blank...
Page 204: ...204 CoaguChek Pro II Operator s Manual Page intentionally left blank...
Page 205: ......


