13
Setting Up Your QB8-PV Nostalgic Music Center
Set-Up of your QB8-PV Nostalgic Music Center is easy. All
components are installed and ready to go, you have only to
supply the following:
(Broadband) Internet Connection
Power
CD’s to load onto the hard drive
Optional additional speakers
Internet Connection
To use the album information QB8-PV Nostalgic Music
Center, you must have a live, (broadband) connection when
you load CDs to the system. Follow the steps below to get
connected. “Broadband” may be DSL, ADSL, Satellite, or
cable modem. The connection is not necessary for music
play.
You may also use a passive wireless bridge, available as an
optional accessory from Rock-Ola, or a dial-up adapter. See
the
Accessories
section of this manual for order and set-up
information relating to these options.
Make sure your broadband cable is long enough to connect
from your modem or router to the Nostalgic Music Center
computer.
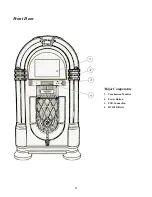
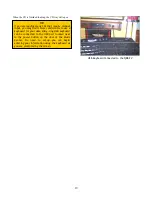
Open the jukebox door and locate the computer core (see
the figure
“Major Component Location,”
previous page).
Thread the free end of your Ethernet cable through the
access hole in the rear of the cabinet. Bring enough inside
the cabinet to reach the computer.
Connect the free end of your Ethernet cable to the
Network
port on the Nostalgic Music Center computer. Make sure the
other end of your cable in connected to your broadband
modem or router. Close the cabinet door.
Power Up
WARNING
Use of adapters or removal of the
grounding pin of the plug may create
a potential shock hazard and will
defeat the surge protection devices causing
erratic operation or destruction of the
electronic assemblies and void all warranties.
WARNING
The Touchmonitor is always powered
up when the jukebox is plugged in. Be
careful when servicing. Unplug the
Touchmonitor from the amplifier module
before servicing.
Connect the power cord to receptacle the back of the
cabinet.
Turn the main power switch to the ON (1) position.
The switch should light up.
Turn the power switch on the computer core to the ON (1)
position.
Press the blue power button on the front panel.
The computer core and lights will power up. After loading
the Operating System, the application software loads and the
main screen will appear. This entire process takes a few
minutes.
!
!
Summary of Contents for QB8-PV
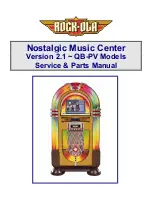
Page 1: ...Nostalgic Music Center Version 2 1 QB PV Models Service Parts Manual...
Page 48: ...48 Block Diagrams...
Page 58: ...58 Harnesses...
Page 59: ...59 Accessories Part No Description 02467 Wireless Bridge Kit 02466 Dial Up Modem Kit...
Page 60: ...60 61743 Nostalgic Music Center Version 2 1 QB PV Models Service Parts Manual...

