46
Service and Maintenance
Computer Core
Core Removal
Be sure power is OFF.
Unplug the machine.
Open the door.
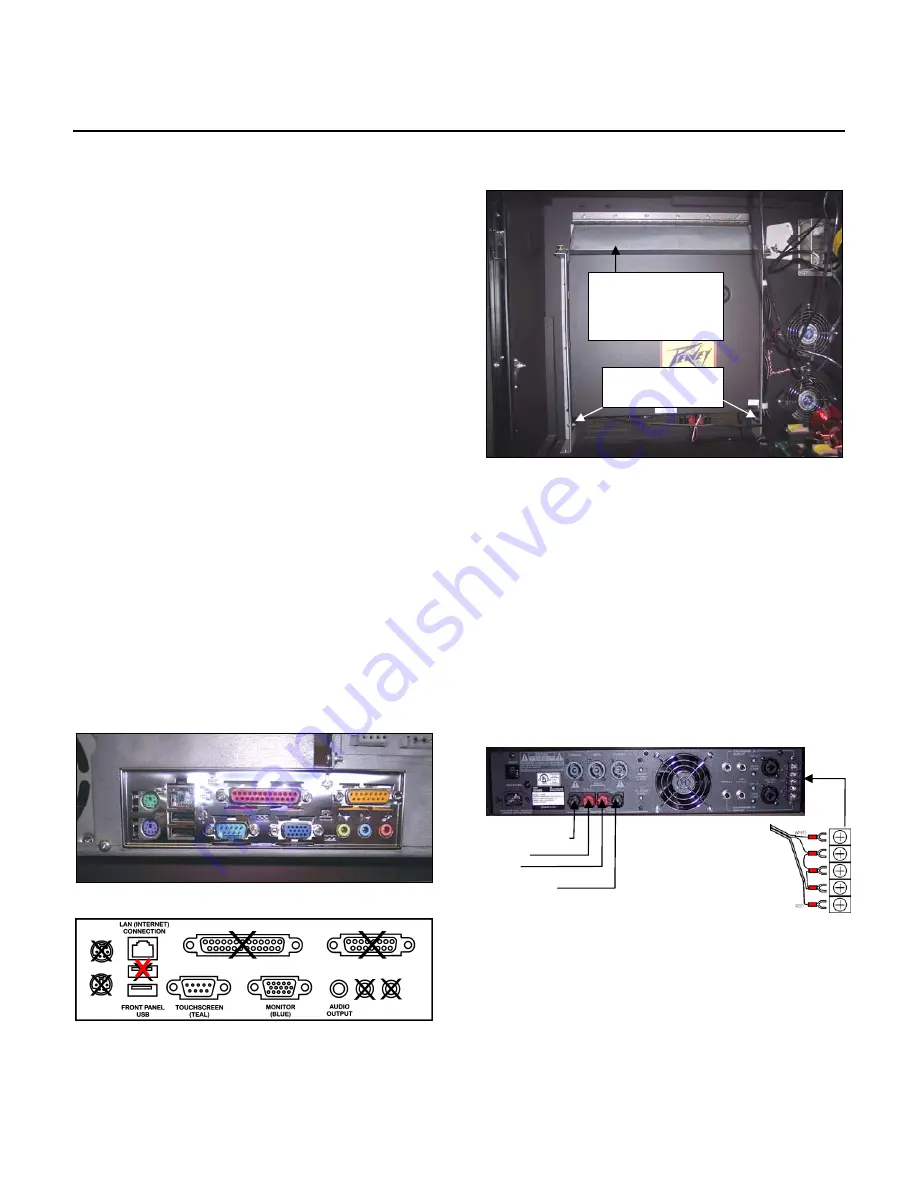
Disconnect all of the cables from the front of the Core.
With a 3/8” nut driver or socket wrench loosen the four nuts
securing the core.
Push the core towards the back and lift it out.
Core Installation
Be sure the power is OFF and the machine is unplugged.
Slide the core on four mounting feet. (Be sure that there are
no connectors under the core.)
Tighten the four nuts on mounting screws.
Connect all of the cables to the front of the core.
Turn the core power switch on.
Plug the machine in.
Turn the main power switch ON.
Press the blue power button on the front of the panel.
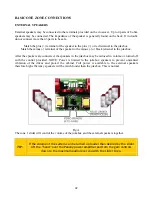
Computer Core Module
Amplifier
Amplifier Removal
Disconnect amplifier power cable from the power
distribution box.
Remove wingnuts and lift amplifier hood.
Remove 4 bolts from amplifier face.
Remove nuts and bolts from amplifier bottom.
Carefully lift the amplifier out of the brackets and rest on its
face so the wiring may be disconnected.
Remove the Input and the Output cables.
Amplifier Installation
Connect all of the cables to the amplifier.
Slide the amplifier into the brackets.
Install the nuts and bolts at the bottom.
Install the bolts on top.
Be sure the amplifier power switch is on and gain controls
are full (or less, if desired).
Lower the hood and fasten with wingnuts.
Plug the power cord into the power distribution box.
Power up and test.
Amplifier hood
(amp face is
under the hood)
Remove nuts
and bolts
Black/Green
White
Red
Black/Red
Summary of Contents for QB8-PV
Page 1: ...Nostalgic Music Center Version 2 1 QB PV Models Service Parts Manual...
Page 48: ...48 Block Diagrams...
Page 58: ...58 Harnesses...
Page 59: ...59 Accessories Part No Description 02467 Wireless Bridge Kit 02466 Dial Up Modem Kit...
Page 60: ...60 61743 Nostalgic Music Center Version 2 1 QB PV Models Service Parts Manual...


