background image

5

Power

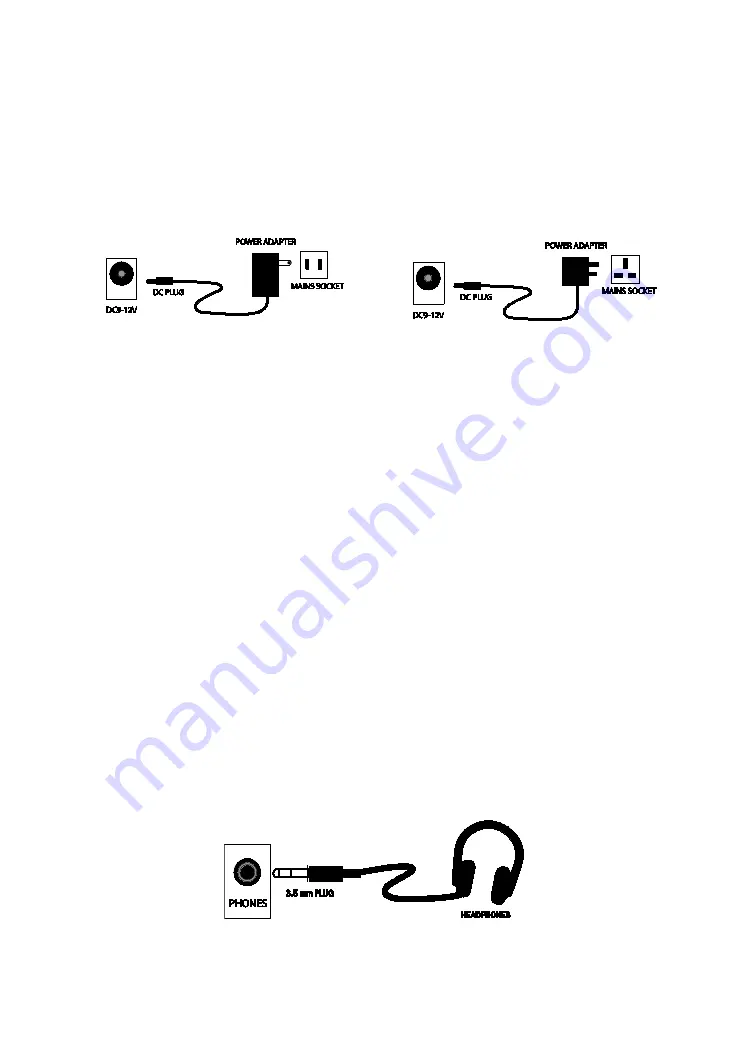
AC/DC power adapter

Please use the AC/DC power adapter that came with the electronic keyboard or a power adapter with 

DC 9V output voltage and 1,000mA output, with a centre positive plug. Connect the DC plug of the pow-

er adapter into the DC 9V power socket on the rear of the keyboard and then connect to the outlet.

Caution:

 When the keyboard is not in use you should unplug the power adapter from the mains power socket.

Battery operation

Open the battery lid on the underneath of the electronic keyboard and insert 6 x 1.5V Size AA alkaline batteries. 

Ensure the batteries are inserted with the correct polarity and replace the battery lid.

Caution:

 Do not mix old and new batteries. Do not leave batteries in the keyboard if the keyboard is not going to be 

used for any length of time. This will avoid possible damage caused by leaking batteries.

Jacks and Accessories

Using headphones

Connect the 3.5mm headphone plug to the [PHONES] jack on the rear of the keyboard. The internal speaker will cut 

off automatically once headphones are connected.


  USA / Canada  

    UK 

Summary of Contents for RJ549

Page 1: ...RJ549 Multi function Keyboard User Guide...

Page 2: ...not functioning correctly please stop using it and send it to a qualified service agent for repair Use of the electronic keyboard To avoid damaging the appearance of the electronic keyboard or damagin...

Page 3: ...Jacks and Accessories 5 Using headphones 5 Connecting an Amplifier or Hi Fi Equipment 6 LED Display 6 Keyboard Operation 6 Power control 6 Adjusting the Master Volume 7 Tone Selection 7 Demo Songs 7 E...

Page 4: ...3 Controls Indicators and External Connections Front Panel 1 2 3 4 5 6 7 8 9 10 11 12 13 14 15 16 17 18 19 20 21 22 23 24 25 26 1...

Page 5: ...B 11 LED Display 12 Rhythm Selection 13 Fill In 14 Stop 15 Tempo Slow Fast 16 Multi Finger Chords 17 Sync 18 Single Finger Chords 19 Chord Off 20 Chord Keyboard 21 Rhythm Program 22 Rhythm Playback 23...

Page 6: ...tery operation Open the battery lid on the underneath of the electronic keyboard and insert 6 x 1 5V Size AA alkaline batteries Ensure the batteries are inserted with the correct polarity and replace...

Page 7: ...N or AUX IN socket on the external equipment and plug the other end into the PHONES jack on the rear of the electronic keyboard Keyboard Operation Power control Press the POWER button to turn the powe...

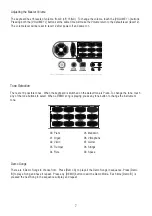
Page 8: ...andolin 06 Vibraphone 07 Guitar 08 Strings 09 Space Tone Selection There are 10 possible tones When the keyboard is switched on the default tone is Piano To change the tone touch any of the tone butto...

Page 9: ...o Song Percussion The Keyboard has 8 percussion and drum effects Press the keys to produce a percussive sound The percussion effects can be used in combination with any other mode Tempo The instrument...

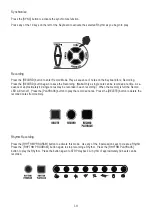
Page 10: ...eyboard The SINGLE button selects single finger chord mode You can then play the chords as shown on page 11 The FINGER button selects the fingered chord function You can then play the chords as shown...

Page 11: ...a time A se quence of approximately 40 single notes may be recorded in each recording When the memory is full the Record LED will turn off Press the PLAYBACK button to play the recorded notes Press th...

Page 12: ...11 C D D E E F F G G A B B m m7 M 7 Chord Table Single Finger Chords...

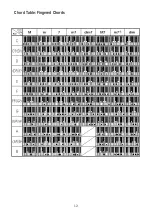
Page 13: ...12 Chord Table Fingered Chords...

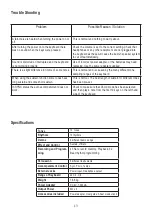
Page 14: ...y different tone sampling ranges of the keyboard When using the sustain function some tones have long sustain and some short sustain This is normal The best length of sustain for different tones has b...

Page 15: ...rmined by turning the equipment off and on the user is encouraged to try to correct the interference by one or more of the following measures Reorient or relocate the receiving antenna Increase the se...

Reviews: