4
Distributed by Rockler Companies, Inc.
Medina, MN 55340
50119
Rev 06/18
Check Rockler.com for updates. If you have further questions, please
contact our Technical Support Department at 1-800-260-9663
or support@rockler.com
If the teeth of the knuckle won’t line up
and interlock, unscrew the knurled knob at one end of the
Sanding Bow and remove the claw end clamp. Lift the
sanding strip off the teeth and pull it back 1/16"; reinstall the
claw end clamp and the knurled knob. Then repeat Step 10.
To avoid injury, keep fingers clear of
interlocking parts when tightening the claw end clamp to the
body of the Sanding Bow.
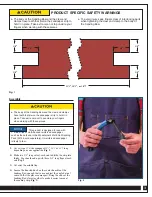
5. At each end of the Sanding Bow, unscrew the knurled knob
and remove the claw end clamps.
6. At one end of the Sanding Bow, position one end of the
sandpaper strip so that the notch allows access to the bolt
hole. Be sure that the sanding strip is straight and far enough
into the Sanding Bow that the teeth will engage the full strip
and not just the outer two flaps.
Fig. 3.
7. Reposition the claw end clamp piece and screw in the knurled
knob to fully tighten.
8. Repeat Steps 6 and 7 to secure the sanding strip at the other
end of the Sanding Bow.
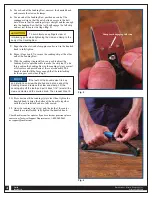
9. With the sanding strip installed, you need to adjust the
Sanding Bow’s center knuckle to make the strip taut. To do
this, position the Sanding Bow so the sanding strip is against
a flat surface and press down at the center knuckle. The
knuckle should still be loose enough that the interlocking
teeth can pass each other.
Fig. 4.
10. Press down until the sanding strip is taut; then tighten the
knurled knob to bring the halves of the knuckle together
until the teeth interlock and are fully seated.
11. Once the sanding strip is taut and the teeth of the center
knuckle are interlocked, fully tighten the knurled knob.
Fig. 3
Fig. 4
Sharp teeth engaging full strip


