Ladder Track Installation
1.
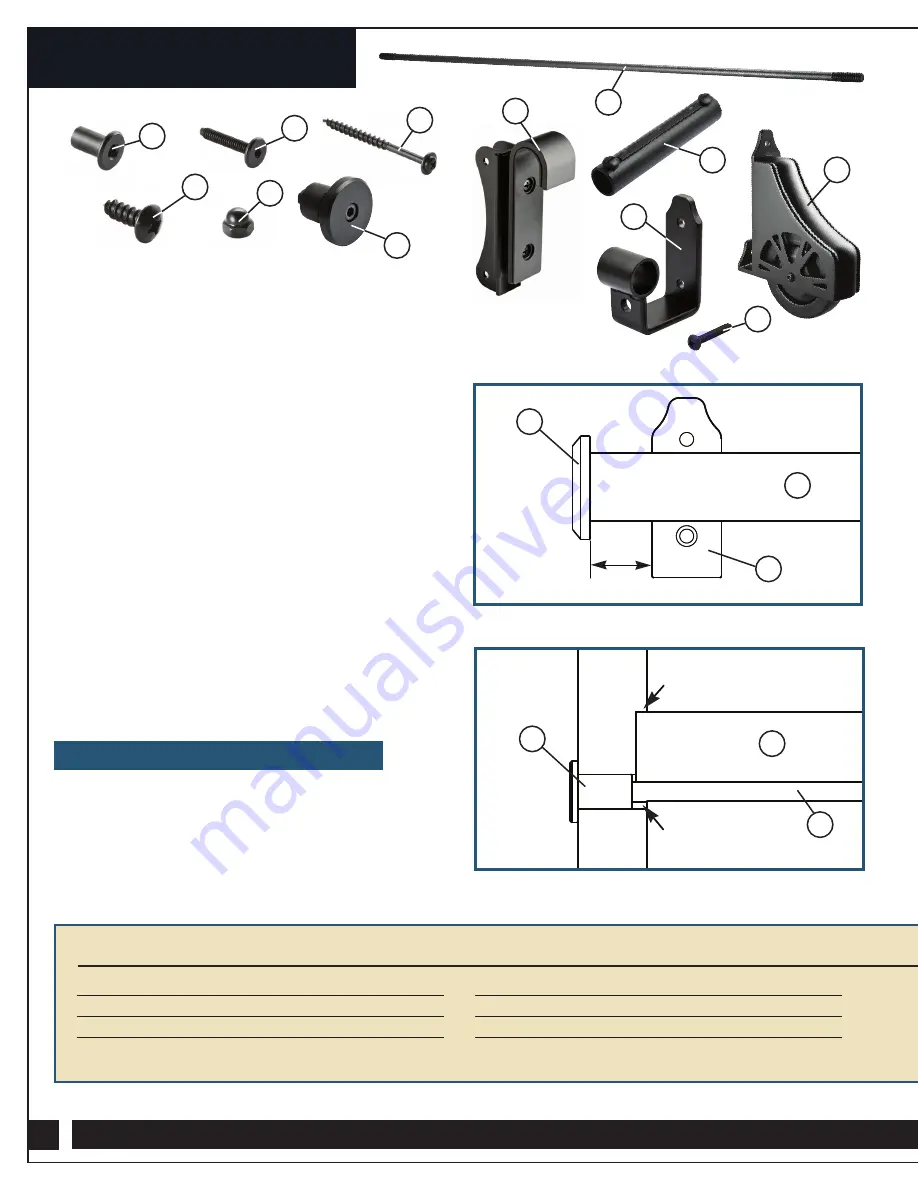
Mount Track Brackets (17) with Pan Head
Screws (20) to a secure fixture (bookcase, cabinet,
wall, etc.) Space brackets every
32-36
inches
along track. Reference the track height diagram
on page 7.
2.
Measure the width of your fixture to determine the
amount of 6' tracks (21) needed. Use Track
Unions (19)to connect tracks together. Space
Track Unions (19) as to not interfere with Track
Brackets (17). Track should extend 1
1
⁄
8
" beyond
outer Track Brackets (17) for Track End Caps (18)
to fit properly.
Fig. 1.
Note:
For applications wider than 6', you will need
additional sections of 6' track. In the event you
need to shorten any length of track, divide all
tracks evenly for best results, e.g., for a 16' run,
order three 6' tracks and cut all to 5'4".
3.
Assemble Track (21) to Track Brackets (17) and
install Track End Caps (19).
Note:
The brackets are tight fitting, a rubber
mallet and block of wood may be required
to attach.
1.
Begin ladder assembly. Glue the Wood Spindle (4)
and Wooden Steps (3) into place. Add #10 x 2
1
⁄
2
"
Washer Head Screws (13) for steps. Start
with one rail at time. 7/64" pilot holes are
recommended to minimize binding or splitting.
2.
Attach Step Rods (11) and Cap Nuts (12).
Fig. 2.
5
Ladder Track Installation
Quantity
9
Hook Bracket Assembly
2
10
Wheel Assembly
2
11
Step Rod
7
12
Cap Nuts (5/8" long barrel)
14
PARTS LIST - LAddeR HARdWARe
Quantity
13
#10 x 2
1
⁄
2
" Washer Head Screws
28
14
#14 x 3/4" Pan Head Screws
2
15
1/4-20 x 35mm Connector Bolts
6
16
1/4-20 Acorn nuts
6
18
17
Fig. 1
Fig. 2
11
12
1/8" Deep Dado
14
16
18
13
15
9
19
10
17
20
3/8" Thru Hole
1
1
⁄
8
"
21
Rail
3
Rail
12
11
Wooden Step Ladder Assembly


