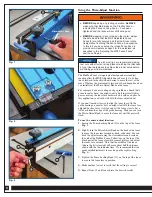
5
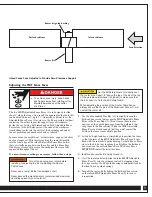
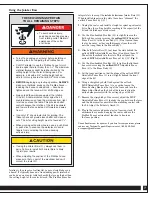
Infeed Fence Face Adjusted to Provide Zero-Clearance Support
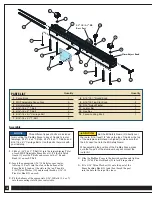
Set the Bit Safety Guard (3) directly over
the router bit, at least 1/2" above the top of the bit or the top
of the workpiece (whichever is highest) to make sure that
the bit doesn’t cut into the Bit Safety Guard.
When adjusting the position of the Router Table Fence,
always ensure that no part of the Aluminum Fence (1) will
contact the router bit.
Outfeed subfence
Infeed subfence
Router bit guide bushing
Router Bit
Feed Direction
>
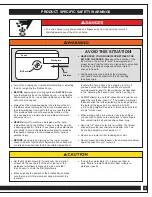
To avoid serious injury, keep hands
and fingers away from rotating cutter.
Maintain awareness of the cutter
at all times.
Turn off and unplug your router before
installing or adjusting the bit or adjusting the Router
Table Fence.
Never use a router bit that is damaged or dull.
Never exceed the manufacturer’s recommended maximum
operating speed for your router bit.
Adjusting the MDF Fence Faces
The two MDF Adjustable Fence Faces (2) are designed to slide
about 2" along the fence. As a result, the opening for the router bit
can be adjusted from 0" up to 3
3
⁄
4
". Generally, you want to set the
Adjustable Fence Faces (2) as close to the bit as possible (without
contacting the cutter) to provide support for your workpiece
during the cut. Setting both infeed and outfeed Adjustable Fence
Faces close to the bit helps prevent the ends of the workpiece
from drifting too far into the cutter at the beginning and end of
the cut, providing enhanced safety and cut quality.
In some cases, you might want “zero-clearance” support to deliver
an even cleaner cut. This involves cutting the router bit profile
into the front edge of the infeed Adjustable Fence Face so that
there’s virtually no gap between the cutter and the Fence Face.
It delivers a cleaner cut because the workpiece fibers are fully
supported throughout the cut.
If a zero-clearance setting is necessary, follow these steps:
1.
Use the blue-handled Hex Key (12) to slightly loosen the
flat-head hex screws that secure the MDF Adjustable Fence
Faces to the Fence Body (1). (Don’t loosen them too far,
however, or they could disengage from the weld nuts that
snug them to the Fence Body.) Slide the MDF Adjustable
Fence Faces outward enough that they won’t contact the
bit when the fence is moved into position.
2.
Set the bit height and use a straightedge to position the fence
so that the faces of the MDF Adjustable Fence Faces (2) are
flush with the router bit’s guide bearing. Set both Fence Faces
close to the bit, but not touching it, and tighten the flat-head
hex screws on the outfeed Fence Face. The Fence Faces
MUST NOT
contact the bit at this time.
3.
Install and secure the Bit Safety Guard (3).
4.
Start the router and slowly slide the infeed MDF Adjustable
Fence Face (2) into the spinning router bit, stopping when
the edge reaches the bit’s guide bearing or midpoint (for bits
that don’t have a guide bearing).
5.
Turn off the router. Fully tighten the flat-head hex screws
on the infeed MDF Adjustable Fence Face (2) to secure
it in position.


