Rockwell Automation Publication 440G-UM001B-EN-P - May 2016
37
Description of Operation
Chapter 4
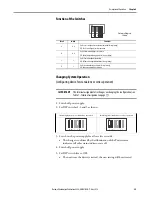
3. Switch on the power supply for at least five seconds.
• The change is confirmed by the illumination of the Power status
indicator. All other status indicators are off.
4. Switch off the power supply.
5. Set DIP switch five to OFF.
• The next time the device is started, the new setting will be activated.
Change Actuation Direction
of Handle Assembly
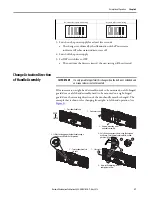
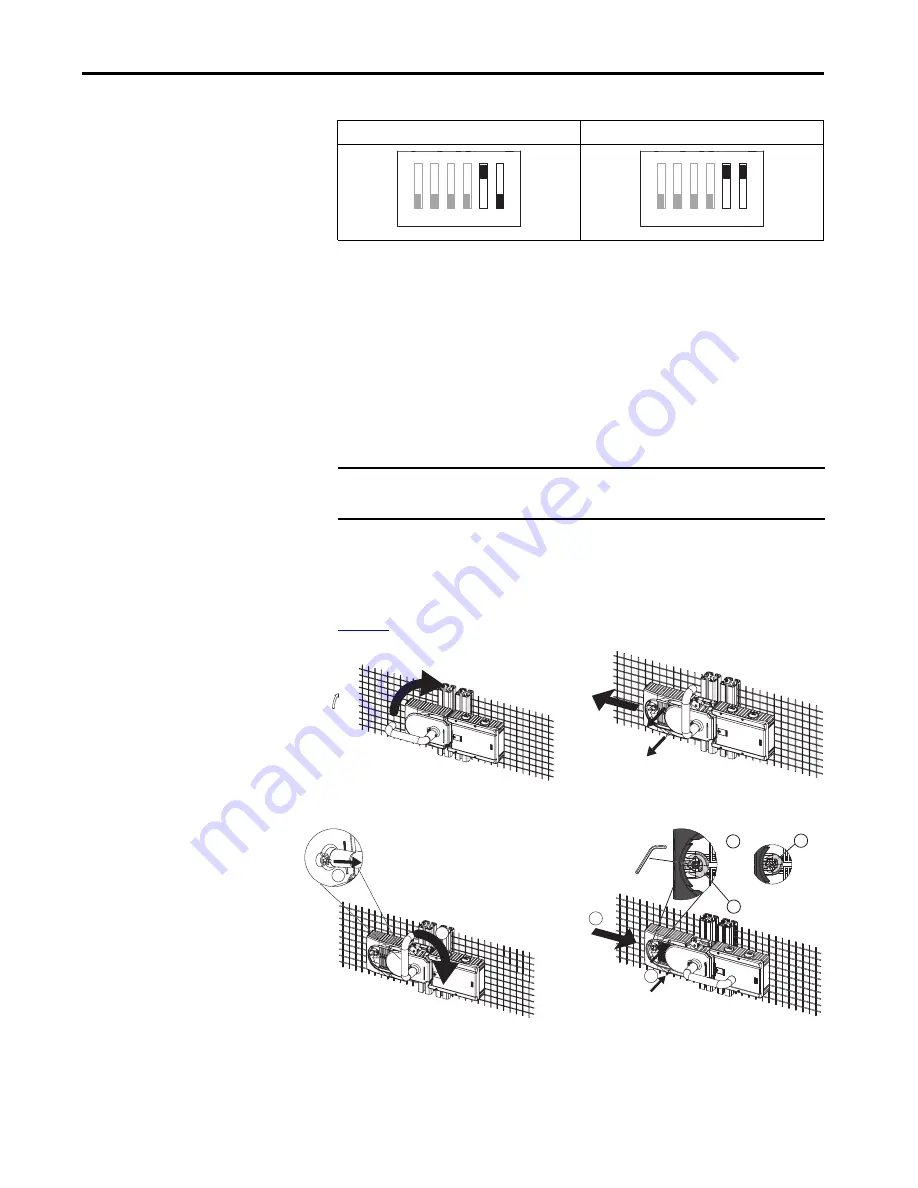
If for some reason a right-hand assembly needs to be mounted on a left-hinged
guard door or a left-hand assembly needs to be mounted on a right-hinged
guard door, the actuating direction of the door handle must be changed. The
example that is shown is for changing from right- to left-hand operation (see
Figure 2
).
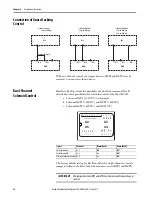
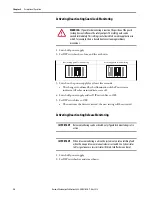
De-activative release monitoring
Activate release monitoring
1 2 3 4
5 6
ON
1 2 3 4
5 6
ON
IMPORTANT
It is only possible to perform this change when the bolt is not extended and
an escape release is not yet mounted.
1 - Press door handle up.
2 - Unscrew mounting screws
on handle assembly.
CLOSED
OPEN
3 - Push cover aside.
4
5
7
6
b
8
a
4 mm
4 - Lift the Locking pin on the door handle using a
screwdriver and hold it in this position.
6 - Only if using an escape release: using the hexagon
head screw, turn the joint counterclockwise from
position (a) to position (b).
5 - Turn the door handle to
the right.
7 - Close cover.
8 - Screw in the mounting screws
and tighten to 2 Nm.

